The following is information, tutorials, and help links for tools that we will be useful in CS 87. More course-specific information is available off the CS 87 webpage, and from individual assignment pages.
ssh and scp
ssh is useful for remotely logging into the CS lab machines. scp is useful for copying files between your local system and the CS system.
ssh
You can remotely connect to any machine by sshing in as you to lab.cs.swarthmore.edu or to a particular machine by logging in as you
to a specific machinename.cs.swarthmore.edu. For example:
# log into some lab machine:
ssh yourusername@cslab.cs.swarthmore.edu
# log into owl:
ssh yourusername@owl.cs.swarthmore.edu
You can find the names of lab machines here: cs lab machines
scp
scp is like the cp command, but for copying files between two different machines.
# copy file named "bio.txt" from the "c87/Labs/lab01" directory on CS machine
# to machine you are logged into (e.g., your home machine)
scp yourusername@cs.swarthmore.edu:c87/Labs/lab01/bio.txt .

# copy a file named "bio2.txt" from current directory on your machine to
# a CS lab machine (Note: by default, this will place the file in your home
# directory; i.e.,  "/home/yourusername"
scp bio2.txt yourusername@cs.swarthmore.edu:

# copy a file named "bio3.txt" from current directory on your machine onto
# a CS lab machine in the "c87/Labs/lab01" directory
scp bio3.txt yourusername@cs.swarthmore.edu:c87/Labs/lab01
ssh and scp links
-
Appendix 2: Using Unix from Dive into Systems
tmux
tmux (and screen) are used to start sessions on a machine that you can detach from and keep running when you log out and then re-attach to later.
tmux is particularly useful for setting up an environment for remote lab work on a particular CS lab machine. You can then detach from the tmux session and logout, and later ssh back into the machine, re-attach to the tmux session and continue from where you left off.
tmux is also handy in that it allows you to create multi-panned windows in a single tmux session. For code development is it nice to have at least two panes: one for editing the file, and another for compiling and running. The CS department help pages has some information for getting started using tmux: CS help tmux page. Here, also, are a few basics:
## tmux commands from bash shell

$ tmux        # create a tmux session
$ tmux attach # attach to an existing tmux session
$ tmux ls     # list existing tmux sessions
$ tmux attach -t sessionname # attach to tmux session named sessionname
$ tmux kill-session -t sessionname # kill tmux session named sessionname


## tmux commands from within a session CNTRL-b initiates these
## first type CNTRL-b then one of the following keys to do:

CNTRL-b d             # detach from the current session
CNTRL-b an_arrow_key  # to move to a different pane within a session
CNTRL-b :             # get tmux prompt to enter all kinds of commands
                      # (ex. to create and configure panes)
Scrolling and copy/paste within a pane is a bit weird. Here are some commands for doing both:
# to scroll within a pane:
CNTRL-b [             # then use page-up and page-down to scroll in pane

# to copy from one pane only:
CNTRL-b [             # to copy from a pane:
  space               # start copying from curser
                      # move curser to end of what you want to copy
  enter               # stop copying at curser

# to paste into same or different pane (be in insert mode if pasting in vim):
CNTRL-b ]             # paste
writing and using bash scripts to create custom tmux session:
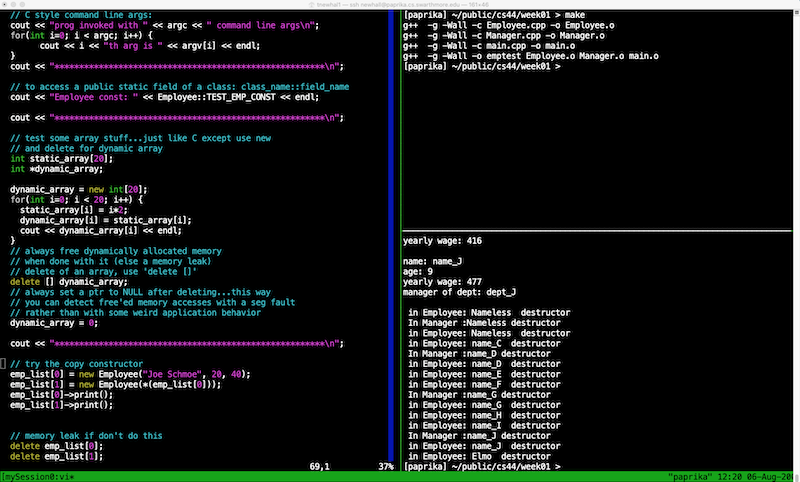
It is often useful to write a bash script for creating a tmux session with a regularly used tmux set-up. Professor Newhall has an example script (mytmux.sh). that sets up a tmux session with 3 panes. It is designed to be useful for code development and testing, where the left-most pane can be used to run an editor (e.g. vim) to edit a source code file, and the right panes are useful for compiling, running, debugging, and other purposes. The script, when run, produces a tmux session that looks like this:
-
you can run the script directly like this to start your own tmux session using this configuration:
~newhall/bin/mytmux.sh -
or you can copy it over into your home directory, and edit as you’d like, and run it to start your own custom tmux session (really 2 panes might be enough and easier to manage):
cd
cp ~newhall/bin/mytmux.sh .
chmod 700 mytmux.sh    # set this to executable
./mytmux.sh

# open in an editor (vim, emacs, ...) to edit the file to customize
# in a different way (we find that 2-3 panes is useful, and more than
# that starts to make the session more difficult to use):
vim mytmux.sh
|
avoid leaving old tmux sessions running
When using tmux (and screen), be careful about not leaving a lot of old
sessions of yours running on lab machines. If you ssh into a
particular machine each time you run tmux or screen
( |
tmux resources and links:
-
CS Help page on tmux includes some basic commands for creating, attaching, detaching and creating and configuring panes.
-
screen and tmux basic information about tux (and screen) and links to more resources.
finding idle machines
If you are ssh’ed into a lab machine and notice that it is running slowly, not responding well, you will want to find a better machine to use.
Here are few utilities to see what is running on a machine and to help you find another machine that will respond better and ssh into that one instead.
getting usage info on a machine (who, and top (and htop))
First, you can run who to see if there are a lot of other users logged into
the same machine as you are:
whoIf there are a lot of users logged into a machine, it may be one that could become overloaded. If all the users are idle, however, it will not be.
A better way to see real cpu and memory load on a machine is to
run top and htop. htop has nicer output, so I’d recommend that:
htophtop shows CPU usage on each core, maybe 1-12 on one of the lab machines, Mem usage, and Swp usage. If the CPU and/or Mem usage is high, and particularly if the machine is Swapping (Swap is active), you want to pick another lab machine to use. Here is some more information about using top and htop
tools for finding a good machine(s)
smarterSSH to find a good lab machine to use
smarterSSH can be used to ssh into a machine that has a lot more available
RAM and CPU resources, and should perform well. Running it directly will
ssh you in to a good machine, but you may want to run using the -i
command line option to list the top machines, then exit the slow machine
(kiling any tmux sessions on it first), and then directly ssh into it
from home.
Here is the way you may want to run smarterSSH:
smarterSSH -i -v -n 20This lists the best 20 machines in terms of available RAM and CPU. Choose one of the machines listed to ssh into (you don’t always want to pick the top one, as maybe others are also choosing it, but if you select one in the top 10 or so, it should perform well)
Here are some other sample line options for using smarterSSH:
# directly ssh's you into one of the best machines
smarterSSH

# list the command line options
smarterSSH -h

# lists top 50 machines based on their available RAM
# probably want the default that orders based on a function of RAM and CPU
smarterSSH -i  -v -n 50 -m

# lists top 50 machines based on their available cpu
smarterSSH -i  -v -n 50 -c
autoMPIGen is a tool similar to smarterSSH that automatically generates an MPI host file using PeerMon data to find good hosts. If you are using MPI on our system, this is useful tool for creating a hostfile of good hosts on our system. here is some more information about autoMPIGen.
system dashboard for machine stats
You could also look at the status dashboard off the CS department machines page to try to find a machine that looks less loaded.
links to more info:
-
smarterSSH and autoMPIGen PeerMon tools for finding good machines to use in a Local Area Network (LAN)
-
tools for examining system state (FYI: way more than to find idle machines)
git
Git and the college’s Enterprise GitHub are used for lab work.
-
using git for CS labs contains some basic (and verbose) git instructions for using git for CS course lab work. It is written using cs31 as an example, but replace with your own course number.
-
git on our system and git help. This is a more complete reference for using git on our system.
Unix Basics
For course work you should set up a course-specific subdirectory in your home directory. First read the resource about ssh about remotely connction to the CS system, then create ssh into our system and create a subdirectory for c87:
# from home ssh into a cs lab machine:
ssh <yourusername>@labs.cs.swarthmore.edu

# on the CS system:
$  cd                 # change current working directory to your home directory
$  pwd                # print current working directory
$  mkdir c87         # create a new subdirectory named c87
$  ls                 # list contents of current working directory (your home directory)
$  cd c87            # change current working directory to c87
$  pwd                # print current working directory
Using Unix and Useful Commands and Resources:
-
Appendix 2: Using Unix from Dive into Systems
-
CS department’s Using Unix tutorial/pages
-
man, man pages, apropos for reading manual entries about specific unix commands and library functions, and for finding functions, command, utilities
vim (and vi)
The vi (and vim) editor is available on every Unix system. It is a very efficient and lightweight text editor that is easy to use after learning a few basic commands, which that you can learn by running though the vimtutor tutorial.
vim is particularly useful when working remotely, ssh’ed into a machine.
Vi (vim) also has a lot of advanced features that are very nice, and
is very configurable, often through the use of a .vimrc file. However,
just a few basic commands is enough to use vim to edit files on our
system.
Learning vim (and vi)
Vim operates in two modes:
-
insert mode: keystrokes are interpreted as inserts into the file contents at the point of the cursor.
-
command or escape mode: keystrokes are insterpreted as vim commands, which allow a user to do such things as saving, exiting, searching, or moving around in the file.
In insert mode to switch to command mode by hit the ESC key.
In comand mode there are many ways to switch to insert mode, one is
to hit the i key.
To learn the vim editor, run vimtutor:
-
ssh into our system and run vimtutor ( more info on remote access, and more info on ssh):
home$  ssh yourusername@lab.cs.swarthmore.edu

cs$  cd c87
cs$  pwd
cs$  vimtutor           # start the vim tutorial
-
Go through the sections listed below of vimtutor (the other sections cover more obscure features that are not necessary). It will take about 30 minutes to run through these lessons.
-
all of Lesson 1 (moving around, x, i, A, :wq)
-
Lesson 2.6 (dd)
-
Lesson 2.7 (undo)
-
Lesson 3.1 (p) and 3.2 (r)
-
Lesson 4.1 (G) and 4.2 (searching)
-
Lesson 6.2 (a), 6.3 ( R ), and 6.4 (y and p)
-
Configuring vim
You do not need to configure vim in any way to use it on our system. However, you may want to based on foreground and background terminal colors, and set some other options
In your home directory you can add a configuration file for vim, named
.vimrc. On start-up, vim examines this file to set different configuration
options for the vim session, including setting a color scheme, and default
window size.
To see if you have one already, run ls -a in your home directory to list
all your dot files:
cd
ls -a
If so, you can open it in vim and edit it like any other file:
vim .vimrcIf not, it is often easiest to start with someone else’s .vimrc file
and then edit what you want. From your home directory, you can copy
someone else’s. Here is one you can copy over into your home directory
that uses a color scheme that shows up well on dark background windows:
cd
cp ~newhall/.vimrc .
At the bottom of this .vimrc file are some settings to give you a visual cue about not line wrapping source code in files. One sets the widowsize to 80 (or 81) chars when you start vim, others can be used to set visual reminders when a line exceeds 80 chars:
tail -20 .vimrc   # dump the last 20 lines of the file .vimrc
                  # note lines that start with double quote are comments

set colorcolumn=80
highlight ColorColumn ctermbg=darkblue
" resize to 81 to more easily see colorcolumn (set to 80 if don't use colorcolumn)
set columns=81
autocmd VimResized * if (&columns > 81) | set columns=81 | endif
set wrap
set linebreak
" visually shows +++ when go past columns limit
set showbreak=+++
You can copy this into your .vimrc file if you’d like this functionality
Vim Resources and Links
-
Appendix 2: Using Unix: vim from Dive into Systems
latex
LaTeX is the standard tool for scientific writing and typesetting. Here is a sample LaTex file. LaTeX is a markup language, which means that you provide text along with commands to typeset or markup that text. You then need to compile a LaTeX document.
Compiling LaTeX
The easiest and most direct way to compile is via pdflatex. Here’s an example:
pdflatex LearningLaTeX.texThis will either produce a pdf document you can read with a standard pdf reader such as Acroread, or will print out error(s) encountered during the LaTeX compilation process.
Working with LaTeX remotely.
If you are working with LaTeX remotely, you might not have LaTeX installed on your local machine. In this case, you have a couple of options:
-
Edit/Compile your LaTeX file on lab machines. To this, you’ll need to ssh into a lab machine, and edit/compile your LaTeX file from there. Then, you can use scp to copy your compiled pdf to a local machine to read it.
-
Use an online LaTeX editor such as Overleaf. In past years, several students have used overleaf to write their LaTeX. It is convenient for writing partered assignments. Warning: Overleaf tends to ignore compilation errors and give you the best pdf it can render. Before submitting a LaTeX file, make sure you can compile it using pdflatex and it looks the way you’d like.
-
Install pdflatex on your home machine.
The basic structure of a LaTeX file
It is likely that you will modify an existing LaTeX template file (e.g. this template) rather than starting from scratch. However, if you do start from scratch, the following snippet of LaTeX illustrates the minimal code needed to get started.
\documentclass{article}
\usepackage{amsmath} % Math notation from the American Mathematical Society.
\usepackage{amssymb} % Typographical symbols from the same.
\begin{document}
  Hello!
\end{document}
Brief explanations of each line lie below:
-
The line
\documentclass{article}tells LaTeX you want to write an "article" document. LaTeX documents start with this line. -
The next few lines add LaTeX packages, which are similar in spirit to
#includelines in C++ orimportin Python. -
\begin{document}and\end{document}specify where the content of your document starts and stops.
Formatting
LaTeX has several formatting commands that make your file look nicer. A few are listed below:
-
\textit{this is italicized.}renders 'this text' in italic. Here is what gets produced \(\textit{this is italicized.}\) -
\textbf{this is boldface.}gets rendered as \(\textbf{this is boldface.}\)
LaTeX has environments for bullet lists and numbered lists.
-
The itemize environment gives unordered bullet-lists.
Here is an unordered list.
\begin{itemize}
  \item Your first item is here.
  \item This is your second item.
  \item This is the third item.
\end{itemize}
Here is the compiled LaTeX.
Here is an ordered list.
\begin{enumerate}
  \item Item One.
  \item Item Two.
  \item Item Three.
\end{enumerate}
Here is the compiled LaTeX.
Math
One of the real strengths of LaTeX is its ability to easily typeset mathematical notation. To render mathematics in LaTeX, enclose the math in dollar signs e.g.
The quadratic equation is $ax^2 + bx + c = 0.$Which gets rendered as: \(\text{The quadratic equation is }ax^2 + bx +c.\)
Sometimes, it’s nicer to put the math on its own line, cenetered in the page. Do this using double dollar signs:
The quadratic equation lies below: $$ax^2 + bx + c=0\ .$$Here is the compiled LaTeX.
The align* Environment
If your LaTeX math runs across multiple lines of text, LaTeX provides an elegant way of typesetting this nicely called the align\* environment. Here is some sample LaTeX code:
\begin{align*}
  (n+1)(n-1) &= n^2 + n - n -1 \\
  &= n^2-1
\end{align*}
which gets rendered as:
\(\begin{align*} (n+1)(n-1) &= n^2 + n - n -1 \\ &= n^2-1\end{align*}\)
Make sure to put a double backslash '\\' to denote the end of each line of your math equations. (no double-backslash is needed after the last line). The ampersand '&' is a control character that specifies vertical alignment. When this LaTeX is compiled, it will line up each line where the ampersands are. In this example, the equal sign in the second line of math will line up immediately below the equal sign in the first line.
Subscripts and Superscripts
In math mode, it is common to use subscripts and superscripts. You can do this in LaTeX using '_' and '^'. For example:
$a_0 = x^2 + 4$gets rendered as \(a_0 = x^2 + 4\)
Summations
If you want to write summations, use the \sum command. For example,
$\sum_{i=1}^n i = \frac{n(n+1)}{2}.$is rendered as \(\sum_{i=1}^n i = \frac{n(n+1)}{2}.\)
Including Images
To include an image, use the graphicsx package and the
\includegraphics command.
...
\usepackage{graphicsx}
...
\includegraphics{bunny.jpg}
...
Creating your own webpage on our system
To create a homepage on our system:
-
Create a
public_htmlsubdirectory in your home directory (this is where our webserver will look for your homepage:cd mkdir public_html chmod 755 public_html # set permissions so you can WRX others can RX -
Create or grab a simple starting point for your homepage (it need to be in a file named
index.htmlorindex.php.You can copy one over from here (and copy over the README file with more information and instructions and links for creating a webpage):
cd ~/public_html cp ~newhall/public/webpage/* . chmod 644 index.html # set permissions so you can WR others can R -
Try loading your homepage in a browser with this url
https://www.cs.swarthmore.edu/~yourusernameSee the README file you copied over for more information
You can create a subdirectories in your public_html directory
to organize content, for example, if I want to put content related
to my resume in a separate subdirectory, I could do this:
-
Create subdirectory for resume:
cd ~/public_html mkdir resume chmod 755 resume # set permissions so you can RWX, others can RX cd resume -
Create an index.html file that has a very simple message in it (for testing and to hide external listing of the contents of this subdirectory)
touch index.html
chmod 644 index.html   # set permissions so you can WR, others can R
vim index.html
Add the following into the contents of the index.html file in your editor
<html>
<body>
nothing here yet.
</body>
</html>
Then try it out by loading this url:
www.cs.swarthmore.edu/~yourusername/resume
General Help Documentation and Links
(specific links for each tool are included above)