sshIf you have a windows computer and don’t have (or don’t want to use) the powershell, see below for how to install putty, an ssh client.
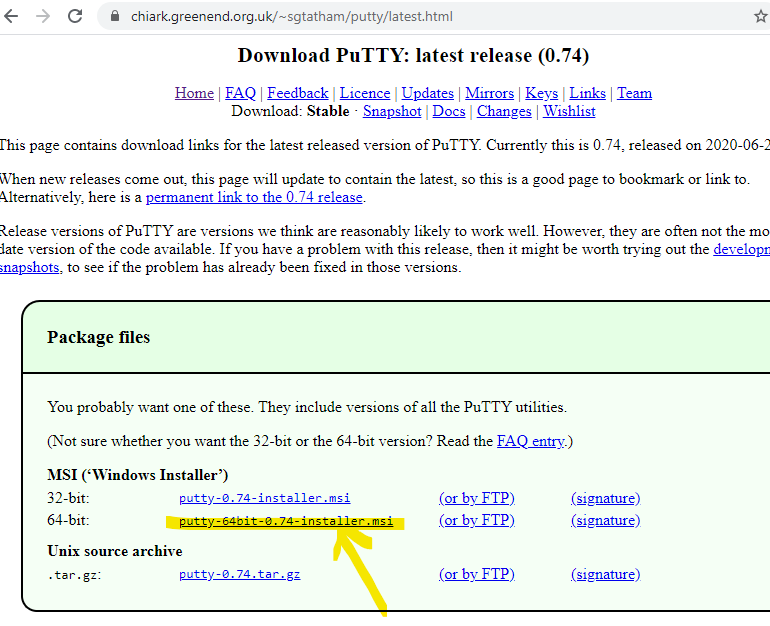
First, download the software from https://www.chiark.greenend.org.uk/~sgtatham/putty/latest.html:
The install is fairly straighforward – all defaults are fine to accept.
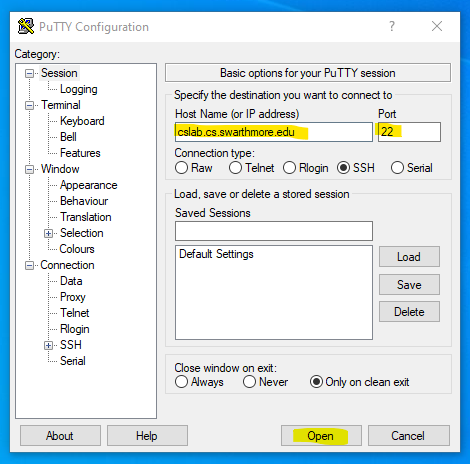
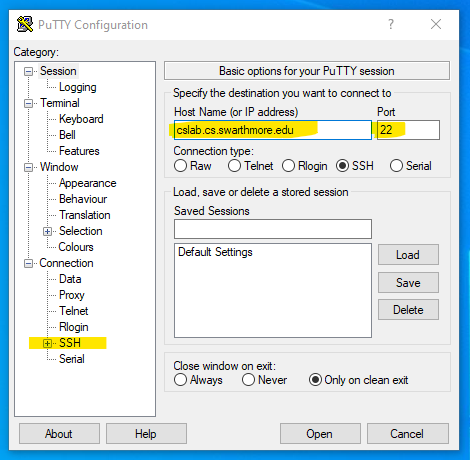
Next, run the putty software. It should pop up a box like below where you enter the name of the computer you want to connect to. You can connect to a specific CS computer or cslab.cs.swarthmore.edu, which will direct you to one of our lab computers:
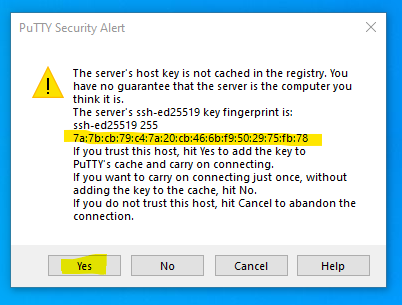
The first time you connect, putty will ask if the server’s host key is correct. If you are connecting to cslab.cs.swarthmore.edu is should look like the image below:
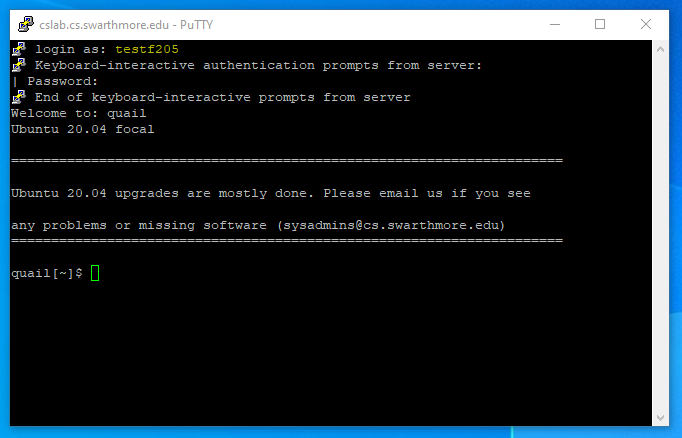
Next you should see a terminal window pop up with a login prompt. Enter your CS username and password:
You should now be connected to one of the lab computers. Keep reading below only if you need an advanced option: X11 forwarding. You might need this if you are running a program on our lab computers that pops open a graphics window (back to your computer).
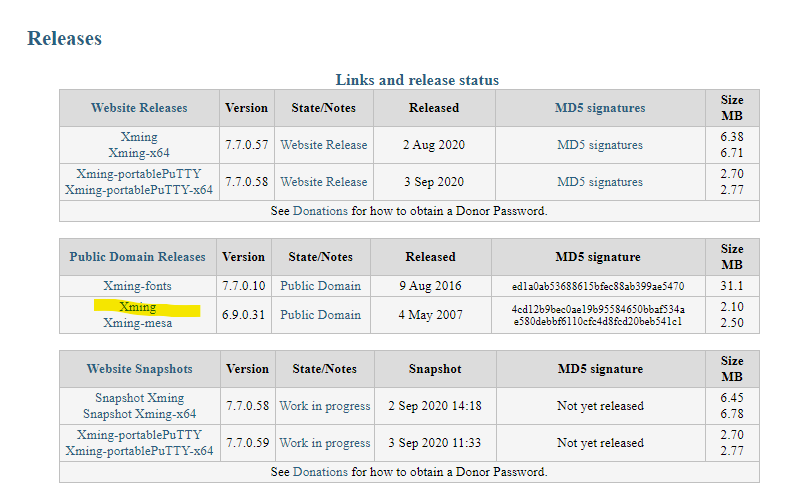
If you need X11 forwarding, you will probably also need to install xming:
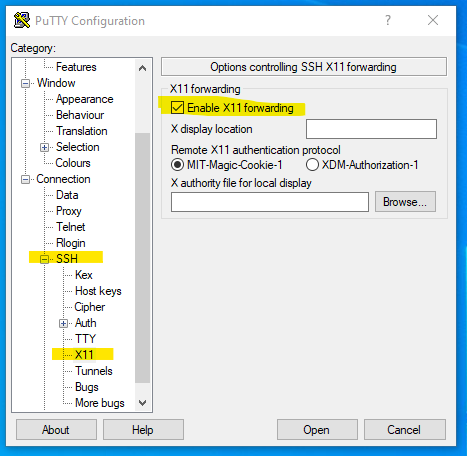
Download and install xming, then start it and restart putty. When you restart putty, click on the additional SSH and Enable X11 forwarding options shown below.
With xming running and putty configured to X11 forward, you should be able to run graphical programs on the CS computers. Note: they will be slow, since you are now sending more data over the network.
See also: