Using Visual Studio Code Live Share in CS Classes
Introduction
In this guide, we will show how to set up and use Visual Studio Code’s Live Share extension. This will help you to work effectively with a partner in team labs. The Live Share extension allows two users on two different computers to share access to a single Visual Studio Code project (such as a lab assignment). Both users can see and edit the files in the folder and can observe each other in real time.
Such a configuration has advantages over others, such as simple screen sharing. Using this setup, both team members can work on the project at the same time. It is also considerably more bandwidth efficient than screen sharing and so likely to work more smoothly on all but the best Internet connections. Of course, this isn’t required; your team should use whatever set of tools is most comfortable and productive for everyone involved.
Overview
Throughout this tutorial, we will assume that two students want to work together on a project. One of these students must take on the role of the host and the other must take on the role of the guest. These roles are fixed at the start of each session: you can be a host to your partner one time and a guest of your partner the next. The difference is that the host’s files will be used in the session.
In cases of more than two collaborators, one person would be the host and everyone else would be a guest. Do not invite anyone other than your teammate and course staff as a guest. Doing so would be a breach of academic integrity, as you are not to share the work you will submit for a grade.
To use Live Share, you will need two things: the Live Share plugin and a way to sign in to Live Share. Swarthmore does not control the Live Share servers, so your Swarthmore account won’t work. Instead, we will suggest that you sign up for an account on github.com. Note that this is a different website than the Swarthmore Github; it’s running the same software, but the repositories and user accounts are entirely different. We’ll walk through the steps below.
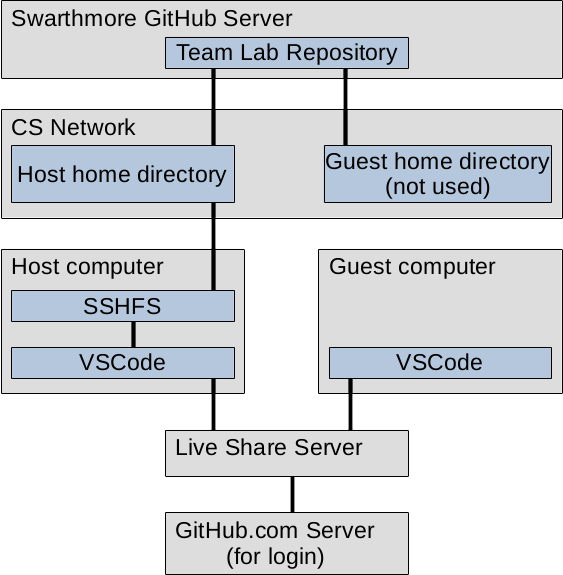
Once you complete the below steps, things will work as outlined in the following picture: the host and the guest will use Live Share to communicate between their Visual Studio Code editors. Live Share will check your login against Github.com. Your work will be saved to the host’s Github repository. Below is a diagram of this arrangement.
Setup
Github.com Account
In order to log in to Live Share, you will need a Github.com account. If you don’t already have one, you can sign up for free. Your username and password are your choice; they don’t have to match your Swarthmore login.
Live Share Plugin
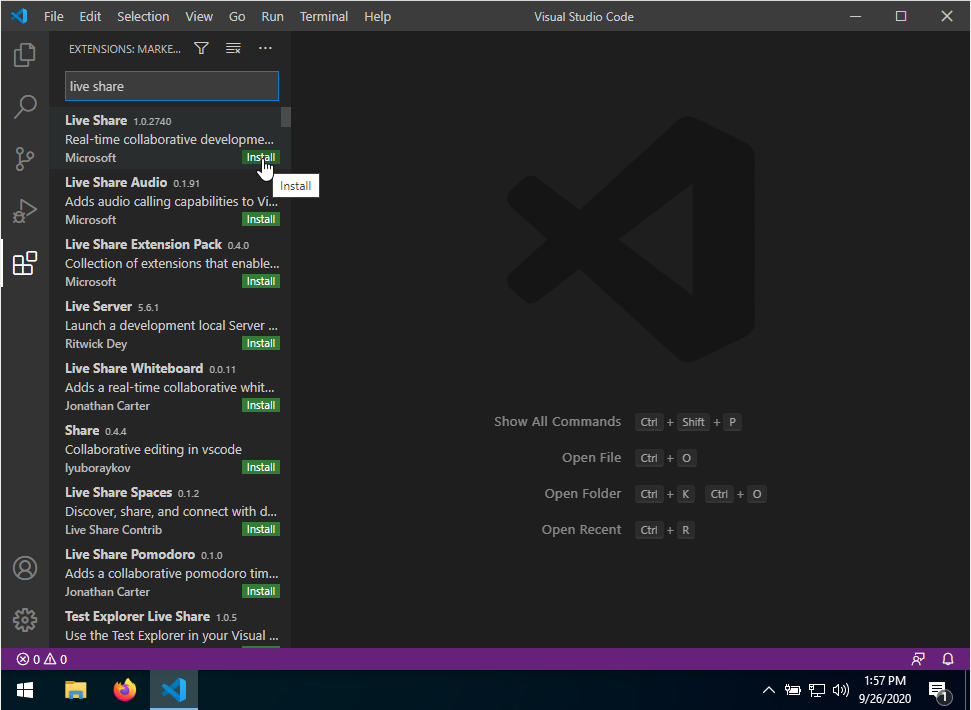
Next, you need to install the Live Share plugin in Visual Studio Code. Open Visual Studio Code and click the Extensions icon on the left.

Type “live share” into the search box. When it appears, click the small “install” button corresponding to the Live Share plugin. (There are other related plugins that you can explore if you like, but we don’t need them for this tutorial.)
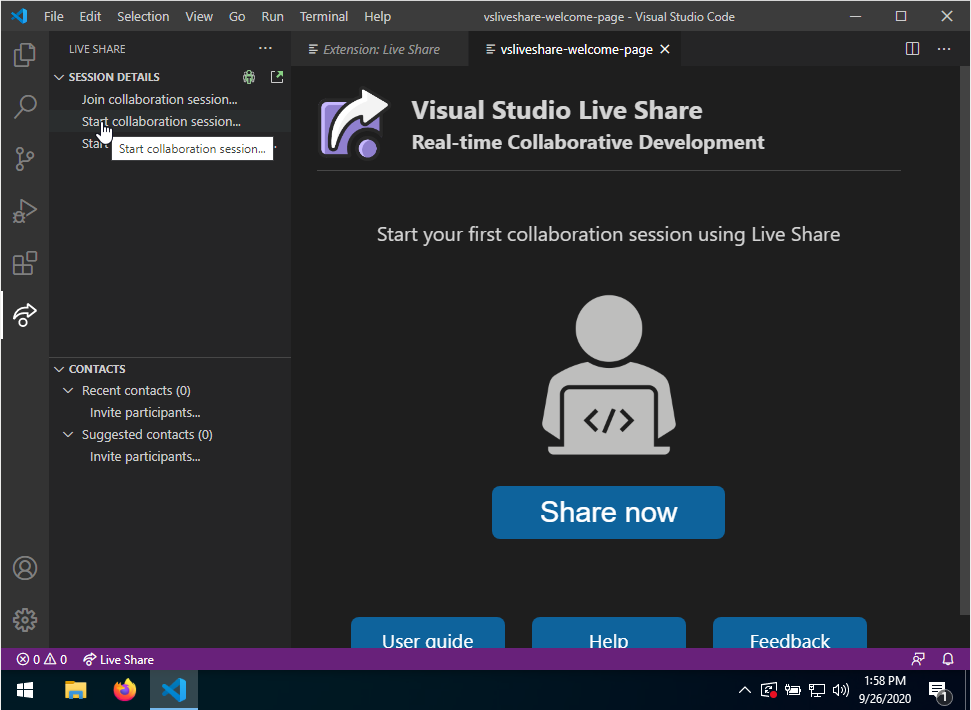
Wait for a moment until you see the Live Share button appear on the left below the Extensions button. Click on the Live Share button. We now need to configure Live Share’s login and the easiest way to do that is to try to start a session. Click “Start Collaboration Session”.
This will prompt you to identify which sign-in method you want to use. Choose “Sign in with Github”.
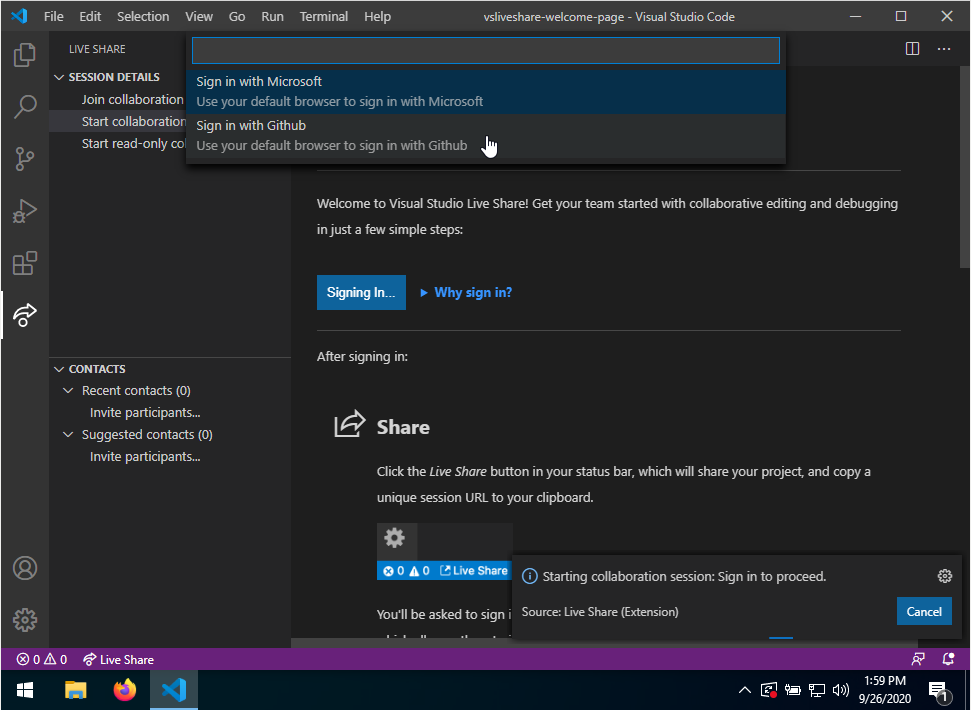
This will open a browser window that asks you to log in to your Github account.
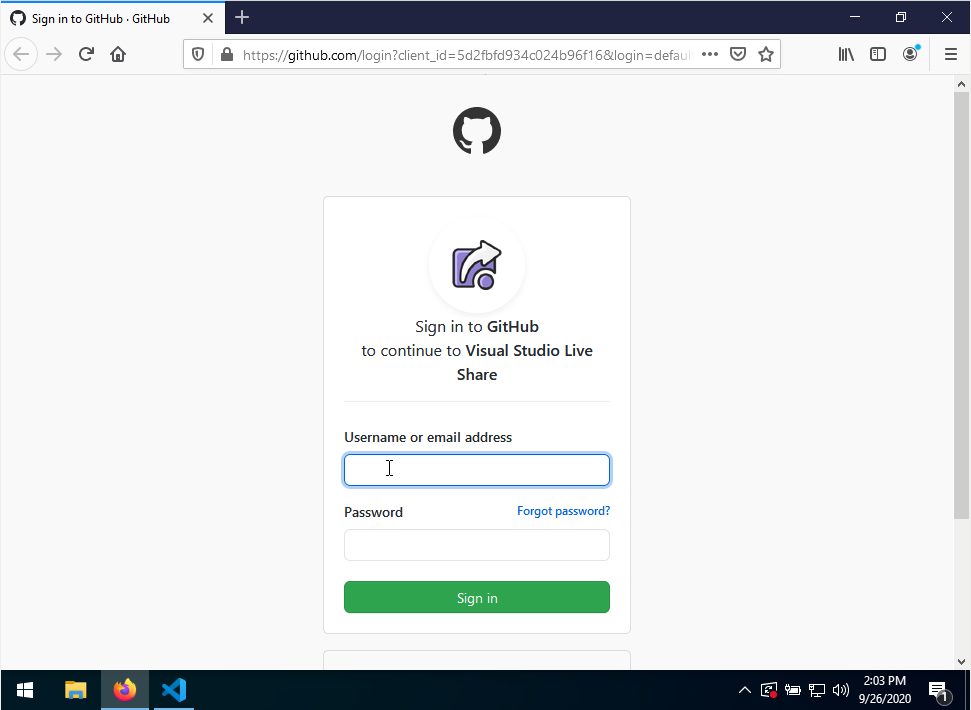
After you log in, you will be redirected to a page that asks you to authorize Visual Studio Code Live Share to verify your identity. Press the Authorize button.

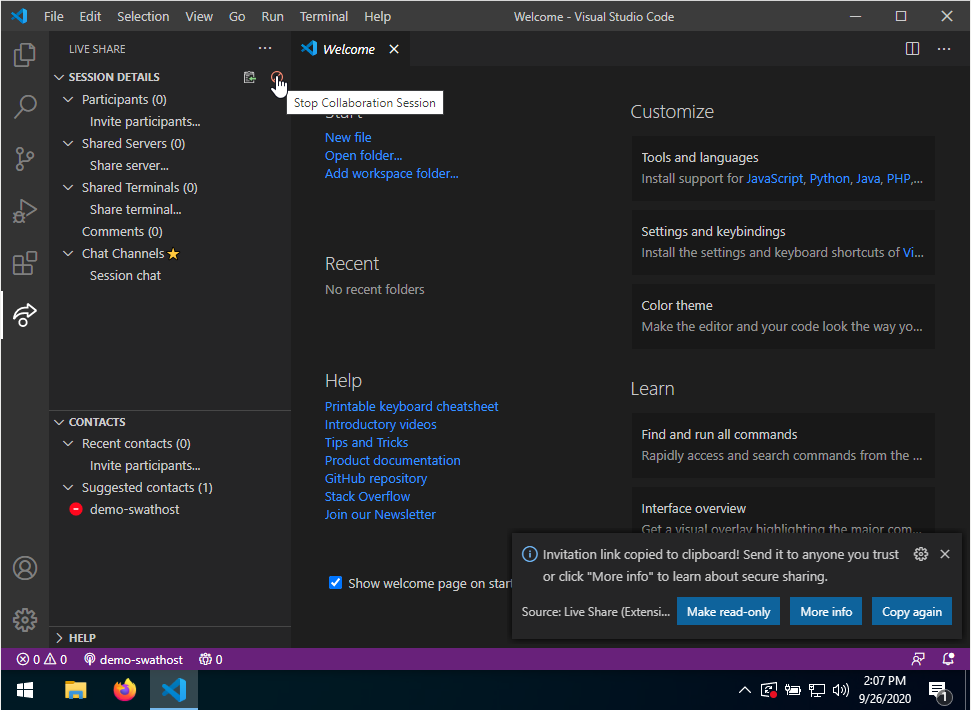
At this point, depending upon your operating system and your settings, you may be prompted with a number of recommendations. These may include associating certain types of links with Visual Studio Code. Visual Studio Code may also request that your firewall allow certain connections through. Allow each of these suggestions. You will eventually be returned to the Visual Studio Code window. If there is an active collaboration session, stop it by clicking the stop button in the upper left. (It appears when you hover your mouse over it.)
You have now configured your Live Share plugin!
Using Live Share
Now that you have set up Live Share, you can use it to collaborate with your partner in lab. One of you will be the host; the other will be the guest. Remember: you will be editing the host’s files.
Hosting a Live Share
If you decide to host the sharing session, you should begin by opening your lab assignment in Visual Studio Code.
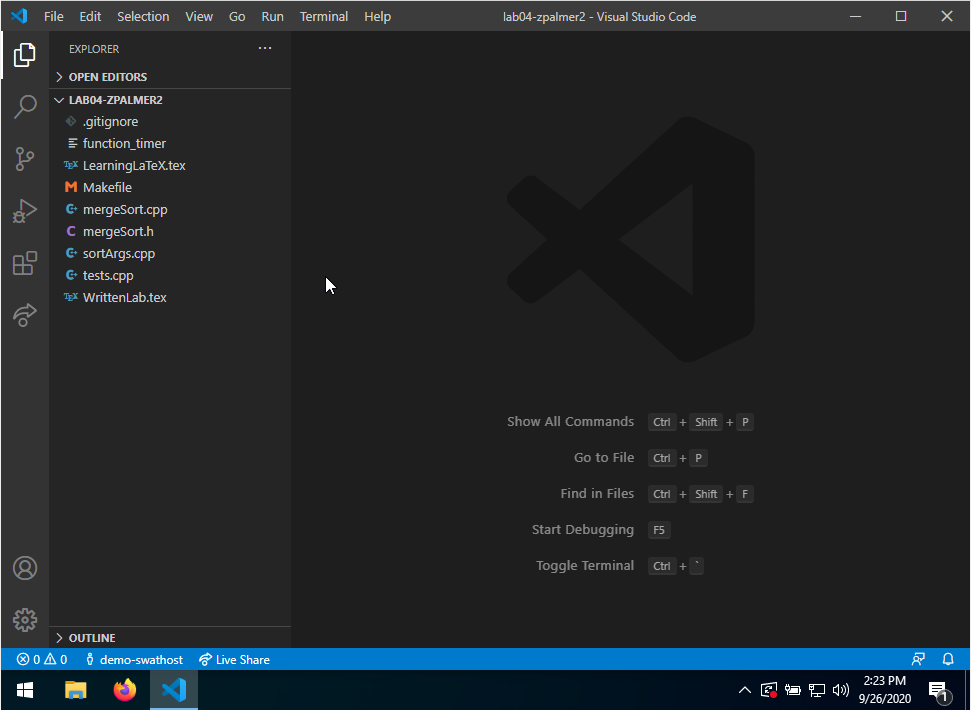
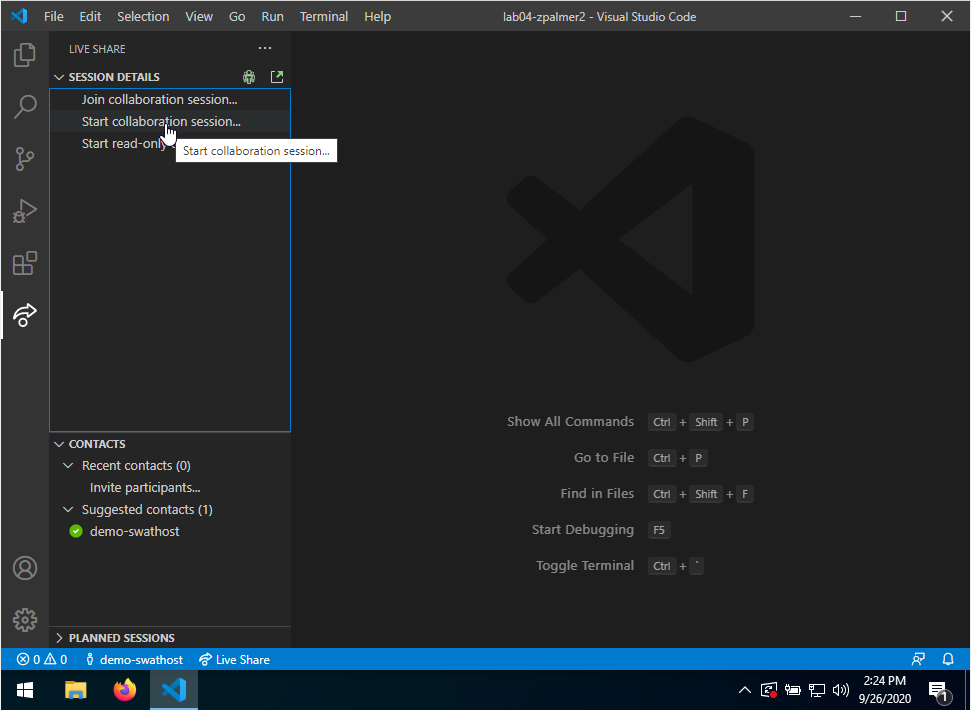
Once your lab is open, click the Live Share button on the left and choose “Start Collaboration Session”.
You will receive a message that says that your invitation link has been copied to your clipboard.
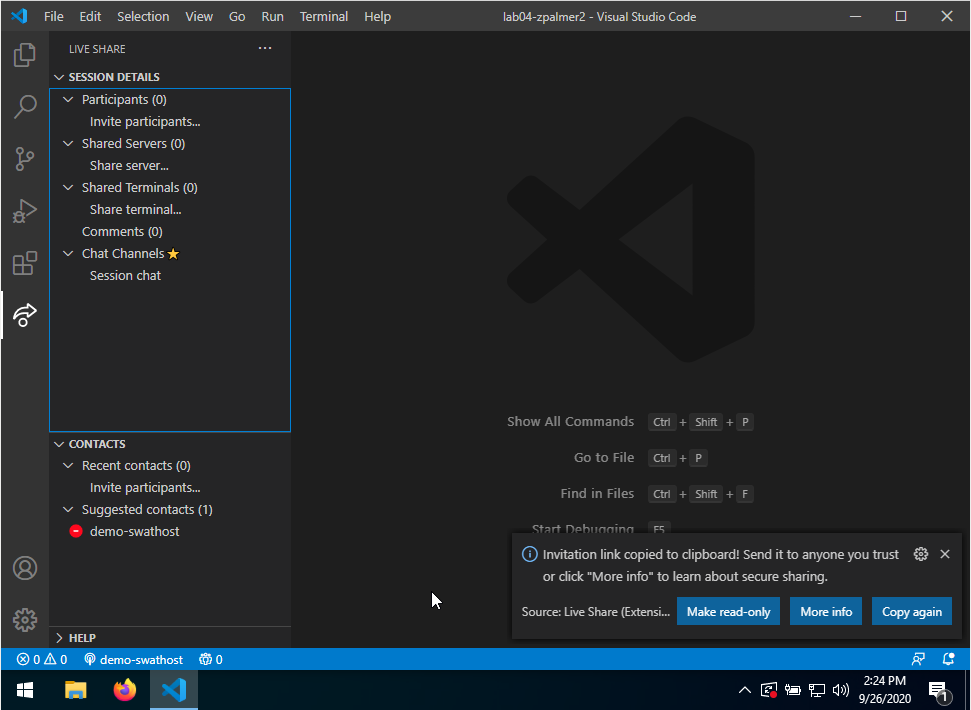
Simply send the link to your partner using whatever mechanism you prefer (Slack, Zoom, Discord, etc.) and ask them to click on it. You are now sharing your session.
Joining a Live Share
If you are the guest of a session, wait for the host to send you a link. Once you click the link, your Visual Studio Code window should open and you should see your host as a participant of the session.
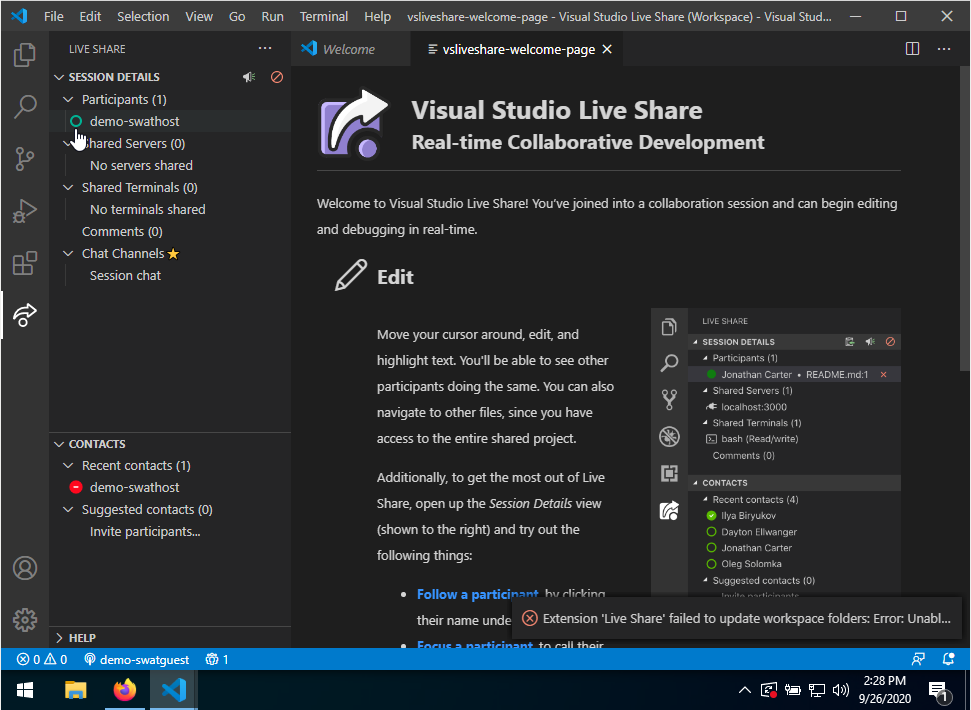
Click the file explorer button in the upper left (which looks like a document icon) to see your project. You can now edit this code with your partner!

Collaborative Editing
Now that you and your partner are using the same session, you can see each other editing the files in your project. For instance, if both people are editing a single file, the host might see this:

The guest, on the other hand, might see this:
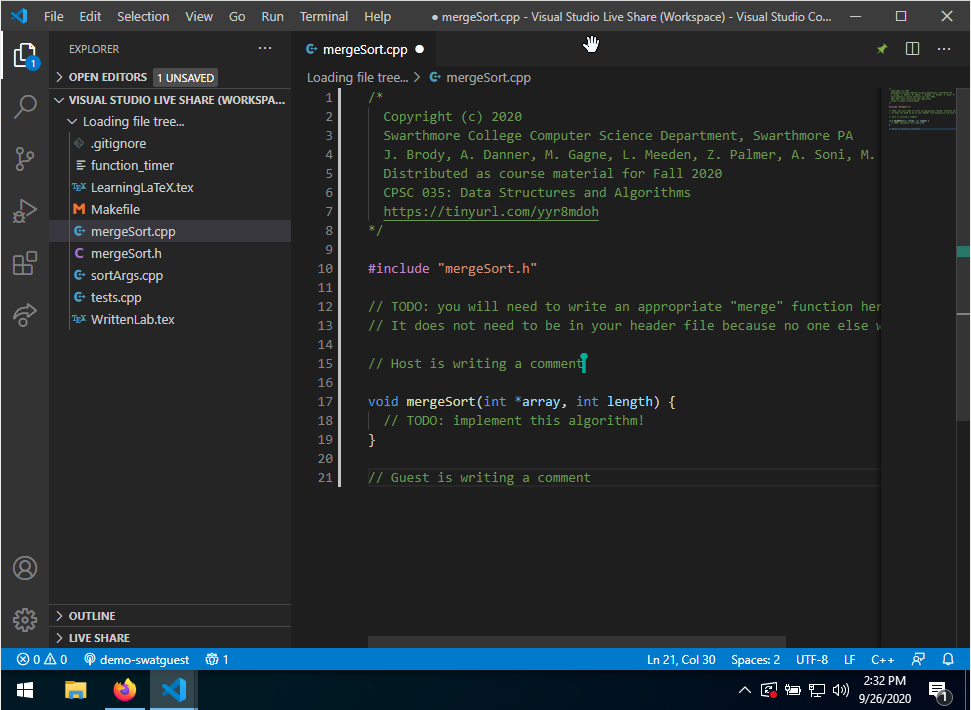
Note that, to each user, the other user’s cursor is visible.
You should pay close attention to the pushpin in the upper right corner of the window. If that push pin is set (green), then you will follow the other user wherever they go. This allows the other user to show you code more easily so you can discuss it. If you want to work independently, the push pin must be unset (white). Click on the push pin to toggle this behavior.
Some Things To Remember
That’s it! You can now both edit the same project. Here are some things to remember:
- Github.com is not the same as Swarthmore’s Github. They are different systems with different accounts; they just look the same. We are only using Github.com to sign in to Live Share; you are still using the Swarthmore Github to get your lab assignments and do your work.
- The files you edit will only be saved to the host’s CS network account. You must still
git add,git commit, andgit pushas you did before. - If you want to switch roles, the new host will need to get updates from Swarthmore’s Github. You will need to run
git pullon the repository directory if you have already cloned it. - The push pin will keep you attached to your friend. Make sure to unset it if this is not what you want!