ChessForge Part 1: Model
Due on September 20th at 11:59 PM.
This is an individual assignment. You are to complete this assignment on your own, although you may discuss the lab concepts with your classmates. Remember the Academic Integrity Policy: do not show your work to anyone outside of the course staff and do not look at anyone else’s work for this lab. If you need help, please post on the Piazza forum or contact the instructor. Note that no exception is made for your group members; collaboration with your group members is a violation of the Academic Integrity Policy as much as collaboration with other members of the class. If you have any doubts about what is okay and what is not, it’s much safer to ask than to risk violating the Academic Integrity Policy.
Overview
In this assignment, you will write a model for a simple game named ChessForge. ChessForge is a variant of a game originally conceived by Three Rings Design for the game Puzzle Pirates. In ChessForge, the player attempts to remove all tiles from the six-by-six board.
The graphical interface for ChessForge has been provided for you in this assignment. Your role will be to implement the rules of the game in the form of a model class conforming to the MVC style we discussed in class.
ChessForge Rules
To implement the game properly, you will require an understanding of how to play ChessForge. This section describes the rules of ChessForge in detail. Instructions for setting up, working on, and submitting the assignment are presented below.
Each tile on a ChessForge board has two properties: a symbol and a number of hits left. At the beginning of the game, all tiles have three hits left and a randomly selected symbol; the distribution of symbols is described below. On the first move, a player may strike any tile. On each subsequent turn, the player must strike a tile based on the symbol of the previously-struck tile. When a tile is struck, its symbol changes to another random symbol and it loses one of its hits; once a tile has no hits left, it is removed from the board. (The next legal move is based on the old symbol of the tile, not the new one.)
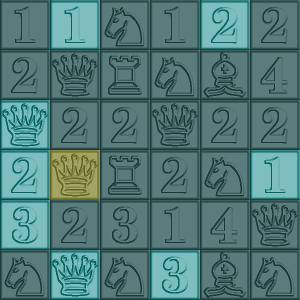
A list of the symbols and the legal moves from them appears below. The accompanying screenshots are from the reference implementation; in that GUI, teal tiles have three hits left, yellow have two, red has one, and a blank grey square represents a tile that has been removed from the board.
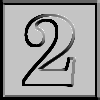 Numeral Symbols |
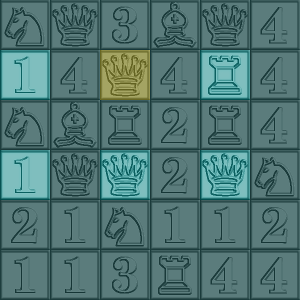 |
A numeral symbol shows a one, two, three, or four. Whenever the struck tile has a numeral symbol, the next tile must be exactly that many spaces away from the struck tile either diagonally, vertically, or horizontally. The example on the left shows legal moves from a struck two numeral. Remember that the legal moves are based on the symbol that the tile had before it changed; the two symbol changed to a queen symbol in this case, but movement is still based on the two. |
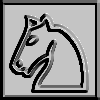 Knight |
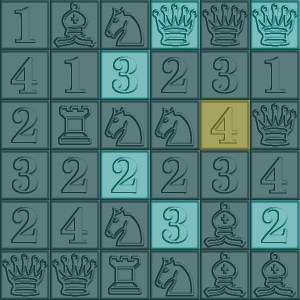 |
Whenever the struck tile has a knight symbol, the next tile must either be (a) one vertical and two horizontal spaces or (b) one horizontal and two vertical spaces away from the struck tile. This is exactly how a knight moves in chess. The example to the left demonstrates this. As with the two symbol above, it is illegal to move off of the board. |
 Bishop |
 |
Whenever the struck tile has a bishop symbol, the next tile must be on a diagonal path from the selected tile. Furthermore, the next tile must be on the edge of the board. |
 Rook |
 |
Whenever the struck tile has a rook symbol, the next tile must be on an orthogonal path from the selected tile. Like the bishop, the next tile must be on the edge of the board. |
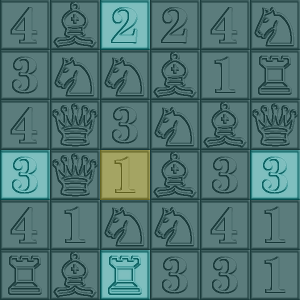
 Queen |
 |
Whenever the struck tile has a queen symbol, the next tile must be either orthogonal or diagonal from the struck tile. Like the bishop and rook, the next tile must be on the edge of the board. In other words, the player may use the queen as either a rook or a bishop, just as in chess. |
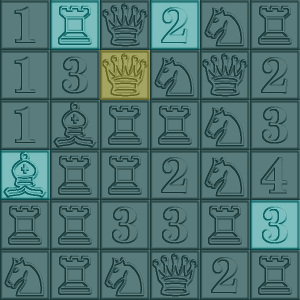
 Wild |
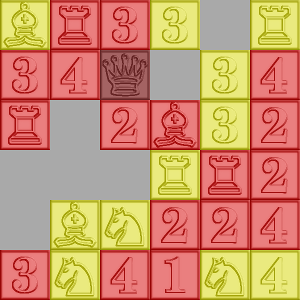 |
Whenever the struck tile has a wild symbol, the player may move to any tile on the board except the tile which was just struck. The example to the left shows a board which has been played for some time; the filled grey spaces contain no tile and can no longer be selected. The wild tile appeared toward the top (in the space now containing the queen tile) and has just been struck. The player may select any tile other than the one which was just struck. |
Tile Replacement
When a tile is struck, its hit count is decreased by one. If it still has hits left, its symbol changes according to the following rules:
- If the player strikes a tile which had more hits than any other tile left on the board when it was struck, it is always replaced by a wild tile. In the reference UI, this means that the last teal tile will be replaced with a wild yellow tile when struck.
- Otherwise, if the struck tile is not in one of the four spaces in the center of the board, its symbol is chosen uniformally at random from the one, two, three, four, knight, bishop, rook, or queen. Wild tiles are never chosen this way.
- Otherwise, the struck tile is in the center of the board and not the last of its hit count. Its symbol is chosen uniformally at random to be one of one, two, three, knight, bishop, rook, or queen. Note that tiles in the center of the board never have the four symbol, as there are no legal moves from a four tile in the center of the board to any other space. Again, wild tiles are not generated at random.
Summary
Here is a summary of the above requirements:
- The game is played on a six-by-six board.
- Each tile has a symbol and number of hits remaining.
- When the player moves to a tile, it loses a hit and changes its symbol. A tile with zero hits left is removed from the board.
- The player’s first move may be to any tile.
- Each subsequent move must obey the above movement rules, using the old symbol of the most recently struck tile.
- The last tile of a given number of hits always gets the wild symbol.
- Tiles in the center never have the four symbol.
- Otherwise, symbols are chosen at random; wilds are never generated at random.
- Play continues until there are no legal moves left.
Setting Up Your Assignment
Your Git repository can be found at the usual location:
git@github.swarthmore.edu:cs71-f17/chessForge-<username>.git
The initial contents of your repository consist of the libraries you will need for the assignment (as well as some images in the tile-images directory which you may ignore for now). The libraries come in the form of .jar files, which are ZIP files containing Java .class files. (This isn’t an analogy; .jar files are actually .zip files in disguise!) We will need to add those libraries (as well as the documentation for them) to your IDE before you can do your work.
Creating a Project
Begin by creating an IntelliJ project for ChessForge. Since there are no source files, you could do this in a number of ways:
- Clone the Git repository and create a new project in IntelliJ using that directory.
- Clone the Git repository and create the project “from existing sources”. Since there aren’t any, this will wind up producing the same result as the above.
- Configure IntelliJ with a Swarthmore GitHub API key and let IntelliJ clone the repository for you.
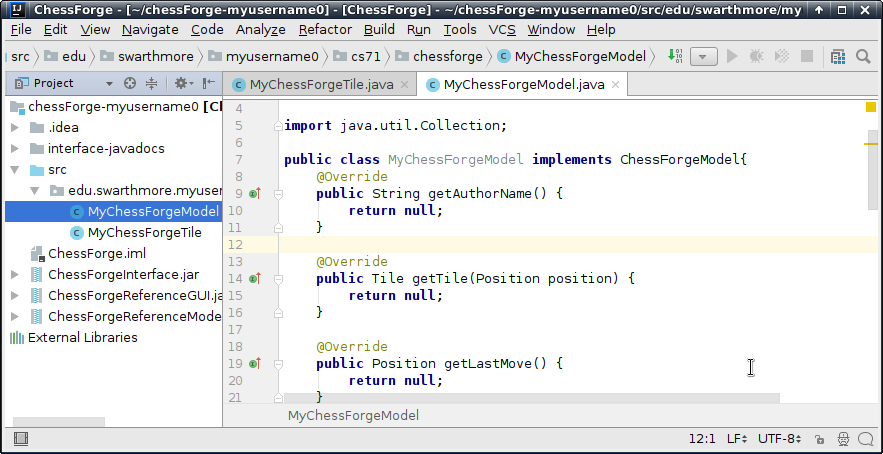
Regardless of your approach, you should wind up with something like the following:
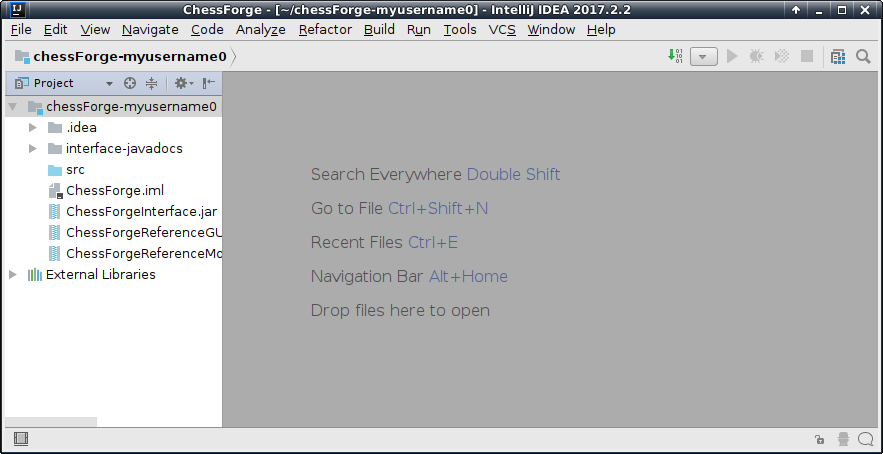
If you do not have a src directory, create it now. Then, right-click it and choose “Mark Directory as” -> “sources root”. If you already have a src directory and it is displayed as a source directory in IntelliJ, you don’t need to do this.
Adding Libraries
Next, right-click each of the ChessForge .jar files and choose “Add as Library”. It is important that you add each .jar separately, as this indicates to IntelliJ that these files are separate libraries and not pieces of one larger library. This will allow your code to use the provided ChessForge GUI when developing your code.
IntelliJ can show you documentation for the ChessForge libraries just like it does for the Java standard library API. To do this, you must tell it where the ChessForge documentation is. Open the “Project Structure” window (under the “File” menu or pressing “Ctrl+Alt+Shift+S” on standard PC) and select “Libraries” on the left. Click on the “ChessForgeInterface” library and press the “Specify Documentation URL button depicted below:
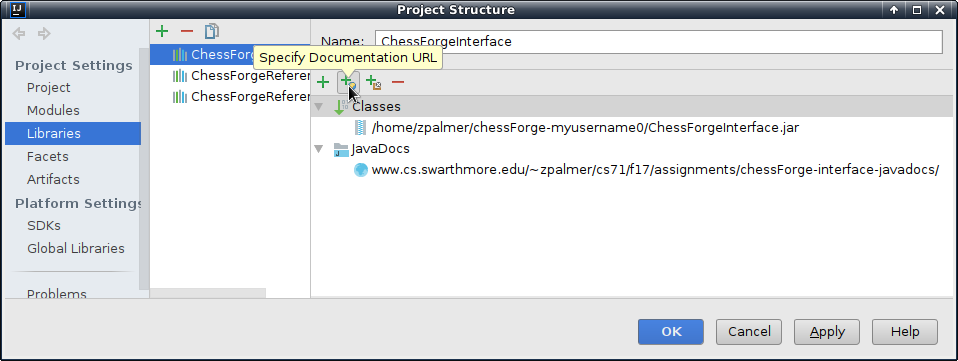
Enter the following URL in the resulting dialog:
https://www.cs.swarthmore.edu/~zpalmer/cs71/f17/assignments/chessForge-interface-javadocs/
Once you are finished, close the various dialog boxes. You are now ready to work on your model implementation!
Starting Your Work
To complete the assignment, you’ll need to create at least two classes. The first is an implementation of the Tile interface which describes a single tile in the game. The second is an implementation of the ChessForgeModel interface, which describes the game model. This second interface is where most of your work will be done. Begin by creating these two classes and writing stubs for each of the methods you must implement just so your code compiles. (Don’t try to get everything working yet; just fill in the stubs. The “Implement Methods” menu option in the “Code” menu will help with this!)
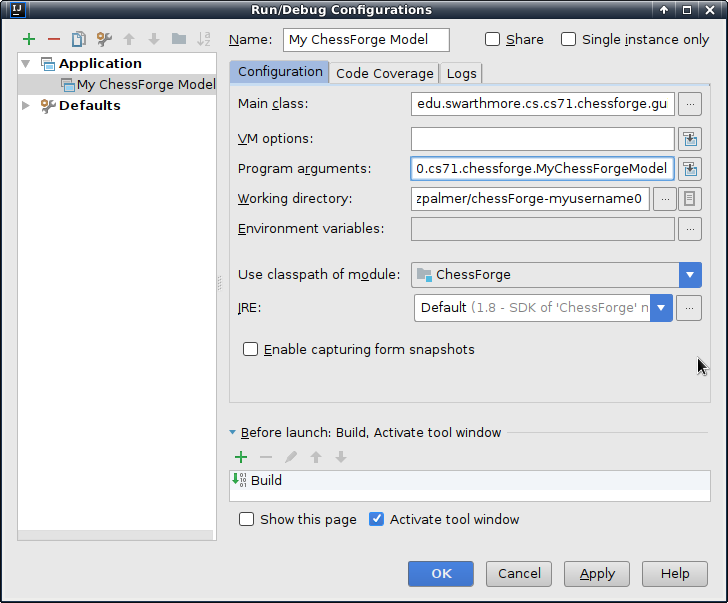
Once you have a compiling model class, you can run the provided GUI to make sure everything is working the way you think it is. In the “Run” menu, select “Edit Configurations”. This section of the IDE keeps track of what programs you want to run and how you want to run them. To create a configuration for your new model, press the plus button in the upper left and select “Application”. Then, give it the following settings:
- Under “Name”, put something like “My Model”.
- Under “Main Class”, put
edu.swarthmore.cs.cs71.chessforge.gui.ChessForge, the class of the provided GUI. - Under “Program Arguments”, put the name of your model class (including its package!).
Once you’re finished, the dialog should look something like this:
Press OK and you will be able to run the GUI using your new, empty model class. Of course, it doesn’t work yet. If you start the GUI now, you’ll get an error like this:
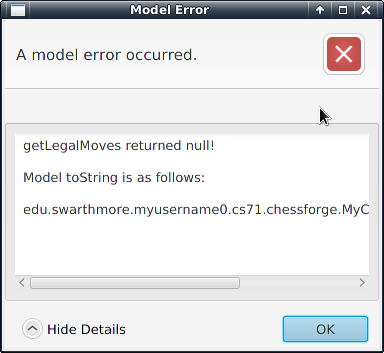
This tells you, though, that your run configuration is set up correctly. You can now begin implementing your model class and use this configuration to test it.
Running the Reference Implementation
The starting libraries you were provided have the following contents:
ChessForgeInterface.jar: The interfaces and basic classes used by any ChessForge implementation.ChessForgeReferenceGUI.jar: A reference implementation of the ChessForge GUI.ChessForgeReferenceModel.jar: A reference implementation of the ChessForge model.
Although you won’t use the reference model in your code, you can use it to experiment with the ChessForge game. To do so, create a copy of the run configuration you created above. Change the name of the copy to something appropriate (e.g. “ChessForge reference implementation”) and delete all text from the “program arguments” section. This will cause the ChessForge GUI to run with the model in the reference JAR.
Completing Your Assignment
Once you have thoroughly tested your implementation, create a README.md file in the root of your repository which includes the name of the class you implemented (including package name). You may submit your work by pushing to your Swarthmore GitHub repository. Make sure your submission conforms to the following expectations:
- Make sure to use comments! You should comment any part of your logic which isn’t covered by the ChessForge interface documentation, especially private helper methods of more than a few lines.
- All classes must be declared in appropriate packages. Don’t use the default package (at top level, just under your
srcdirectory) and don’t use the package in which the libraries have placed their classes. - All identifiers must meet basic Java naming convention standards.
- All non-final fields and local variables should be named in lower camel case. Examples of lower camel case include:
helloWorld,variableName,testOneTwoThree. - All types should be named in upper camel case. Examples of upper camel case include:
ArrayList,MyVeryOwnClass,HtmlReader. - All final fields should be named in underscore-separated caps. Examples include:
SINGLETON,SPECIAL_VALUE,LOCAL_TAX_RATE. - No identifier should contain the
$character under any circumstances.
- All non-final fields and local variables should be named in lower camel case. Examples of lower camel case include:
- Give methods and variables meaningful names. The definition of a “meaningful name” is subjective, of course, but it should be obvious that
connectionMappingis a more descriptive name thantemp42. - Empty catch blocks are bad practice. If a method throws an exception, it is trying to tell you something. Simply ignoring it is just as bad as ignoring a method’s return value or any other information at your disposal. If you think an exception is impossible, re-throw it wrapped in an
IllegalStateException. If you think an exception requires no action (which is very rare), leave a comment explaining why. - Program to interfaces, not to classes. For variables, always use the least specific interface which supports your needs. For instance, use
Listinstead ofArrayList. This may become important practice later on, especially if your project group wishes to use powerful libraries such as Hibernate. - Use generics when appropriate. For instance, a list of strings should have type
List<String>; never declare a variable simply of typeList.
The above requirements are enforced very leniently in this first assignment. These standards will be expected of your group projects, though, and the best way to develop a good habit is to start early.
Extra Credit
If you like, you can also earn some extra credit on this assignment while exercising your creativity. There are three symbols in the TileSymbol enumeration which do not have any purpose in the standard game rules: the lambda, the shamrock, and the skull. To earn extra credit, you must do the following:
- Create additional rules for ChessForge which make use of one or more of these tile symbols. Document these rules in a file named
README.mdin the root of your repository. Identify in this file which model is your normal ChessForge model and which is the model for extra credit. - Create a second model class which implements these rules in addition to the usual ChessForge rules. You must submit your extra credit as a separate model! (Your original model with just the usual ChessForge rules must be submitted as well!) If it is convenient, your extra credit model may be a subclass of your original model.
Note that the ChessForge framework can only use models which have nullary constructors (constructors which take zero arguments). Any model classes you submit must have nullary constructors.