Lab 2: Picfilter
Due on Wednesday, September 18th at 11:59 PM. This is an individual lab. You are to complete this lab on your own, although you may discuss the lab concepts with your classmates. Remember the Academic Integrity Policy: do not show your code to anyone outside of the course staff and do not look at anyone else’s code for this lab. If you need help, please post on the Piazza forum or contact the instructor or ninjas. If you have any doubts about what is okay and what is not, it’s much safer to ask than to risk violating the Academic Integrity Policy.
Overview
In this lab, you will write a program to apply filters to a particular image file format. You will become familiar with the following in C++:
-
Command-line arguments
-
Dynamically-allocated arrays
-
Organizing your code into separate files
-
Defensive programming (e.g. detecting invalid input)
As with the previous lab, you should clone your repository. The URL is: git@github.swarthmore.edu:cs35-f19/lab02-<your-username>
Images
Image data on a computer is typically stored in a series of units called pixels, each of which represents a single colored dot. The image in the tomato figure to the right, for instance, was originally 8 pixels wide and 7 pixels tall. (It has been magnified for demonstration.) In reality, the individual pixels on a modern computer monitor are almost too small to see. By packing the colored dots together so tightly in a grid, we can render pictures, text, and so on.
Image data on computers may be stored in a variety of different formats; common formats include JPEG (often abbreviated ".jpg"), PNG, and GIF. Each image format has its own set of advantages.
In this lab, we will be using the PPM image format, the advantage of which is that it is quite simple.
The PicFilter Program
You will write a program called picfilter that allows the user to manipulate PPM files from the command line. Your program will read a PPM file into memory as an array, perform a transformation on it, and then save it back to disk in another PPM file. Your program will take the input file, the transformation, and the output file as command-line arguments. For instance,
./picfilter old.ppm flipHorizontally new.ppm
will read the file old.ppm, flip it horizontally (left to right, as in a mirror), and then save the result as new.ppm.
Reading PPMs
To read a PPM file, you will pass its filename to three functions (these have been defined for you in ppmio.h and ppmio.cpp):
-
ppm_width: Returns anintdescribing the number of columns in the image. -
ppm_height: Returns anintdescribing the number of rows in the image. -
read_ppm: Returns anint*pointing to an appropriately-sized array of pixel data.
The read_ppm function takes care of opening a PPM file, reading the image data into it, and giving it back to you in a new array. Once you’ve read the PPM, you can change it and then write it back out into another file using the corresponding write_ppm function. These functions are defined in ppmio.h.
The array of pixels will be three times the size of the number of pixels in the image. For instance, a 100x100 PPM image would produce an array of size 30,000. This is because each pixel is represented by three numbers: the amount of red, green, and blue light to show for the pixel. Each number ranges from 0 (no light) to 255 (all the light). Here are some example pixel values:
-
0 0 0: No red, green, or blue light. This color is black. -
255 255 255: All red, green, and blue light. This is bright white. -
0 255 0: No red or blue light; all green light. This is a bright neon green. -
255 255 0: Red and green light, but no blue light. This winds up looking yellow. -
128 0 64: No green light. Some red light and just a little blue light. This color is a dark reddish-purple.
Transforming PPMs
Once you’ve read in your PPM as an array of integers, it’s up to you to change those integers to transform the image. You could loop over the entire image and set every number to 255, resulting in a giant white rectangle (since every pixel is now white). You could loop over each position in the first row and set each third number to 0, draining all of the blue light from the top line of the image.
As mentioned above, the user specifies an input file, a transformation, and an output file. Here are the transformations the user is allowed to request (and that you must implement):
-
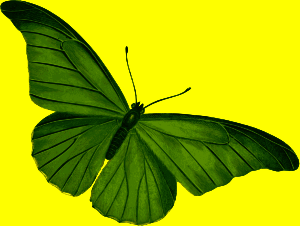
noRed: Every pixel’s red value is set to0. -
noGreen: Every pixel’s green value is set to0. -
noBlue: Every pixel’s blue value is set to0. -
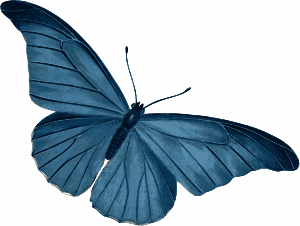
invert: All channels are subtracted from255. For instance,255 128 0would become0 127 255. -
grayscale: The channels of each pixel are averaged. For instance, the pixel255 128 0would become127 127 127(since(255+128+0)/3is approximately127). -
flipHorizontally: The first pixel in each row becomes the last pixel in that row, the second pixel in each row becomes the second-to-last pixel in that row, and so on. The result is a mirror image of the original picture. -
flipVertically: The first pixel in each column becomes the last pixel in that column, the second pixel in each column becomes the second-to-last pixel in that column, and so on. As a result, the image should appear upside-down.
For each of these transformations, you will write a void function of the same name that takes an int* (the array of image pixels) and makes the appropriate changes. You will then write a main function which, based upon the command-line arguments to the program, loads the image, calls the right function, and then saves the result. If the user gives an invalid transformation (e.g. flipDiagonal), your program should generate an appropriate error message and quit without saving a PPM file. You are allowed to ignore errors caused when the user gives non-existent or invalid filenames.
In the sub-directory called test_data, we have provided a number of example PPM files. Take a look at these examples to get a better understanding of how each filter will transform images. For instance, you can view the image of a rose using the eog program:
eog test_data/Rose.ppm
And then look at all of the ways the rose can be filtered by opening transformed versions of the image. (The name of the transformation is appended to the image name. You can view them all using the ls command.)
Writing Your Program
When you first clone your Git repository for this assignment, it will contain the following starter files. Those that are highlighted require modification.
-
Makefile- instructions for compiling your program. -
image.h,image.cpp- declaration and implementation of functions that will manipulate images. This is where you will write your image transformation functions. -
ppmio.h,ppmio.cpp- functions for reading and writing PPM images. This has been provided for you and should not be modified. -
picfilter.cpp- you will write yourmainfunction here -
test_data/- a directory containing examples for testing your program
Compiling Your Program
Your starter code contains a Makefile. This file contains instructions to compile your code so you don’t have to mess with the details of calling clang++ yourself. You can compile your program by typing make. If it compiles successfully, you can then run ./picfilter.
We have provided a test that does an exact comparison between your program output and the correct solution. You can test your code by typing make tests.
Getting Started
Remember: you should not write everything all at once. It’s often best to get a small amount of your code to work and then move on to the next part.
-
Start by writing your
mainfunction inpicfilter.cpp. Write the code necessary to take filenames fromargv, load the PPM image, and then save it again. In this step, don’t try to transform the images yet; just read the file in and write it back out. -
Complete the
pixelToIndexhelper function (see below). This function takes the width of the image and the X (column) and Y (row) coordinates of a pixel in the image and translates them to an index in an array. Writing this helper function will make it easier to write your image transformations. -
Write the header and body of a single transformation (e.g.
noRed) into yourimage.handimage.cppfiles. Then, add anifstatement tomainto call that function if the transformation matches it. If not, theelsepart of yourifstatement should print an error message. For now,noRedwill be the only transformation you can handle. -
One by one, implement more transformations, adding them to
mainas you complete them. Be sure to try each one out before you move on to the next one. -
Once you’ve finished writing your transformations, run
make teststo see if the automated testing tools agree that your code is correct.
pixelToIndex
We require you to write the pixelToIndex function because it allows you to write your other algorithms in terms of pixels rather than array indices. To explore the difference, let’s briefly consider how an image (a two dimensional grid of pixels where each pixel is three numbers) might be stored in an array (a single dimensional sequence of numbers).
According to long-standing computing traditions that are counterintuitive to geometry students everywhere, the first pixel is in the upper left of the image. We store this pixel as the first three numbers in the array in the order described above: red, then green, then blue. The next (fourth) number in the array is the red value for the next pixel, which is immediately to the right of the first pixel. In this way, all of the pixels in the first row appear in order in the array; afterward, the array contains all pixels in the next row, and so on.
For instance, let’s consider the grid below which represents an image which is three pixels wide and two pixels tall:
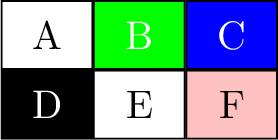
This image is probably best described by the following array diagram:
| r | g | b | r | g | b | r | g | b | r | g | b | r | g | b | r | g | b | |
| values | 255 | 255 | 255 | 0 | 255 | 0 | 0 | 0 | 255 | 0 | 0 | 0 | 255 | 255 | 255 | 255 | 192 | 192 |
| indices | 0 | 1 | 2 | 3 | 4 | 5 | 6 | 7 | 8 | 9 | 10 | 11 | 12 | 13 | 14 | 15 | 16 | 17 |
| pixels | A (0,0) | B (1,0) | C (2,0) | D (0,1) | E (1,1) | F (2,1) | ||||||||||||
The first two rows represent the actual array you obtain when you call read_ppm with three values per pixel; the top row shows the array’s values and the second row shows the C++ indices of those values. The last row is the corresponding pixel from the image with an RGB value for each pixel, and each row following the next.
For this example, pixelToIndex(3,2,1) should return 15. The argument 3 represents the width of the image in pixels, the argument 2 represents the desired column, and the argument 1 represents the desired row (pixel F). Likewise, pixelToIndex(3,1,0) should return 3 (pixel B). Before continuing, add calls pixelToIndex and print out the return value.
Coding Style Requirements
For this lab, you will be required to observe some good coding practices:
-
Your C++ code must be properly and consistently indented to match the blocks (
{…}) you write. -
You must always use blocks for conditions (
ifandelse) and loops (for,while, etc.).
For more information about good style, please see the course style guide.
Lab Survey
Once you have completed the lab, please fill out the lab assignment survey. This will usually take less than a minute and is part of your participation grade.
Going Further
If you like, you can implement additional filters in your picfilter program (as long as doing so does not break any of the required filters above). This is not required and we will not assign extra credit for these filters, but you may find it interesting and fun to experiment with the images your program has loaded.
-
spin2x2: Rotate each 2x2 block of pixels in the image by 180 degrees. That is, we swap (0,0) with (1,1), (1,0) with (0,1), (2,0) with (3,1), (3,0) with (2,1), etc.

-
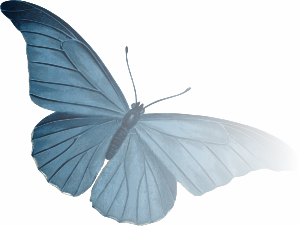
faderight: Brighten each pixel by an amount determined by how far to the left or right it is in the image. The leftmost pixels should all be their original color; the rightmost pixels should all be bright white. We can accomplish this using a weighted average between the original values and the value 255, where the weight is determined by the X coordinate. Since your weight will likely be a value between 0 and 1, you’ll want to use afloatto calculate the weight. You can convert numeric values between different types in C++ as follows:int x = 4; float y = 6/float(x); // this is equal to 1.5 int z = int(y); // this is equal to 1 int a = 6/x; // this is also equal to 1 (int division)
-
blur: For each pixel, set its values to the average of itself and those pixels adjacent to it. That is, the new red value of (1,1) is the average of the old red values of (1,1), (0,1), (1,0), (2,1), and (1,2). Note that this is a bit trickier than the other transformations, since you need the old values of all adjacent pixels. Think carefully about how you might be able to store that information before writing code.

You’re also welcome to make your own filters and try anything you like. Just make sure the filters required for the assignment work correctly!
Summary
To summarize the requirements of this lab:
-
Your program must perform the image transformations:
noRed,noGreen,noBlue,invert,grayscale,flipHorizontally, andflipVertically. -
Your program must take its input from command-line arguments and gracefully handle invalid transformations.
-
You should be able to run
make testson the CS lab machines without any errors. -
You must complete the lab assignment survey as part of your participation grade.
Acknowledgements
This lab writeup is based on Joshua Guerin and Debby Keen’s NIFTY 2012 submission titled "PPM Image Editor".