CS35 Lab1: Image Editor
The goal of this lab is to introduce you to basic concepts in the C++ program language. Concepts you will be familiar with after this lab include:
- basic user input/output (i.e., cin, cout)
- file input and output (using the fstream library)
- function declarations, definitions, and calls
- managing arrays, including passing by reference to functions
- for loops
- defensive programming (e.g., detecting improper input)
A skeleton version the program will appear in your cs35/labs/01 directory when you run update35. The program handin35 will only submit files in this directory. In later labs you may have the opportunity to work with a partner, but for this lab you should work on your own. Useful links:
This lab will have write a program to load and output image files. In addition, you will provide a user the option to perform some basic image manipulation, including color alteration and horizontal flipping. To begin, we will first learn about the PPM Image format. Click here for information about the PPM format (and how to parse it) as well as tips for viewing and creating PPM image files.
Reading about the PPM format may seem overwhelming, but it's actually fairly simple to get started. At a high level, your program will ask the user to provide both the name of the input PPM image and the name of the file they would like to save the modified PPM to. You will then ask the user which of several image alteration techniques they would like to apply, perform the operations, and save the resulting image. Here is a sample run of the program where the only options are to convert an image to greyscale and flip it horizontally:
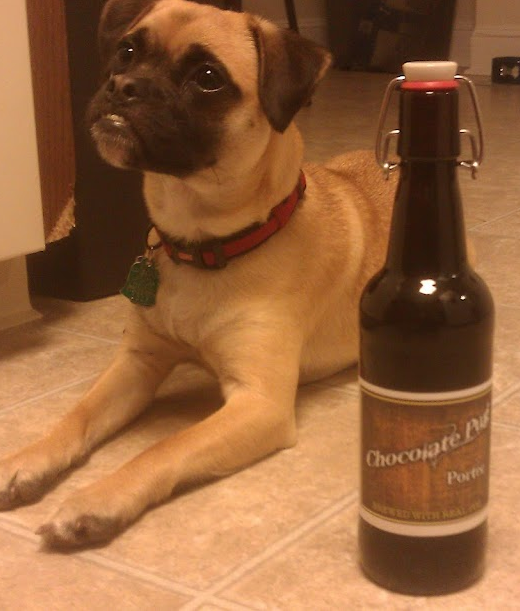
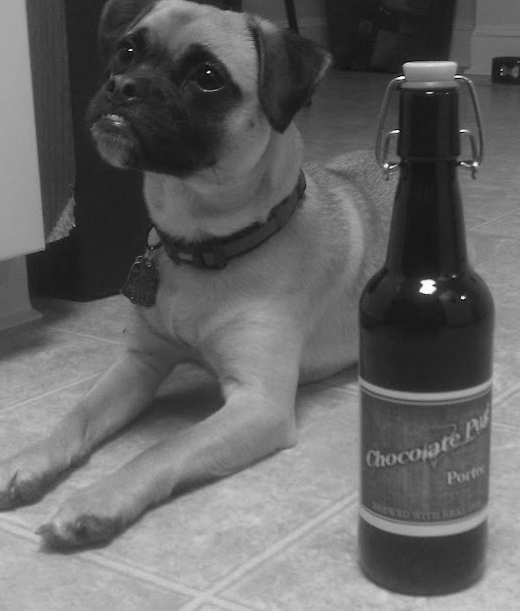
$ g++ ppmEditor.cpp -o ppmEditor
$ ./ppmEditor

Welcome to the Portable Pixmap (PPM) Image Editor

Enter name of image file: input/oberon.ppm
Enter name of output file: oberon-grey.ppm
Do you want to:
	convert to greyscale? (y/n): y
	flip horizontally? (y/n): n

Session complete
The original and resulting image:
| oberon.ppm | oberon-grey.ppm |
 |
 |
I recommend implementing your program in 3 phases:
- File Input and Output - be able to read in a PPM image and output it without loss of information
- Image alteration functions - add functions for modifying the image
- Bring it all together with a menu - complete your program by adding user interaction to choose which image filters to apply to an image
I. File Input and Output
Your program will need to handle opening, reading, closing, and writing to file. I will provide many of the details since this is an early program, but we will do more thorough file i/o later in the semester. Your program already has some of this code implemented, so it may be useful to read this section while looking at ppmEditor.cpp.
- The user will specify the name of the image file. The file will be a
text file in PPM format as described in the discussion above. To open
an input file, use the ifstream data type.
        string inputfilename = "image.ppm";
        ifstream inputFile(inputfilename.c_str());
The provided code has already implemented this step, you simply need to obtain the file names from the user. - To read from the input file, treat inputFile the same as
cin .
You can read in any basic type, such as strings and integers. The >>
operator parses text by reading all characters until whitespace is found. It
will also ignore all preceding whitespace. For example, to read the lines:
	hungry
	356     blue
You can use the code:string verb, color; int number; input >> verb; //"hungry" input >> number //356 input >> color //"blue"
Notice that the strings do not contain whitespace, and that it automatically skipped the whitespace between 356 and blue. The provided code shows how to read the first two lines of the PPM file, you will need to complete the rest. - If you are using a loop to read from a file, you may need to know if the file still has data to read. Use the eof() function to do this. That is, if input.eof() returns true, you have reached the end of the file and should not continue. Depending on your algorithm, this may not be necessary.
- The user will specify an output filename. Opening this is similar
to the example above, except you will use the ofstream data type.
Details on file i/o can be found
here.
Here is an example of loading an output file and writing the variables above:
	string outName = "output.txt";
	ofstream outputFile(outName.c_str());
	output << verb << endl;
	output << number << "   " << color << endl;
As with the input, I have provided the code to output the first two lines of the image. - For this first phase, your
goal is to make an exact copy of the input file as the output file.
The catch is that you are limited to only one buffer array which is
3000 integers long (would represent 1000 pixels). This is not an
unrealistic restriction. (And 3000 should be set up so it is easy to change!)
A picture of a normal size could easily become hundreds of thousands
of numbers. You will not be able to read all of the image into memory at
one time. So you have to deal with one piece of the file at a time.
To keep things simple, your program should make sure the size of one
line of the image is smaller than your buffer (you know how many pixels
are in one line based on the header). If the image is too large,
gracefully abort the program.
To help read a line of pixels write a function readLine with the following signature:
bool readLine(ifstream& input, int pixels[], int columns)
that takes in the input file, your buffer, and the number of columns for one line of the image. Your function should read one line of the image (NOT necessarily one line of the file) and load the values into the pixels buffer. Note that arrays in C++ are passed-by-reference, so any modifications to pixels will modify the array designed in the call to readLine (just like in Python!). Your method should return whether the input stream is still valid (HINT: inputFile.good() returns true if everything is in the clear). Your main program should stop if a read fails, output an error message, and quit. An example of this is provided in the given code.Create a corresponding function for writing one line of data:
void writeLine(ofstream& output, int pixels[], int columns)
- With your buffer, input, and output files established, have your main method read in one buffer full, write it out to the output file, and repeat the process until the input is exhausted. Test it out on an image, does the output image look the same?
Your output file can actually be formatted as you like. Whitespace includes newline characters, so you can put them in where you wish. The format allows for it. Test this with small files and large files. You can check to see if they are identical by loading them both into a text editor like gvim and comparing number by number. Load them into image viewers, as discussed in the PPM Image Format help page listed above. Example ppm files are available in the input folder in your labs directory for this week.
- cake.ppm - A picture of a slice of cake on a plate
- squares.ppm - Some boxes
- blocks.ppm - Some solid blocks of color
- tinypix.ppm - The example image from above
II. Image Alteration Functions
Once you can exactly replicate a PPM image, you can begin writing functions to manipulate the image. At a minimum, you must implement a function to convert an image to greyscale, another to flip the image horizontally, a method to negate all green values, and at least 2 more of your choosing. Let us begin with negating green values.
- Write a function called negateGreen.
void negateGreen(int pixels [], int columns, int maxColorValue)
It will change just the green color numbers into their "negative". That is, if the green number is low, it should become high and vice versa. This depends on the maximum color value. For example, if maximum value is 255 and a pixel had a green value of 0, it would become 255; if it were 255 it would become 0. If the green were 100, it would become 155. It should make changes to the buffer array as described above. - When you have this function written, insert it into Phase I so that every pixel of the picture has had its green color negated in the output file.
- View this picture - does it look as you expected?
- Write a function called flipHorizontal which will flip the picture horizontally. That is, the pixel that is on the far right end of the row ends up on the far left of the row and vice versa (remember to preserve RGB order!). This is probably the trickiest of all of image alteration functions, so be sure to think about this carefully and test often.
- Write a function called greyScale which will change the picture into a grey scale image. This is done by averaging the values of all three color numbers for a pixel, the red, green and blue, and then replacing them all by that average. So if the three colors were 25, 75 and 250, the average would be 116, and all three numbers would become 116.
Note that you are responsible for determining what parameters are needed for each of these functions (aside negateGreen which has been provided for you.
Pick whatever sounds interesting for your other methods. Some ideas include:
- negateRed - negate the red number of each pixel.
- negateBlue - as above but change the blue
- flattenRed - sets the red value to zero
- flattenGreen - sets the green value to zero
- flattenBlue - sets the blue value to zero
- extremeContrast - change each color number to either the highest color number possible or to 0. That is, if the current value is closer to the maximum value than 0, set it to the maximum value. If it is closer to 0, set it to 0. This decision is independent for each color channel.
- horizontal_blur - takes the value of the red numbers of three adjacent pixels and replace them with their average. It also does the same with the greens and the blues of 3 adjacent pixels. Pixels on the edges will have to be handled specially. Note that this is not the same as greyscale conversion.
III. Bring it all together with a menu
The overall design of your program should be as follows:Greet user Ask user for input file (check if valid) Ask user for output file Read header (check if valid) Output header Ask user what filters (image alterations) to apply For each line of the image: Load image into buffer (check if still in valid state) Apply chosen filters Write image to output file Close files, output messageThe menu simply asks the user if they would like to apply each filter you developed. Using a series of yes or no questions. If the user enters an invalid value (you must define this) you should restate the question until a valid response is provided. At all points in your program, you should be defensive against potential user error
See the example at the top of the writeup for an example menu. Your program should apply each filter specified, in succession, one at a time. The filters must be cumulative (even if doesn't make sense in some cases); that is, if the user chooses to flatten all reds and flatten all blues, you should have a resulting picture of only green values.
- Are you validating user input?
- Implement at least 5 filter methods (including the three required methods)
- Your program must use good design. Main should be fairly simply, calling on other methods to perform work. The exception (for this lab) is that opening files and reading/writing the header can be done in main. All other file i/o and user interaction must be done within their respective methods
- All functions must have a top header comment that includes the functions name, purpose, parameter descriptions, and expected return values if any
- All significant portions of code and non-trivial code should have a comment explaining purpose
- All functions must be declared before main, but defined after main
Once you are satisfied with your code, hand it in by typing handin35. This will copy the code from your cs35/labs/01 to my grading directory. You may run handin35 as many times as you like, and only the most recent submission will be recorded.
This lab write up is based off of Joshua Guerin and Debby Keen's NIFTY 2012 submission titled PPM Image Editor. The pictures of the dog are by me. His name is Oberon. And yes, he does know how ridiculously cute he is, but he loves hearing it anyways.