CS81 Lab2: Controlling Aibo, Khepera, and Pioneer robots
Due by noon next Thursday
In this lab you will learn how to use pyro to control a physical robot: either an Aibo, a Khepera, or a Pioneer. The goal of this lab is to give you hands-on experience dealing with issues that arise when operating in the real world rather than in a simulation. This lab will focus on direct control of the robots and need not include any learning mechansims.
To begin, run update81 to copy some starting point files into your home directory (cs81/labs/2/).
Aibos (Ashley, Rachel, Maria, Andrew, Anne Marie, Erick)
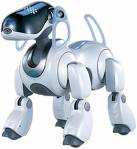
- Connect to the Aibo following these instructions. When you are done using the Aibo be sure to put it back on the recharging station. Unfortunately we only have one recharging station that must be shared by both Aibos. It typically takes several hours for the Aibo to recharge fully.
- Read about the various sensors and affectors that are available on the Aibo here. Experiment with them at the command line of the pyrobot window.
- Try executing the AiboTrackBall.py brain available in your cs81/labs/2/ directory. This will cause the Aibo to move its head to try to track a bright pink ball. If the ball moves beyond the head's range of movement, the program causes the head to return to center until the ball is in view again.
- Options for lab task:
- Use the AiboTrackBall.py brain as a starting point to create a brain that will cause the robot to follow the pink ball with both its head and its body. If the ball is relatively centered and close, the robot will stop and watch it with its head. If the ball is off center or distant the robot will move its body to attempt to get it centered and close again. In the current brain, when the ball isn't in view the robot just stopos and waits. You may want to consider adding a searching behavior that will try to find the ball if it is not in view.
- Your own idea; please run it by me before you begin.
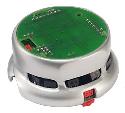
Kheperas (Alex, Malcom, Roby, Madeleine, Amber, Raul)
- Connect to the Khepera following these instructions. NOTE: the power cable must be plugged into the Khepera interface box. When you are done, always unplug the power cable.
- The basic Khepera has 7 infrared sensors (to measure distance to obstacles) and 7 light sensors (to measure light intensity). Read about range sensing, sensor units, sensor topology, and named sensor groups here. Then within pyrobot, query the range sensors under a variety of different conditions to get a sense of how they could be used for navigation control. A small light source is available on the desk. Try plugging this in and viewing how the light sensors respond as well.
- If you are using the Khepera that also has a camera, and are interested in using vision for this lab, then read about image processing here. Follow additional links to learn more details.
-
Options for lab task:
- Create a program that will search for and find a light source within the environment.
- Create a program that will search for and find particular landmarks (using the camera).
- Create a program that will wall follow its way through a maze.
- Your own idea; please run it by me before you begin.
Pioneer (Derek, Phyo, Ryan)

- Connect to the Pioneer following these instructions. NOTE: this is a big, heavy robot. Please use it with caution and use appropriate translation and rotation values. The white button on the side of the robot can be used to disable the motors if the robot is about to crash into something or someone.
- The Pioneer has bumper sensors (to detect collisions), 16 sonar sensors (to measure distance to obstacles), and a camera. Unfortunately the connection to the camera is not working right now. but I will try to get it fixed this semester. Read about range sensing, sensor units, sensor topology, and named sensor groups here. Then within pyrobot, query the range sensors under a variety of different conditions to get a sense of how noisy they can be. How well can the sonar sensors pick up the chairs that are in the robot lab? The couchs in the hallway?
- Read about how to control the gripper, and then experiment with the gripper commands from the command line of the pyrobot window.
- Options for lab task:
- This week's reading discussed the correspondence problem, which is that results obtained in simulation may not translate to the real world. Because we have a simulated pioneer and an actual pioneer, you could create an experiment that would test how well a program created and tested within simulation would translate to the real world. To do this you would first need to create an appropriate simulated world representing some portion of the CS floor of the Science Center. Because the robot lab has very little free space, I would suggest using the hallway. The program's goal could be to traverse the hallway, trying to stay centered while avoiding any dynamic obstacles.
- Your own idea; please run it by me before you begin.
Finishing up
- Be sure that all the relevant files are in your cs81/labs/2/ directory.
- Create a text file called summary where you describe the task chosen by your team, any interesting issues that arose because you were using a physical robot operating in the real world, and the results. Be prepared to do a short demo of your robot's behavior next week.
- Only one member of each team needs to run handin81 to turn in the completed lab work.