Use Teammaker to form your team. You can log in to that site to indicate your partner preference. Once you and your partner have specified each other, a GitHub repository will be created for your team.
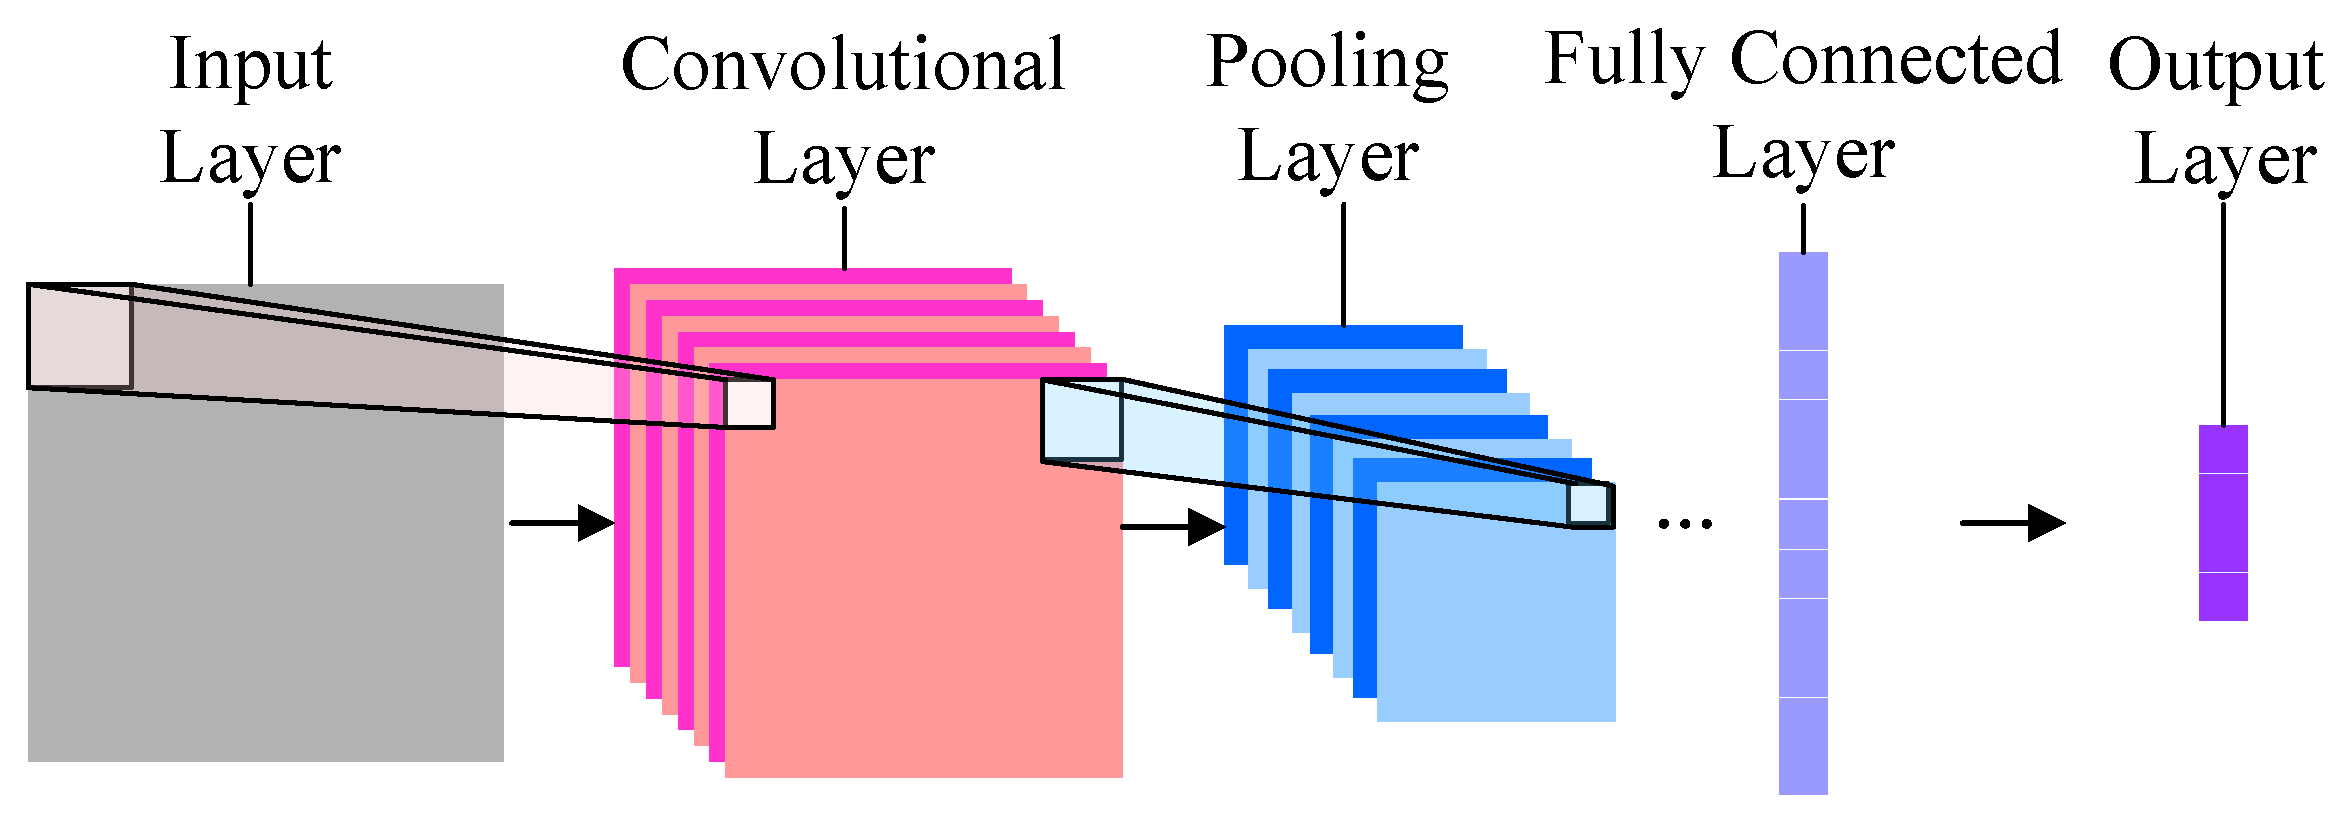
In this lab you will be using Keras and aitk to explore convolutional neural networks. You will start by experimenting with an already constructed convNet to learn the MNIST dataset. Once you understand how to use Keras and aitk to construct, train, and test a convNet, you will create your own convNet to classify fashion images of clothing.
Relative to all of the previous labs in this class, much of the design of the lab is left up to you. This is intended to start to prepare you for your upcoming AI project. You will likely be using some type of publicly available software, like Keras, to complete your project. You should get used to consulting the documentation when you have questions. I am also willing to help, of course.
Before using Keras and aitk, you need to activate a virtual environment that contains all of the software packages that you'll need:
source /usr/swat/bin/CS63envTo leave the virtual environment, just type:
deactivate
We will be using Jupyter Lab to enable lots of interactive experiments with the deep networks. Once you have activated the virtual environment, you should cd to the directory containing your repo for this lab and then you can start up jupyter like this:
jupyter labTo leave jupyter shut down the kernels and close out the browser window. You may also need to press CTRL-C in the terminal window where you started jupyter.
Within jupyter, open up the file digits.ipynb and read through the notebook. Doing deep learning will typically require the steps listed below. Take your time and try to understand how each of these steps is being handled for learning the MNIST dataset.
Typically the network's performance will not be as successful as you would like. To improve the performance you will need to iterate over these steps multiple times. Here are some ways to consider adjusting the deep learning network:
Once you feel that you understand what is happening with this network to learn to classify handwritten digits you can move on to classifying images of fashion apparel.
In the collection of images below, for each category, there are three rows of example images.
Using jupyter, open up the notebook fashion.ipynb. Experiment with this data and try to find the best network you can to learn this data. Remember that your goal is to generalize as well as possible on the test data. Once you are satisfied with your network, write up what you did.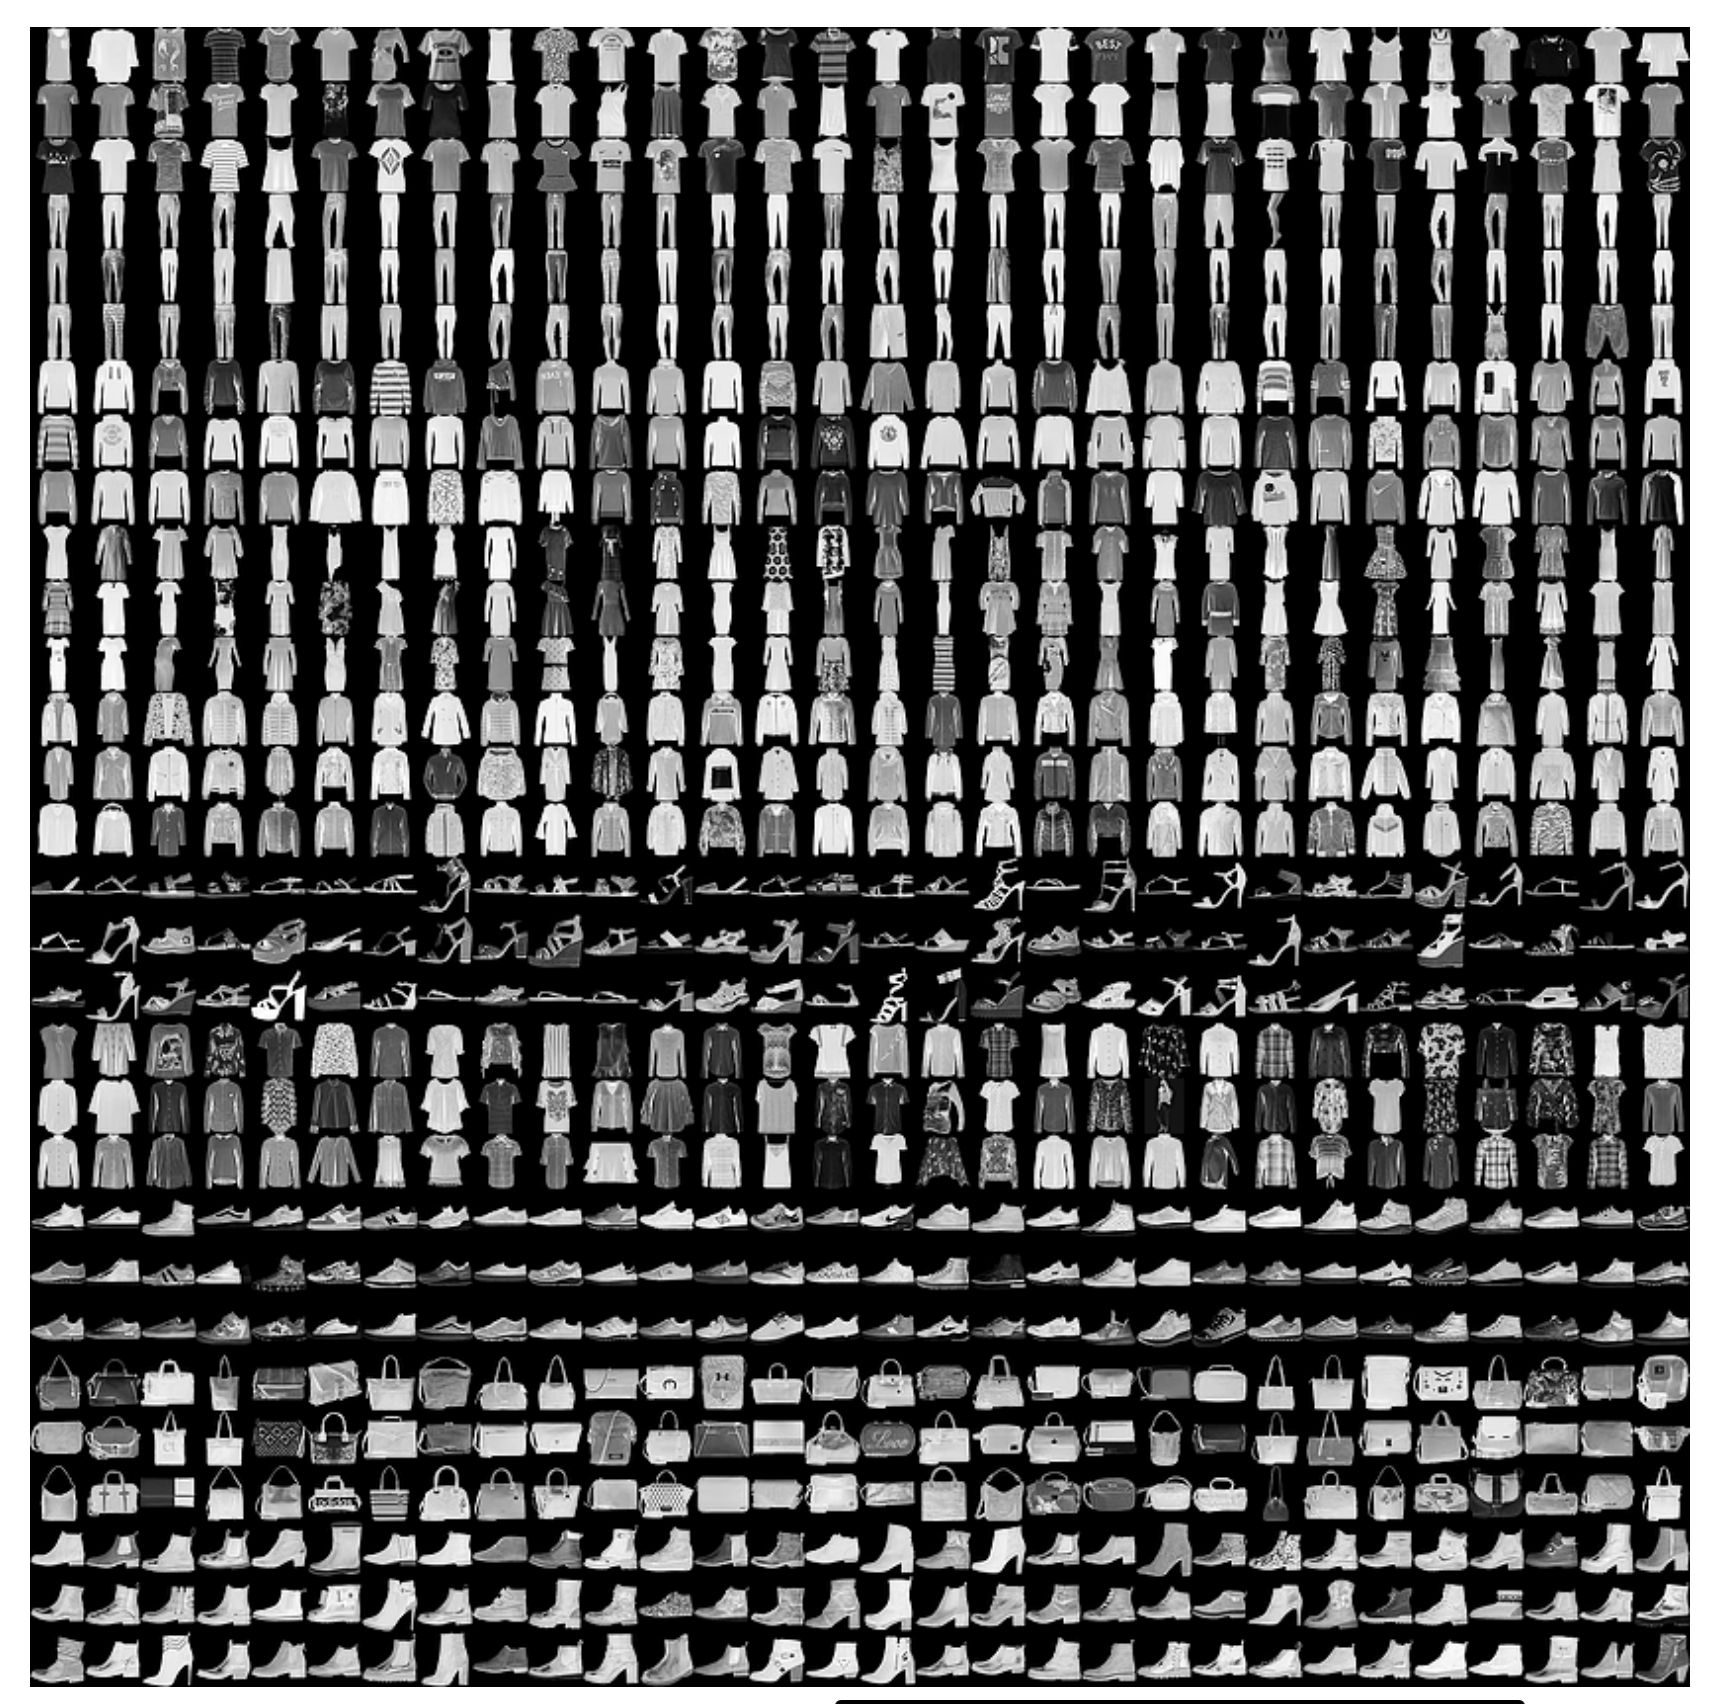
In the file writeup.tex:
You can edit the writeup.tex file with any text editor. There's lots of great help available online for latex; just google "latex topic" to find lots of tutorials. To compile your latex document into a pdf, run the following command:
pdflatex writeup.texYou can then open the pdf from the command line with the command evince. Feel free to use services like sharelatex to edit your latex file. Be sure to include the final PDF version of your writeup in your repo.