CS 43 — Lab 3: Talking to DNS
Due: Thursday, March 17, 11:59 PM ET
|
Due to campus security policies put in place by ITS, you will only be able make DNS queries from one of the CS department lab machines. You can run it remotely by connecting to a CS lab machine with SSH, but it will not work from your own devices on the campus wireless network, from residence halls, or using the campus VPN. |
1. Overview
For this lab, you will be implementing the DNS protocol to build your very own iterative name resolver! Your resolver will iteratively query servers through the DNS hierarchy from the root, TLD, and authoritative DNS servers to resolve (based on options):
-
host name → IP address, or
-
domain name → mail server host name → IP address
1.1. Goals
-
Use UDP sockets to send and receive data.
-
Implement a protocol that uses a binary message format.
-
Analyze protocols / message headers with Wireshark.
-
Communicate directly with DNS — critical Internet infrastructure.
1.2. Handy References:
2. Requirements
You may use any programming language you want for this lab. I encourage you to try Python so that you can see the similarities and differences between high- and low-level languages with respect to network programming.
|
If you plan to use something other than C or python, please give me a heads-up
first. Regardless of which language you choose, you must NOT use any libraries
that simplify DNS or hide the details of socket programming! Don’t make any
calls to |
Ultimately, you need to submit a program or script named lab3 that takes a
host name string (HN) as a required input parameter, with one optional flag
(-m).
-
If the
-mflag is not present, you should be resolving a DNS type A record, which maps HN to its corresponding IP address. For example:$ ./lab3 demo.cs.swarthmore.edu -Querying 198.41.0.4 (root server) to look up demo.cs.swarthmore.edu (MX:False) -Querying 192.5.6.30 (a.edu-servers.net) to look up demo.cs.swarthmore.edu (MX:False) -Querying 130.58.64.20 (ibext.its.swarthmore.edu) to look up demo.cs.swarthmore.edu (MX:False) Answer: demo.cs.swarthmore.edu resolves to 130.58.68.26
-
If the
-mflag is present, you should first look up a DNS type MX record to determine the host name of the email server for HN’s domain. Next, you should another query (type A) to look up the IP address of that mail server. For example:$ ./lab3 -m cs.swarthmore.edu -Querying 198.41.0.4 (root server) to look up cs.swarthmore.edu (MX:True) -Querying 192.5.6.30 (a.edu-servers.net) to look up cs.swarthmore.edu (MX:True) -Querying 130.58.64.20 (ibext.its.swarthmore.edu) to look up cs.swarthmore.edu (MX:True) ---MX Answer: 0, allspice.cs.swarthmore.edu -Querying 198.41.0.4 (root server) to look up allspice.cs.swarthmore.edu (MX:False) -Querying 192.5.6.30 (a.edu-servers.net) to look up allspice.cs.swarthmore.edu (MX:False) -Querying 130.58.64.20 (ibext.its.swarthmore.edu) to look up allspice.cs.swarthmore.edu (MX:False) Answer: cs.swarthmore.edu resolves to 130.58.68.9
Your output does NOT have to exactly match what’s above, but it should show all the queries you make along the way so that the user can observe how you navigated the DNS hierarchy.
2.1. Workflow of Your Program
Roughly, your resolver should follow this sequence:
-
Populate a collection of root DNS server IP addresses from the file
root-servers.txt. -
Check the command line arguments to determine if it’s being invoked with or without the
-mflag. At this stage, you may want to delegate to a helper function for each of the cases. -
Build a query.
-
Build your DNS request, according to RFC 1035, Section 4.
-
Pack your binary header and message query using
struct.pack.
-
-
Send your query using UDP Socket Calls.
-
After your request is built you will need to use
socket.sendtoto send your request to the server. Note: DNS uses UDP port 53. -
Send the query to one root server and wait for a response. If you don’t hear a reply after 5 seconds, move to the next server in the list. See an example on setting timeouts in
timeout.pyin your starter files.
-
-
Receive the response using
socket.recvfrom. -
Parse the response message.
-
Use
struct.unpackto decode the bytes you were sent.Since the header is always the first 12 bytes (
[0:12]) of your response, you might want to unpack the full header first. Use the information in the headers to determine how to parse the remaining bytes (i.e., how many questions, answers, etc. there will be). -
Now that you have your response headers, you can parse the resource records in the response. The headers tell you how many answer records, NS records, and additional records you’ll find after the header.
-
-
Repeat steps 4-6 as you work your way down the hierarchy, only instead of using the root servers for subsequent queries, use the
NSrecord results from the previous query’s response. -
Eventually, a successful query will find an
Arecord in the ANSWER section of the response. Inform the user of the result and exit.You can call
socket.inet_ntoaat the offset in your response where the IP address is located to return the address formatted as a human-readable string.
2.2. Resolver Behavior Expectations
For full credit:
-
Your resolver should iteratively work its way down the DNS hierarchy, querying the root, then the TLD, then authoritative server(s) until resolves the requested host name.
-
Query Types: Your resolver should query for host name to IP address mappings (Type
A, decimal value 1) unless given the-mflag, in which case it should first query for mail exchanges (TypeMX, decimal value15). After getting theMXanswer, it should begin a second sequence of queries for the IP address of the mail server. -
Query status messages: Your resolver should print short status messages regarding its intermediate steps as it traverses the DNS hierarchy. For each request you make, you should output the server you’re querying and a brief summary of the response you got back. If you didn’t get a response (because you timed out), say so. You should print:
-
who you’re querying (IP address or, name + IP if available).
-
the result of the query (success, failure, timeout, etc.).
-
upon a successful final query, print the final result.
-
-
Errors: If asked to resolve an invalid name, your resolver should print an error message.
-
Query Timeout: If you attempt to query a server and get no response after waiting a short time (approximately 5 seconds), your resolver should move on to the next server and attempt to query that instead.
-
You should never ask a DNS server to perform a recursive query for you.
-
If using a language without garbage collection, you should free all memory and generate no
valgrindwarnings.
2.3. Assumptions
-
You should assume that there will be a file named
root-servers.txtin your resolver’s current working directory and that it contains a valid list of IP addresses for DNS servers. Your resolver must use this file to find the initial set of server to query. -
You may assume that you will not receive a response that is larger than four kilobytes (this is realistic for DNS — most replies will be far smaller).
-
You are only responsible for working with resource records of type
A(1),NS(2),MX(15), andAAAA(28). If you see any other resource record types, you can simply report an error and exit. -
You may assume that the additional records section will contain the
Arecords for any server names listed in theNSrecords of the authority record section. NOTE: This may not be the case for all queries (e.g., to the.milTLD) — I will not use such domains when grading. -
You may see some records of type
AAAA(IPv6) in the responses you receive. You’ll need to parse them in order to get past them, but otherwise you can ignore their contents.
2.4. Checkpoint
To be on track, by the start of the next lab session, you should have finished:
-
Creating requests and sending them to the first server in
root-servers.txt. -
Receiving a reply from a root server and parsing it such that you have extracted the information you need to make your next request (i.e., to a TLD server). For example, you could print the IP address(es) of the TLD server(s).
OR
-
Receiving a reply and parsing a name string that has a pointer in it.
Good stretch goals are:
-
Falling back to additional server(s), with a timeout, if sending to the first yields no response.
-
Using the results of the root’s reply to make the subsequent query to a TLD server.
-
Fully resolving IP addresses for non-MX queries.
It’s fine to defer until next week:
-
Resolving
MXrecords with the-mcommand line argument.
3. Examples and Testing
To get "ground truth" answers, you can use the dig command to query a DNS
server of your choice. It’ll send the query and then print the response. For
example, running:
$ dig +norec @192.58.128.30 sesame.cs.swarthmore.edu
Produces (I’ve shortened some repetitive sections):
; <<>> DiG 9.16.1-Ubuntu <<>> +norec @192.58.128.30 sesame.cs.swarthmore.edu
; (1 server found)
;; global options: +cmd
;; Got answer:
;; ->>HEADER<<- opcode: QUERY, status: NOERROR, id: 25202
;; flags: qr; QUERY: 1, ANSWER: 0, AUTHORITY: 13, ADDITIONAL: 27

;; OPT PSEUDOSECTION:
; EDNS: version: 0, flags:; udp: 1472
;; QUESTION SECTION:
;sesame.cs.swarthmore.edu.	IN	A

;; AUTHORITY SECTION:
edu.			172800	IN	NS	a.edu-servers.net.
edu.			172800	IN	NS	b.edu-servers.net.
edu.			172800	IN	NS	c.edu-servers.net.
...

;; ADDITIONAL SECTION:
a.edu-servers.net.	172800	IN	A	192.5.6.30
b.edu-servers.net.	172800	IN	A	192.33.14.30
c.edu-servers.net.	172800	IN	A	192.26.92.30
...
a.edu-servers.net.	172800	IN	AAAA	2001:503:a83e::2:30
...

;; Query time: 36 msec
;; SERVER: 192.58.128.30#53(192.58.128.30)
;; WHEN: Mon Feb 21 16:40:35 EST 2022
;; MSG SIZE  rcvd: 848
Here, we queried a root server, and it replied by telling us to ask the .edu
TLD servers (in the AUTHORITY section), and it conveniently gave us their IP
addresses (in the ADDITIONAL section).
If you make the same request to the CS department’s DNS server (130.58.68.10), we’ll get an answer instead:
$ dig +norec @130.58.68.10 sesame.cs.swarthmore.edu

; <<>> DiG 9.16.1-Ubuntu <<>> +norec @130.58.68.10 sesame.cs.swarthmore.edu
; (1 server found)
;; global options: +cmd
;; Got answer:
;; ->>HEADER<<- opcode: QUERY, status: NOERROR, id: 10842
;; flags: qr aa ra; QUERY: 1, ANSWER: 1, AUTHORITY: 2, ADDITIONAL: 3

;; OPT PSEUDOSECTION:
; EDNS: version: 0, flags:; udp: 4096
; COOKIE: 5a53216ff5e300ba2d629ceb62140808b898203edc8f6f65 (good)
;; QUESTION SECTION:
;sesame.cs.swarthmore.edu.	IN	A

;; ANSWER SECTION:
sesame.cs.swarthmore.edu. 86400	IN	A	130.58.68.164

;; AUTHORITY SECTION:
cs.swarthmore.edu.	86400	IN	NS	dns.cs.swarthmore.edu.
cs.swarthmore.edu.	86400	IN	NS	oak.swarthmore.edu.

;; ADDITIONAL SECTION:
dns.cs.swarthmore.edu.	86400	IN	A	130.58.68.10
oak.swarthmore.edu.	2958	IN	A	130.58.64.20

;; Query time: 0 msec
;; SERVER: 130.58.68.10#53(130.58.68.10)
;; WHEN: Mon Feb 21 16:45:44 EST 2022
;; MSG SIZE  rcvd: 165
3.1. Wireshark
When debugging, it’s often helpful to compare what you received against what your program interpreted that it received. Since DNS isn’t string-based like HTTP, you can’t easily print the responses you receive in a human-readable way. Fortunately, Wireshark allows you to easily and interactively dissect the messages you receive.
We’ll walk through how to use wireshark during the lab meeting.
4. Tips & FAQ
-
In your queries, you can expect to encounter resource records of type
A,MX, andNS. You’re likely to also come acrossCNAME(in the case of a name alias),SOA(if you’re asked to resolve a name that doesn’t exist), andAAAA(IPv6 answer). You don’t need to handle the first two in a special way, just print what you got and exit. When you get anAAAAresponse, look beyond it to see if you got other answer records of typeA. -
If you need to check for the presence of a single bit or set a single bit in a larger integer field (e.g., in the headers or for string compression), recall the bitwise operations you learned in CS 31. If you bitwise and (
&) a variable with a value that has the bit you want to test, you’ll get either 0 (it wasn’t set) or the value (it was set). With bitwise or (|), if you dovariable = variable | value, you will set any of the bits that are 1’s invalue.
4.1. Code Structure
You will find yourself using similar logic to parse many parts of a resource record. Structure your program in a modular way! You’ll have a much better time if you create helper functions that you can call whenever necessary, to handle a task that comes up repeatedly. Duplicating code leads to significantly more difficult debugging!
I would suggest writing functions for:
-
Parsing name strings. DNS uses a string compression scheme to reduce message sizes. Essentially, it looks for places earlier in a message where a string has appeared, and instead of repeating the string again, it refers back to that first instance.
I strongly suggest that you write a function that, given a response message and an offset within that message, can 1) extract the full string, and 2) determine the offset at which the string ends, so that you know where to resume with parsing the next portion of the message. In Python, you can return a tuple to hand both pieces of information back to the caller.
-
Resolving a name, with parameters for the name query type (
AorMX), and perhaps other things (e.g., the list of server(s) to contact). With this function, you can easily structure your program either iteratively or recursively. I took a recursive approach to mine, and it worked well. -
Parsing questions, resource records, or any other things you see repeatedly. Often, you may not care about the contents, but you need to parse it to determine the size of the question or record in bytes so that you can move past it.
4.2. Packing and Unpacking DNS Messages
4.2.1. Strings
For python 3.0+, when you want to send a string, you must encode it into bytes.
For example, if you wanted to send the string "demo", you’d use
"demo".encode(). This also works for string variables, for example:
string_var = "hello"

# Add the encoded string to the end of the message.
message = message + string_var.encode()
When parsing a response, you need to decode. For example, if you know the next
five bytes of data starting from the location offset of a response are a
string, you could do something like:
string_result = response[offset:offset+5].decode()
4.2.2. Binary Integers
For reasons of byte ordering (see reference material below), senders and
receivers of binary protocols need to agree on how to send multi-byte integers.
In Python, you can use struct.pack and struct.unpack for this task.
When you are unpacking results with struct_unpack use one of the following formats:
result, = struct.unpack(...)                       # NOTE THE COMMA AT THE END of result

result1, result2, result3 = struct.unpack(..)
The second option allows you to unpack multiple values at once into separate named variables.
As you’re parsing responses, you must keep track of where you are within the
response. I strongly suggest that store an offset variable that represents
the current offset (from the start of the message) that you’re parsing.
Advance the offset forward as you work your way through the message.
5. Other Reference Material
5.1. Byte Ordering
Since DNS is a binary protocol rather than an ASCII-text based protocol, we need to solve the problem of sending multi-byte integer values over the network such that all network entities know how to interpret these bytes.
Consider a 2-byte (16 bit) integer represented in binary, 0000000011111010:
Binary:      00000000                      11111010
        Most Significant Byte (MSB)   Least Significant Byte (LSB)
            "the big end"                "the little end"
Which byte should we send over the network first, the MSB or LSB?
How does the receiving end host know how to interpret this value — is it 250 or 64000?
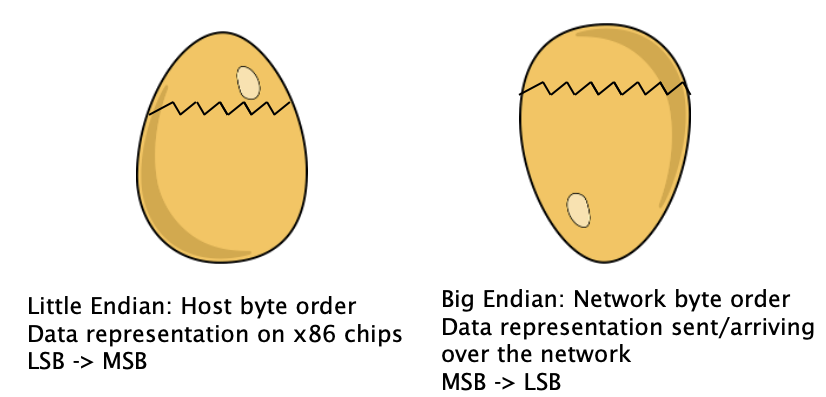
-
The networking community adopted the Big Endian format, which means we send the most significant byte first.
-
As it so happens, most end hosts store all multi-byte values internally in memory and the CPU using Little Endian i.e., Least Significant Byte First.
-
This means, that you as a programmer need to convert between the two byte orderings before sending your data over the network!
-
In Python, you’ll want to use the struct module and in particular
!to indicate converting from one format to the other. -
In C, the functions
htonl()andntohl()(32-bit l-ong integers) andhtons()andntohs()(16-bit s-hort integers) will help you convert back and forth between h-ost (your local machine’s integer format) and n-etwork byte orderings.
-
5.1.1. Using Python struct.pack and struct.unpack
Follow along with the example code provided in struct_example.py to pack a binary header in Python.
|
The struct.pack
function is useful to put data of a specific size in network byte order.
For example, to get started with the DNS header, we know from the DNS Header format, that the first field in the header is the ID field. We can set the ID field to any number we want (as long as it fits in 16 bits!). We can also pack the flag fields (which are all zero) and concatenate the two. So we would pack our struct as follows:
# packed_id = binary value 500, stored in 2 bytes.
packed_id = struct.pack("!H", 500) # 500: random ID value that we chose
packed_flag = struct.pack("!H", 0) # !H: 16-bit unsigned integer in network byte order
packed_fields = packed_id + packed_flag
Alternatively, you can pack multiple values at once, which is often more convenient for large data chunks, like the DNS header. Here, you specify two H’s (for two 16-bit fields) in the format code and then pass two additional arguments, one for each of the two respective codes:
packed_once = struct.pack("!HH", 500, 0)
You can pack (or unpack) and many fields at a time as you want, but the number of values needs to match the format code.
Packing variable-length host names
The NAME field of the DNS
Question Format has the following format:
<length><sub_domain><length><sub_domain>...<length_of_root>. The length_of_root is always 0.
For example, to encode "demo.cs.swarthmore.edu", you need to express:
4 demo 2 cs 10 Swarthmore 3 edu 0
Where each of the length numbers above is a one-byte integer. You could produce it like:
Packing "demo" in Python:
subdomain = struct.pack(“!B”, 4) + 'demo'.encode() # ASCII characters are 1-byte: no packing required

(Repeat for the other sections of the name, continuing to accumulate the result.)
Unpacking
The
struct.unpack
function is useful to extract data from a network response. Let’s say we wanted
to unpack the entire DNS Header, where each field is 2 bytes long, and there
are 6 fields (total 12 bytes). You can unpack all the fields at once:
msgid, flags, qdcount, ancount, nscount, arcount = struct.unpack('!HHHHHH', response[0:12])
|
WARNING: Unpacking will fail if:
|
After unpacking the header this way, you’re done looking at the first 12 bytes (response message offsets 0-11), so you can resume decoding from the byte at index 12.
5.2. UDP Socket programming
-
DNS uses UDP (port number 53) rather than TCP. So there are no guarantees about reliability — we don’t establish a connection in advance at all this time.
-
Rather than explicitly connecting a socket to one particular destination, a UDP socket can send to any destination!
-
UDP Socket Calls in Python: Use the
socket.sendtoandsocket.recvfromsocket calls. You will need to specify the destination every time you want to send.-
You can use a
4096buffer size to receive data.
-
-
UDP Socket Calls in C: When creating a socket, make sure to use
SOCK_DGRAMrather thanSOCK_STREAM, and you don’t need toconnect()it to anything. Instead, you will need to specify the destination for each call tosendto. -
Unlike TCP, UDP will not perform partial sends and receives. If you call send on a message and the socket buffer is full, UDP will drop the message! Similarly for
recvfrom, you will either receive all of message or none of one. When working with UDP, you do not need to callsendtoandrecvfromin a loop.
6. Submitting
Please remove any excessive debugging output prior to submitting.
To submit your code, commit your changes locally using git add and git
commit. Then run git push while in your lab directory.