Lab 10: Creating fractals with recursion
The goal of this program is to learn about recursion by designing fractal patterns. A fractal is a seemingly complex pattern that is built up from many copies of some rather simple base pattern. We will again be using the graphics library that we used in earlier labs.
To start, run update21 to create the cs21/labs/10 directory containing two initial files called triangle.py and tree.py. Edit these files to create your solutions for this lab.
In triangle.py, write a recursive function:
fracTriangle(window, top, left, right, color, n)that takes as parameters a GraphWin window, three Points (top, left, and right), a color that will be "black" or "white", and an integer n which is the recursive depth. The fracTriangle function should draw a triangle of color color in the graphics window and then, depending on the depth n, either return or recursively use the fracTriangle function to draw smaller triangles as described below.
Recall that every recursive function needs a base case where the
recursion ends. For your fracTriangle function, the base
case should occur when n is zero; your fracTriangle
function should use top, left, and right to draw
a single triangle of the given color, and then return.
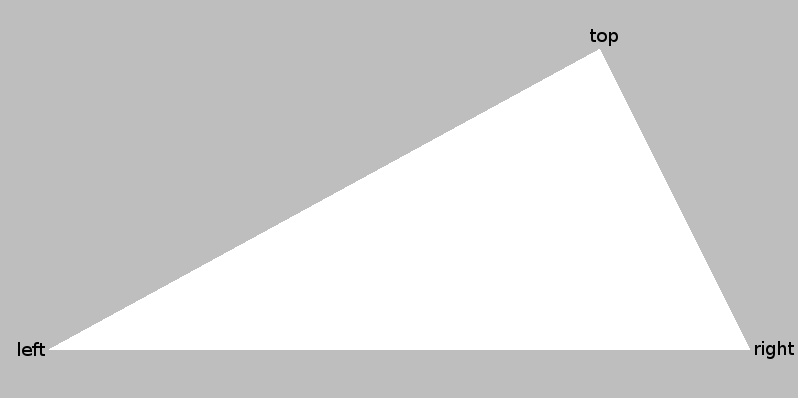
For example, with color="white" and n=0, your
function should produce something like the single triangle below.
(Your image should not contain the text labels "top", "left", and "right".
We just put them in the image here to clarify how the triangle is
drawn.)
If n is greater than zero, your function should use top, left, and right to draw a triangle of the appropriate color and then use three recursive calls (with depth n-1) to draw smaller triangles inside the given triangle. The three recursive calls should each draw one triangle of the opposite color defined by the points illustrated below:
- top, midLeft, and midRight
- midLeft, left, and midBottom
- midRight, midBottom, and right

Note that given two Points top and right, you can create their midpoint as:
  midX = (top.getX() + right.getX()) / 2.0
  midY = (top.getY() + right.getY()) / 2.0
  mid = Point(midX, midY)
You might even (hint!) write a function to return a midpoint, given two end points.
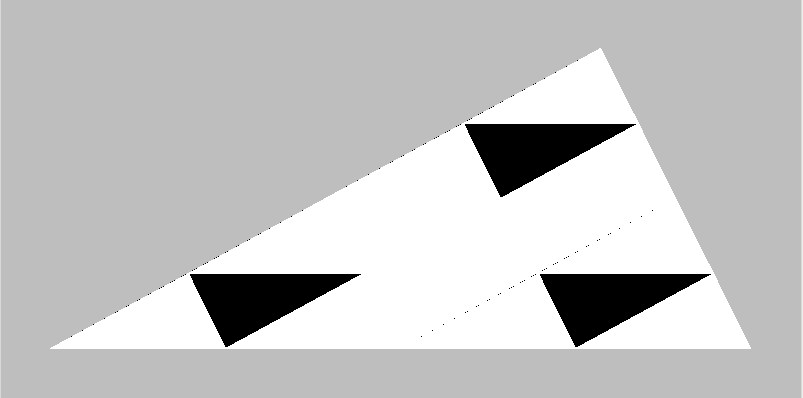
The left image below was drawn with n = 2 and
color = "white", and the right image was drawn with
n = 3 and color = "white":
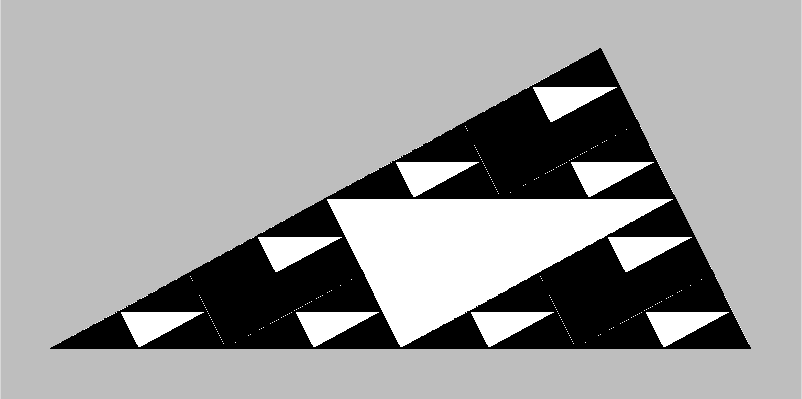
Using larger depths can lead to attractive patterns, but can take a long
time! The following diagram was drawn with color="white" and
n=7:

In main(), your program should read in a recursive depth n and initial color (which must be "black" or "white") and draw the pattern of the appropriate recursive depth.
To summarize, here are some hints for the recursion:
- fracTriangle should always draw a single triangle.
- For the base case (when n equals 0), fracTriangle should return -- making no recursive calls -- after drawing its triangle.
- For non-base cases, fracTriangle should make three
recursive calls after drawing its triangle. Each recursive call should:
- correspond to one of the triangles (using midLeft, midRight, and midBottom) described above.
- use the opposite color.
- use a recursion depth that is one smaller than the current recursion depth.
- Your main function should call fracTriangle just once. All other triangles should be drawn using recursive calls.
- Our example triangles were drawn using an 800x400 pixel window and the initial points top as Point(600,50), left as Point(50,350), and right as Point(750,350).
In tree.py, you will write a program that draws a fractal tree using recursion. Your tree will be drawn using a recursive function:
drawBranch(window, n, start, length, angle, scale, splitAngle)that takes the following parameters:
- window: a window to draw in
- n: a recursive depth
- start: a Point marking the start of a branch
- length: the length of the branch
- angle: the angle of the branch, in radians
- scale: the relative size of adjacent branches in the tree
- splitAngle: the relative angle of adjacent branches in the tree, in radians
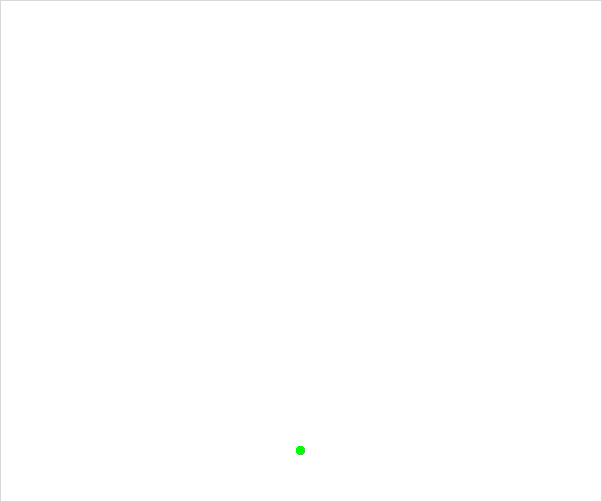
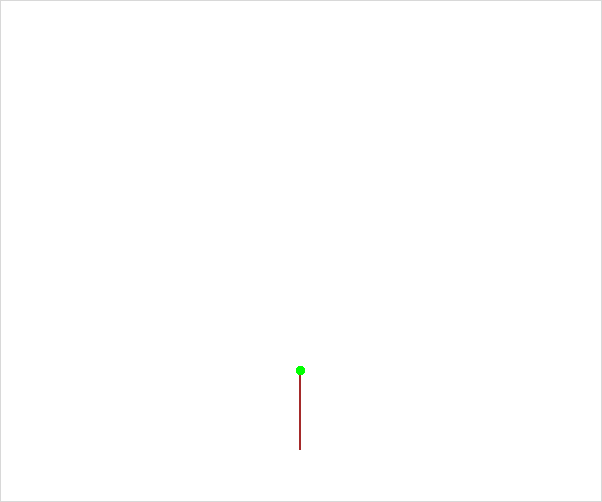
If the recursive depth n is 0, drawBranch should
draw a small green circle -- a leaf --
at the Point start and then return;
this is the base case. The following image was created using some
start Point and n=0:
If the recursive depth n is not 0, drawBranch first draws a single branch, and then recursively uses two calls to the drawBranch function to draw more branches or leaves.
A branch is just a brown Line drawn between the given start Point and some end Point that you must compute. The position of the end Point is specified by the length and angle parameters using polar coordinates. You can compute the x and y coordinates of the end Point using the following equations:
  endX = startX + length*cos(angle)
  endY = startY + length*sin(angle)
where angle is in radians and startX and startY are the x and y coordinates of the start Point.
For some start Point, length, a vertical angle, and
n = 1, drawBranch produces the
image below. Note that the initial call to drawBranch
draws just the brown branch, and the green leaf is produced by
recursive calls with a smaller n.

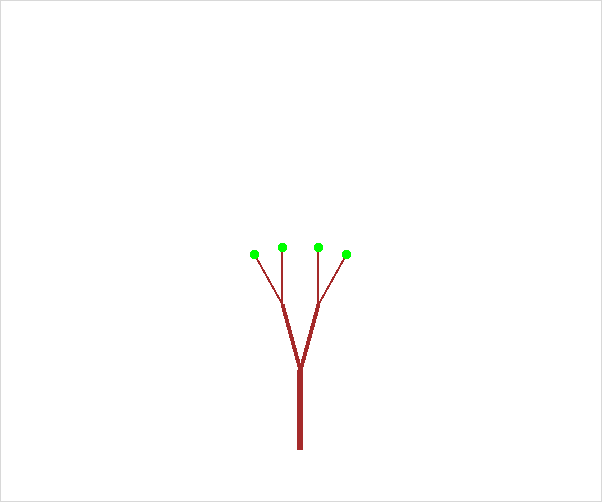
Carefully consider the above image for n = 2. In this image, the bottom (thicker, vertical) branch is drawn by the initial call to the drawBranch function. Each of the thinner, non-vertical branches is drawn using a recursive call from the drawBranch function -- one call for the left branch and one call for the right branch -- using a different start Point, length, and angle.
For those thinner, non-vertical branches:
- their start Point is the end Point of the thicker, vertical branch.
- their length is scale times the length of the thicker, vertical branch.
- if angle is the angle for the thicker, vertical branch, one of the thin, non-vertical branches has an angle of angle - splitAngle and the other thin, non-vertical branch has an angle of angle + splitAngle.
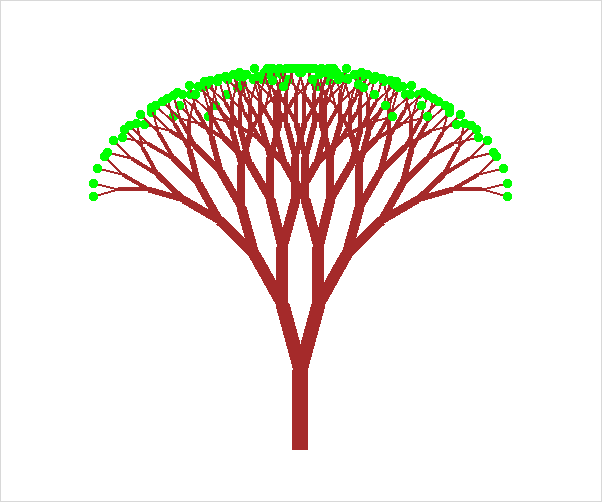
Using a larger recursive depth can lead to very pretty trees. For instance,
here are images produced for n = 3 and n = 8:
- n: recursive depth of tree (e.g., the number of branches between the trunk and a leaf.)
- splitAngle: the angle between two branches in each level of the tree (e.g., 15.0 degrees)
- scale: the relative length of a smaller branch relative to a bigger branch at each level in the tree. (e.g., 0.7 is a good scale factor).
Some hints:
- drawBranch should always draw a single object. This object will be a single leaf (for the base case if n equals 0) or a single branch (for the non-base case if n does not equal 0).
- Don't forget to import the graphics and math libraries.
- When testing your program try using 20 degrees as the split angle, and 0.7 as the scale factor.
- In addition to the parameters that you get from the user, the first call to drawBranch from the main program will also need to supply a window, an initial starting Point, length, and angle. If you use a 500 by 500 graphics window, try a starting point at (250, 400), a length of 100, and an angle of -pi/2, which is vertically upwards.
- You should get an angle from the user in degrees, but you should immediately convert that angle to radians and then only use radians after that.
- If d is an angle in degrees, its value in radians is d * pi/180.
- Set the width of the branch Line based on the recursive depth n
- For the recursive calls to drawBranch
- Each recursive call should use a smaller depth, n-1.
- The window, scale, and splitAngle should be the same for all recursive calls.
- Your main() function should call drawBranch only once. All other branches and leaves should be drawn using recursion.
Note: This is not required and should only be attempted once the previous two parts are working correctly. This problem is more difficult.
Below are examples of six Koch curves that have recursion depths from 0 (a straight line) at the top to 5 at the bottom.
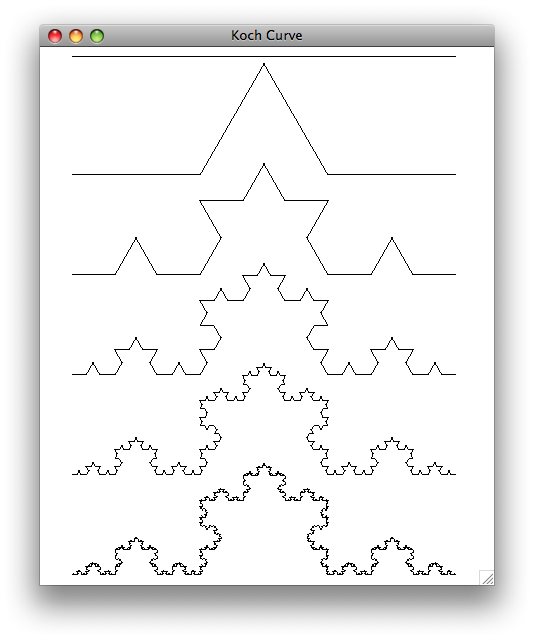
A Koch curve is created by breaking a line segment into thirds and replacing the middle segment by two segments that are equal in length. This creates a two-sided equilateral triangle in the middle (e.g., all angles are 60 degrees).
You should start by creating a program called koch.py. You will write a function:
drawKochCurve(win, n, start, end, angle)which draws a Koch curve from point start to a point end with recursion depth n where angle specfies the angle of the line that connects start to end.
A Koch curve of recursion depth n is formed by four Koch curves as follows:
- drawing a Koch curve of length length/3 with degree n-1 and angle
- drawing a Koch curve of length length/3 with degree n-1 and angle-radians(60)
- drawing a Koch curve of length length/3 with degree n-1 and angle+radians(60)
- drawing a Koch curve of length length/3 with degree n-1 and angle
Hint: Each one of these recursive calls is starting from a different starting point.
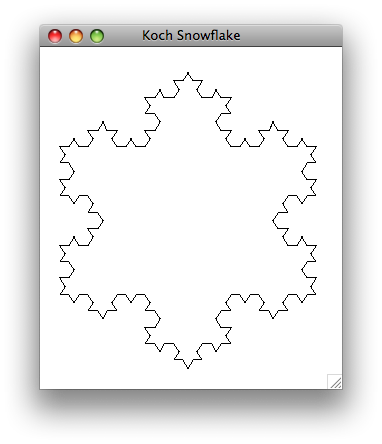
Once you have successfully create a single Koch curve, you can put three Koch curves to create a Koch snowflake. The snowflake shown below is an example of a Koch snowflake made with 3 Koch curves.
Once you are satisfied with your programs you can hand them in by typing handin21 in a terminal window.