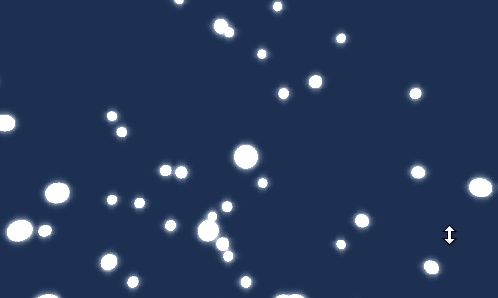
Glow spheres
In which, we begin our journey with C# and Unity...
The goals for this lab assignment are:
The source is available from github.swarthmore.edu. We will use git to keep track of our source code throughout the semester.
If you are joining the class from another semester, you may not have your git account yet. In this case, you will be able to download the source and check it in later when you submit your assignment.
$ mkdir cs71
$ cd cs71
$ git clone git@github.swarthmore.edu:cs71-s19/01-constellations-YOURUSERNAME.git For those of you without an account yet, you can download the repository as a ZIP file from here. Click on the clone or download button. You can still use git locally to keep track of your changes. To submit, we will set the url to the remote repository manually (I will send you instructions once your account is setup)
$ mkdir cs71
$ cd cs71
$ unzip 01-constellations-master.zip
$ cd 01-constellations-master
$ git init
$ git add .
$ git commit -m "assignment 1 framework"
Create a file README.md under the directory /01-constellations (the root directory of your assignment). This is a markdown file which supports pretty formatting that you can view in github. Checkout this markdown cheatsheet to see the types of formatting supported.
To start, your README should say
# Constellations

* TODO: 1-2 description of how you organized your code for the assignment

* TODO: Number of hours it took you to complete the assignment

* TODO: One thing you found annoying, interesting or challenging about the assignment
Then check in the readme like so
$ git add .
$ git comment -m "add readme"
$ git push
And finally, look at the result on github!
Open an editor and type in the following program.
using System;

public class ClassMain
{
   public static void Main()
   {
      Console.WriteLine("Hello C#");
   }
}
Now, try building and running it
$ csc hello.cs
$ mono hello.exe
$ Hello C#The preferred coding style guidelines for this class should follow the Unity C# guidelines with one exception:
DO use a prefix for private or protected member variables (_ or m). Be consistent with your choice. Public member variables should not have a prefix.
Let's go through a brief tutorial together to create the following scene.
Glow spheres
Step 1: Open Unity. You will need a Unity account to get started. If you do not have one already, let's create one now.
Step 2: Setup VS Code. We will use VS code as an Integrated Development Environment (IDE) in this course. An IDE allows us to edit, debug, build, and more from within a single application. To set up the IDE for Unity, go to Edit -> Preferences -> External Tools. For external script editor, select "Browse" and choose /usr/bin/code. Next, we will install the following extensions for code:
Step 3: Unity Controls and Interface. Let's get used to the controls and create a sphere! The coordinate system for Unity is left handed with Y pointing up. To add a sphere to the scene, go to Game Object -> 3D Object -> Sphere
Step 4: Unity Scripts I. Let's animate our sphere so it hovers! We will create our first C# script. Name it Hover.cs and put your C# file in a folder named Scripts.
Step 5: Unity Scripts II. Let's make lots of copies of our sphere using code!
First some background:
Unity is an example of a framework, which means that we let Unity handle the main structure and control flow of our program. Frameworks provide structure for creating classes of programs. For example, Unity is a game engine framework. Another common programming module is a toolkit, which implements specific functionality that can be embedded into an application. Examples of a toolkit might be a regular expression parser, or a plotting library. Both frameworks and toolkits have APIs (Application Programmer Interfaces) for programmers to use them.
We cannot use new to create Unity objects
Because of how Unity is designed, it needs to manage all GameObject instances. Therefore, if we want to create new GameObjects programmatically, we cannot call new. Instead we must call
GameObject newObj = GameObject.Instantiate(myObjToCopy);However, we can still call new on any classes that aren't derived from GameObject or from MonoBehavior. Write a C# script, CreateRandomStars that let's the user specify a number of spheres to place randomly around the origin. Use the Random.Range function in Unity to compute random positions.
Step 6: Controlling the camera. We can move the camera in the scene view but not the game view. Let's add a camera controller that rotates around a given point based on mouse input. Download the script OrbitControl.cs and put it into your Scripts directory. Drag it onto the camera.
Step 7: Customizing materials. Let's make our spheres SHINY. In your repository, you have a shader that implements a glow effect. Shaders are a computer graphics term for programs that customize how objects are rendered. Shaders are executed by the graphics card.
The full tutorial can be found in the project GlowSpheres.
This is an individual assignment. We will write an application that reads in a star map and displays the result in 3D.
This assignment has two parts: in the first, you will write a C# program that reads in the star map and prints out the contents; in the second, you will re-use the classes you wrote in the first part to visualize the stars in 3D using Unity.
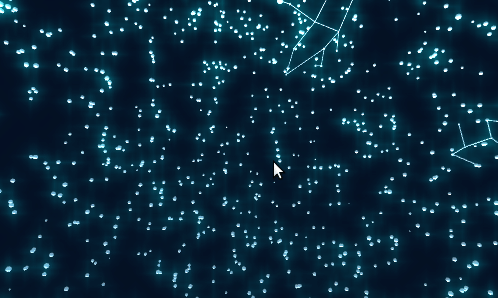
Constellations
Create a file, StarMapReader.cs in the directory StarMaps. In this file, define a class StarMapReader that can read in star information.
stars.txtstars.txt contains a list of stars, one on each line. The star map file format is defined here and reproduced below:
The file stars.txt contains one line for each star that is represented in the catalog. The meaning of each field (column) is described below.
- The first three fields are the x, y and z coordinates for the star. We will ignore the z coordinate, and use only the x and y coordinates. Each axis in the coordinate system goes from -1 to +1, and the centre point is 0,0. (See the figure below.)
- The fourth field is the Henry Draper number, which is simply a unique identifier for the star.
- The fifth field is the magnitude (or brightness) of the star.
- The sixth field is Harvard Revised number, another identifier.
- The seventh field exists only for a small number of stars and is a semicolon-separated list of names for a star. A star may have several names.
Two unique identifiers appear in the data because the star data has been collected from different sources, and the catalogs have several different ways to uniquely identify stars. The fields that you will need for this assignment include the x and y coordinates, the magnitude, the Henry Draper number, and the name (or names) of each star.
Your implementation should define an API which supports the following features:
To test your class, instatiate StarMapReader in Main and call each of its functions. Compare your output with the original file stars.txt.
Hints and tips:
csc. Feel free to store the individual (x,y,z) components as it may be easier.StarMapReader.cs and Main defined in Main.cs. To build:$ csc StarMapReader.cs Main.csWe have included several text files containing information about constellations. Each line represents a pair of stars that should be connected by a line. Extend your StarMapReader class to contain methods which implement the following:
In Main.cs, test each of the functions in your API.
In this part of the assignment, you will use the code you wrote in part 1 to load in the star map and visualize them in Unity.
For this assignment, you may copy your class StarMapReader.cs to the Scripts directory in Unity. This is awkward, however, since changes in StarMaps will have to be re-copied back into Unity. To work around this problem, you can define symbolic links, e.g.
$ cd StarViewer3D/Assets/Scripts
$ ln -s ../../../StarMaps/StarMapReader.cs .Next, create a Unity C# script CreateStarMap.cs that works similarly to CreateSpheres.cs. CreateStarMap will use a GameObject as a template to create stars for every star in stars.txt. Re-use your StarMapReader to read in the star files. CreateStarMap should have public variables for
stars.txt, Cygnet.txt, etc..Your visualizer should support the following features: * Allow the user to specify the file stars.txt and a template star object * Create stars based on a template object * Position the stars based on the (x,y,z) coordinate * Scale the stars based on the magnitude of the star * Allow the user to zoom and rotate the camera
Hints and suggestions:
stars.txt might not match. Try scaling the positions you get from your Reader so they look correct.Use cylinders to connect stars that are part of a constellation. Add a cylinder to your scene which CreateStarMap can use to connect stars that belong to a constellation.
Your visualizer should support the following features: * Allow the user to specify a list of constellation files (use a public TextAsset[] array) * Create connections between stars using a template cylinder object * position, rotate, and scale the cylinder to connect pairs of stars in a constellation
To align the cylinder, find the direction between the two stars and then set the rotation of the cylinder to point in the same direction. The position of the cylinder should be the midpoint between the two stars.
Vector3 pos1 = // get position of star1
Vector3 pos2 = // get position of star2
Vector3 dir = pos2 - pos1;

GameObject cylinderObj = // create new cylinder
cylinderObj.transform.position = 0.5f * (pos1 + pos2);
cylinderObj.transform.rotation = Quaternion.LookAt(dir) * Quaternion.Euler(90,0,0);

Vector3 scale = cylinderObj.transform.localScale;
scale.y = 0.5f * dir.magnitude;
cylinderObj.transform.localScale = scale; (60 points) C# star reader API
(40 points) 3D constellation viewer
Update the README.md file with any feedback on the assignment, how long it took you to do, and what you found most challenging.
Use git to hand-in your assignment.
$ git status
$ git add .
$ git status
$ git commit -m "description of my awesome work"
$ git push
NOTES
status: lists the changes you've madeadd: specify which files to stage for commit. Dot adds everything recursively starting at the current directory.commit: Everytime you commit, you save a snapshot of your work, so you can go back to an old version if necessary. Specify good comments to help you remember what each commit contains.push: Everytime you push, you save a backup of your work on Swarthmore's servers. It's good practice to both commit and push your assignments often.