This document describes what git and GitHub are and provides instructions
for inital setup to work with git and GitHub on Computer Science (CS)
Network machines.
What is Git?
git is a version control software package. When developing programming
projects, it is useful to keep track of when and how code is added. git
provides tools for tracking changes in a project’s code and for helping
multiple programmers work on large projects together.
A project that is managed by git is called a git repository, or git repo
for short.
git is free open source software, meaning that it is free for anyone to
use or modify. Every CS network machine has git installed.
What is GitHub?
GitHub is an online service that stores and manages git repos online. It
provides additional features that git alone does not.
The GitHub service is not completely free even though it uses git. GitHub is
currently owned and managed by Microsoft.
Swarthmore College pays for a version of GitHub that is private and dedicated to college use, called GitHub Enterprise.
Local vs. Remote
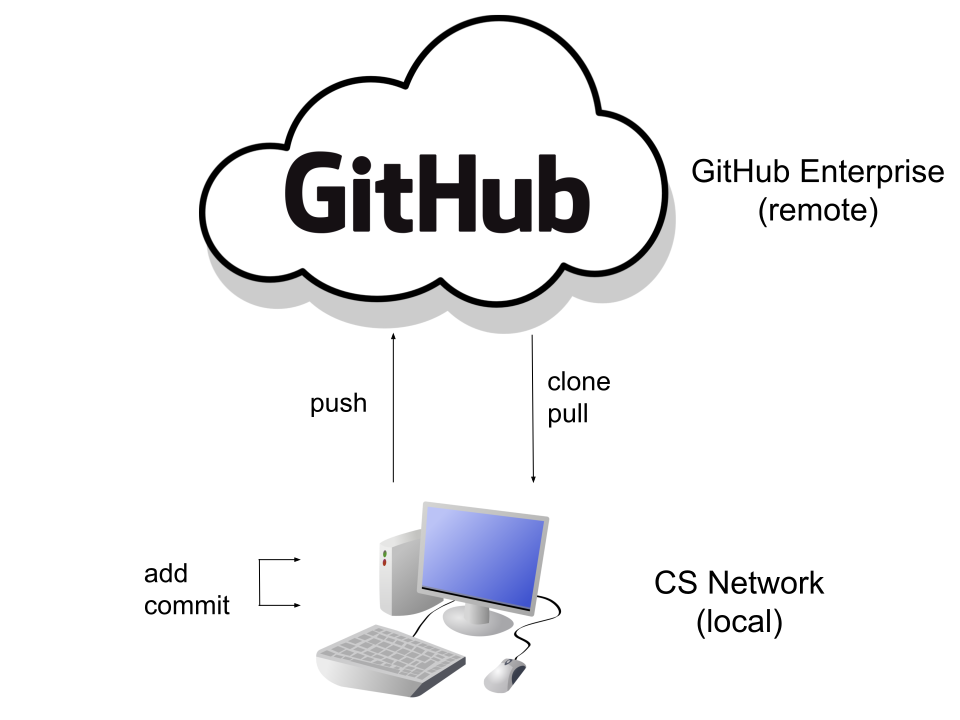
When talking about git and GitHub, you’ll often hear about local and
remote repositories or code changes.
Local refers to a repository that exists on the computer you are working from. In this case, your local repositories should be stored on a CS Network machine.
Remote refers to a repository that exists on a different machine, typically stored by a service like GitHub.
Almost always, your local repo will track a remote repo which represents the same project as the local repo. This allows you to easily transfer changes to and from the remote repo. Then, from the remote repo, the code can be shared with others.
Initial GitHub Setup
Before using Swarthmore’s GitHub Enterprise for class work, you’ll need to complete the following configuration steps once.
1. Local Git Config
Before you start using git to create and/or clone repositories, you should
give it a basic configuration. This will tell git who you are, making it easy
for you and your partner (or other collaborators) to identify who committed
code to your shared repository.
The following commands configure git to store your email and name. We also
instruct git to simplify how git push commands can be given. Finally, we
set the default editor that git uses to VScode.
Make sure to replace the email and name strings in the double quotations with your email address and name.
git config --global user.email "username@swarthmore.edu"
git config --global user.name  "Your Name"
git config --global push.default simple
git config --global core.editor "code --wait"
Double-check that your name and email and name are entered properly by using the following command:
git config --global --listIf you prefer a different text editor, you can update the core.editor
setting to use whatever editor you like. Here are some examples:
git config --global core.editor "code --wait"     (VScode)
git config --global core.editor "vim"             (vim)
git config --global core.editor "emacs"           (emacs)
git config --global core.editor "nano"            (nano)
2. Create an SSH Key
Next, we need to set up a way for GitHub Enterprise to authorise who you are when you attempt to access remote repositories from the command line.
SSH (Secure SHell) is a mechanism that allows you to interact with remote machines and issue commands to them. SSH can use a username and password in some cases, but other cases (such as linking to GitHub Enterpirse) require a cryptographic key.
If you already have an ssh key, you can skip this step. If you’re not sure, you probably do not already have a key. You can check by issuing the command:
ls -l -a ~/.sshIf you see files named id_ed25519 and id_ed25519.pub, you already have a
key. If those files aren’t there, or you’re told that you have no such
directory named .ssh, you’ll need to generate a key.
To generate a key, run the command ssh-keygen. This will give you the output:
$ ssh-keygen
Generating public/private ed25519 key pair.
Enter file in which to save the key (/home/[username]/.ssh/id_ed25519):
Press enter to confirm the default location of
/home/[username]/.ssh/id_ed25519. Next, it’ll ask you for a passphrase.
This passphrase is separate from both your Swarthmore and CS Network account
passwords.
Note that when you type your passphrase, it will appear like nothing is
being entered, but that is normal. Your entry is just hidden. Press Enter
once you have typed in the passphrase.
Enter passphrase (empty for no passphrase):
Enter same passphrase again:
Set a passphrase that you’ll remember and then confirm it a second time. After confirming your passphrase, it’ll print a key fingerprint and some strange abstract ASCII artwork that you can safely ignore.
3. Add Your Key to GitHub
Next, we need to let GitHub know about this key we just created. Head over to https://github.swarthmore.edu and log in using your typical Swarthmore account credentials (same account you use for email). It may ask for your name, email address, or other information. Fill that in.
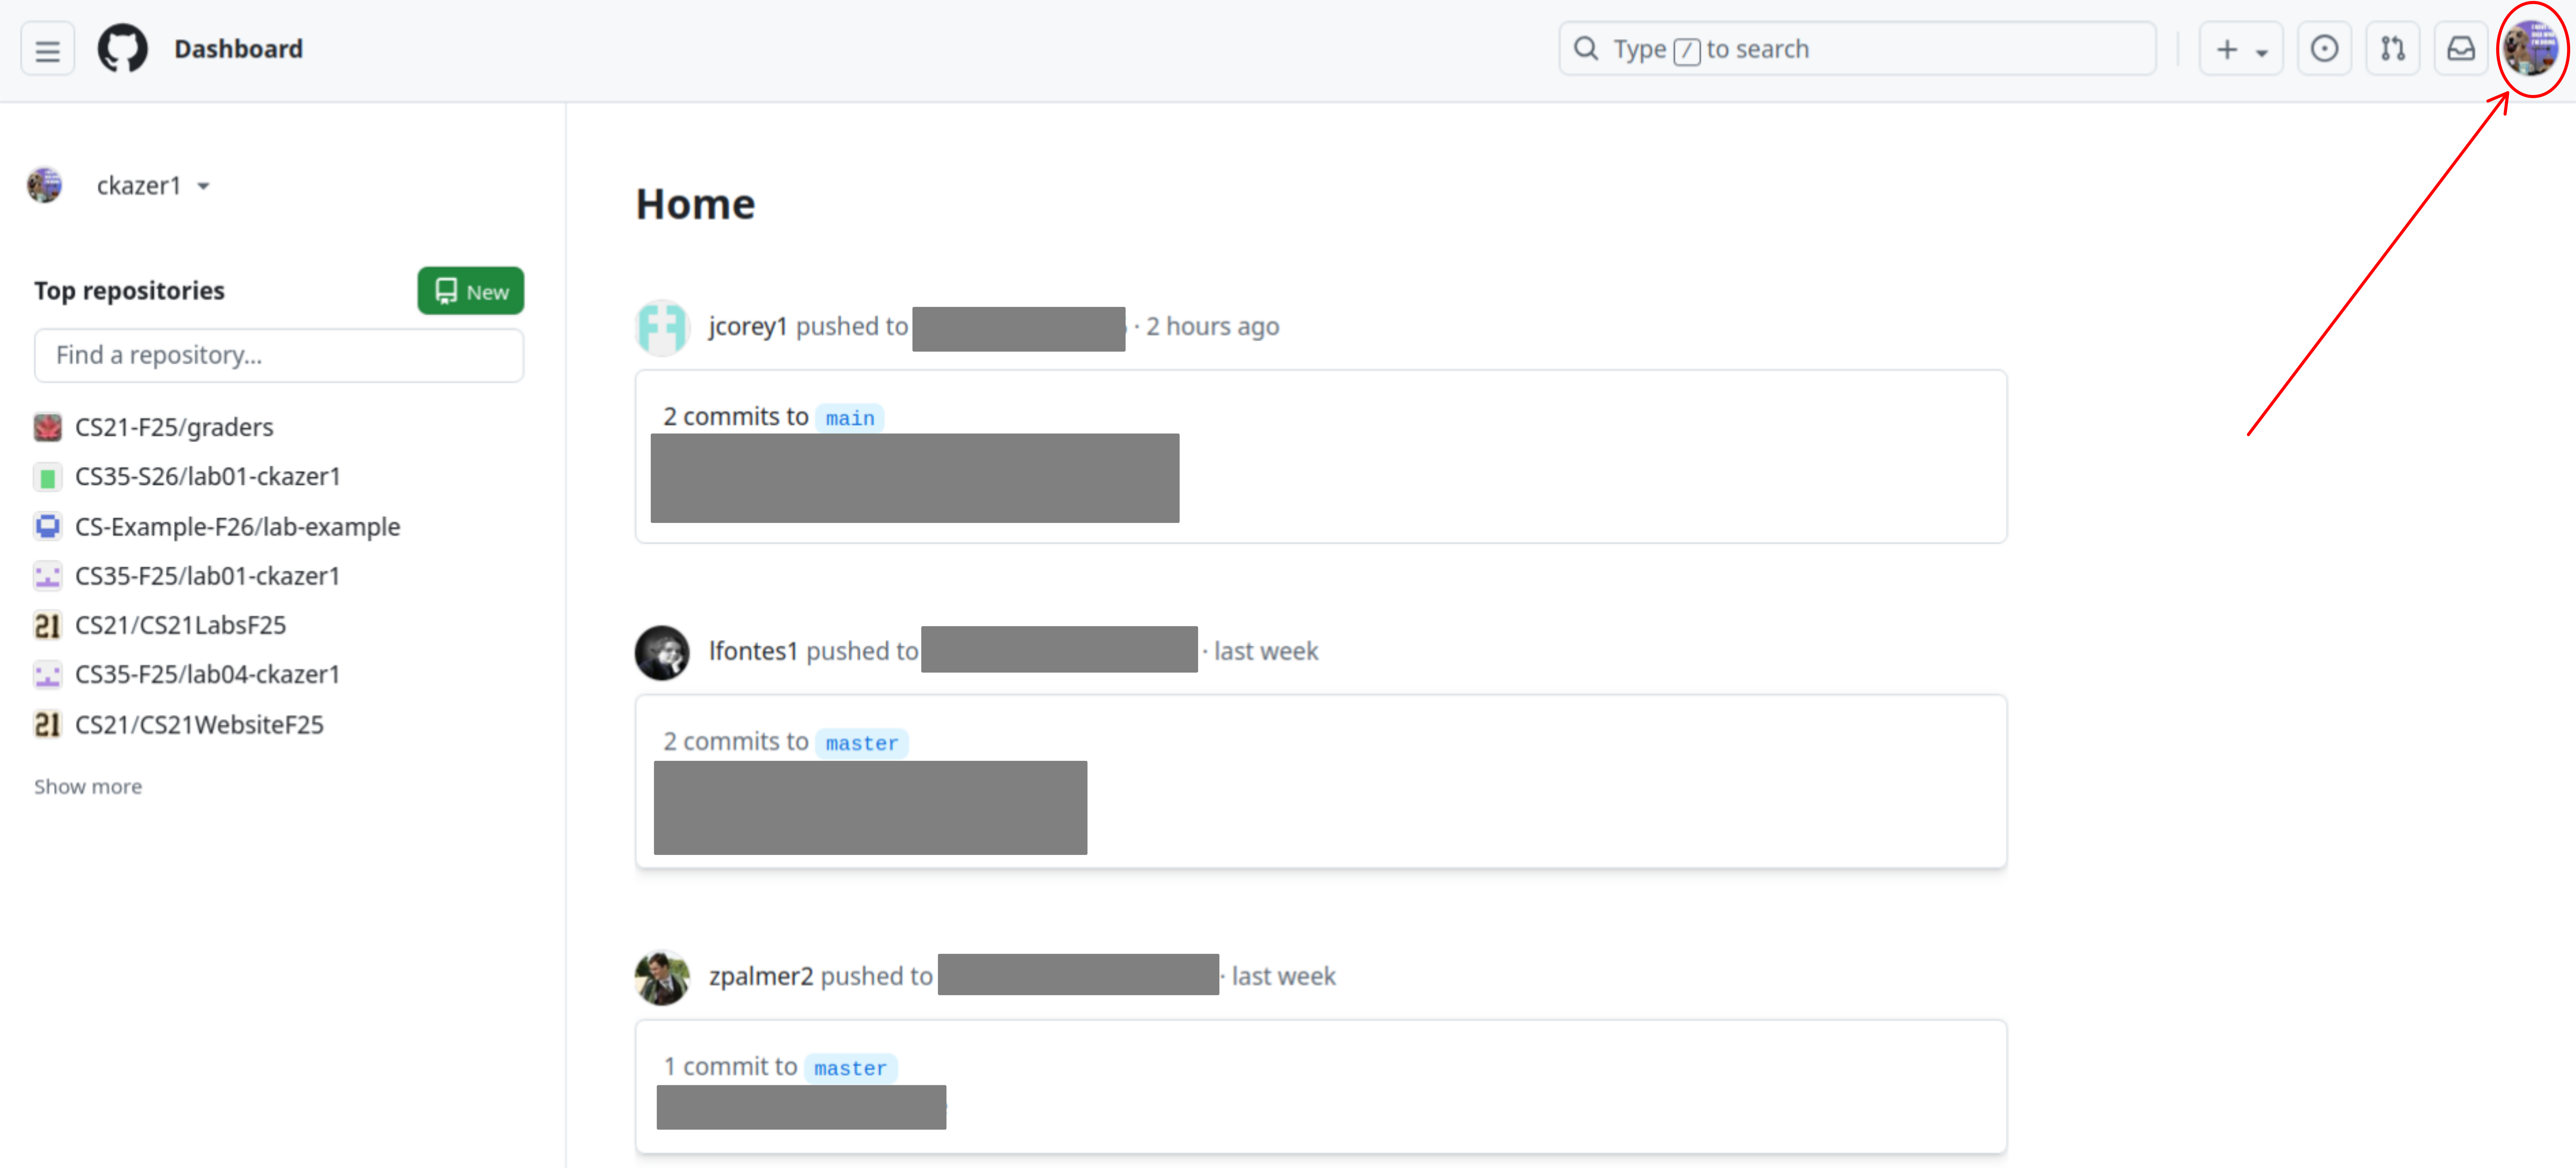
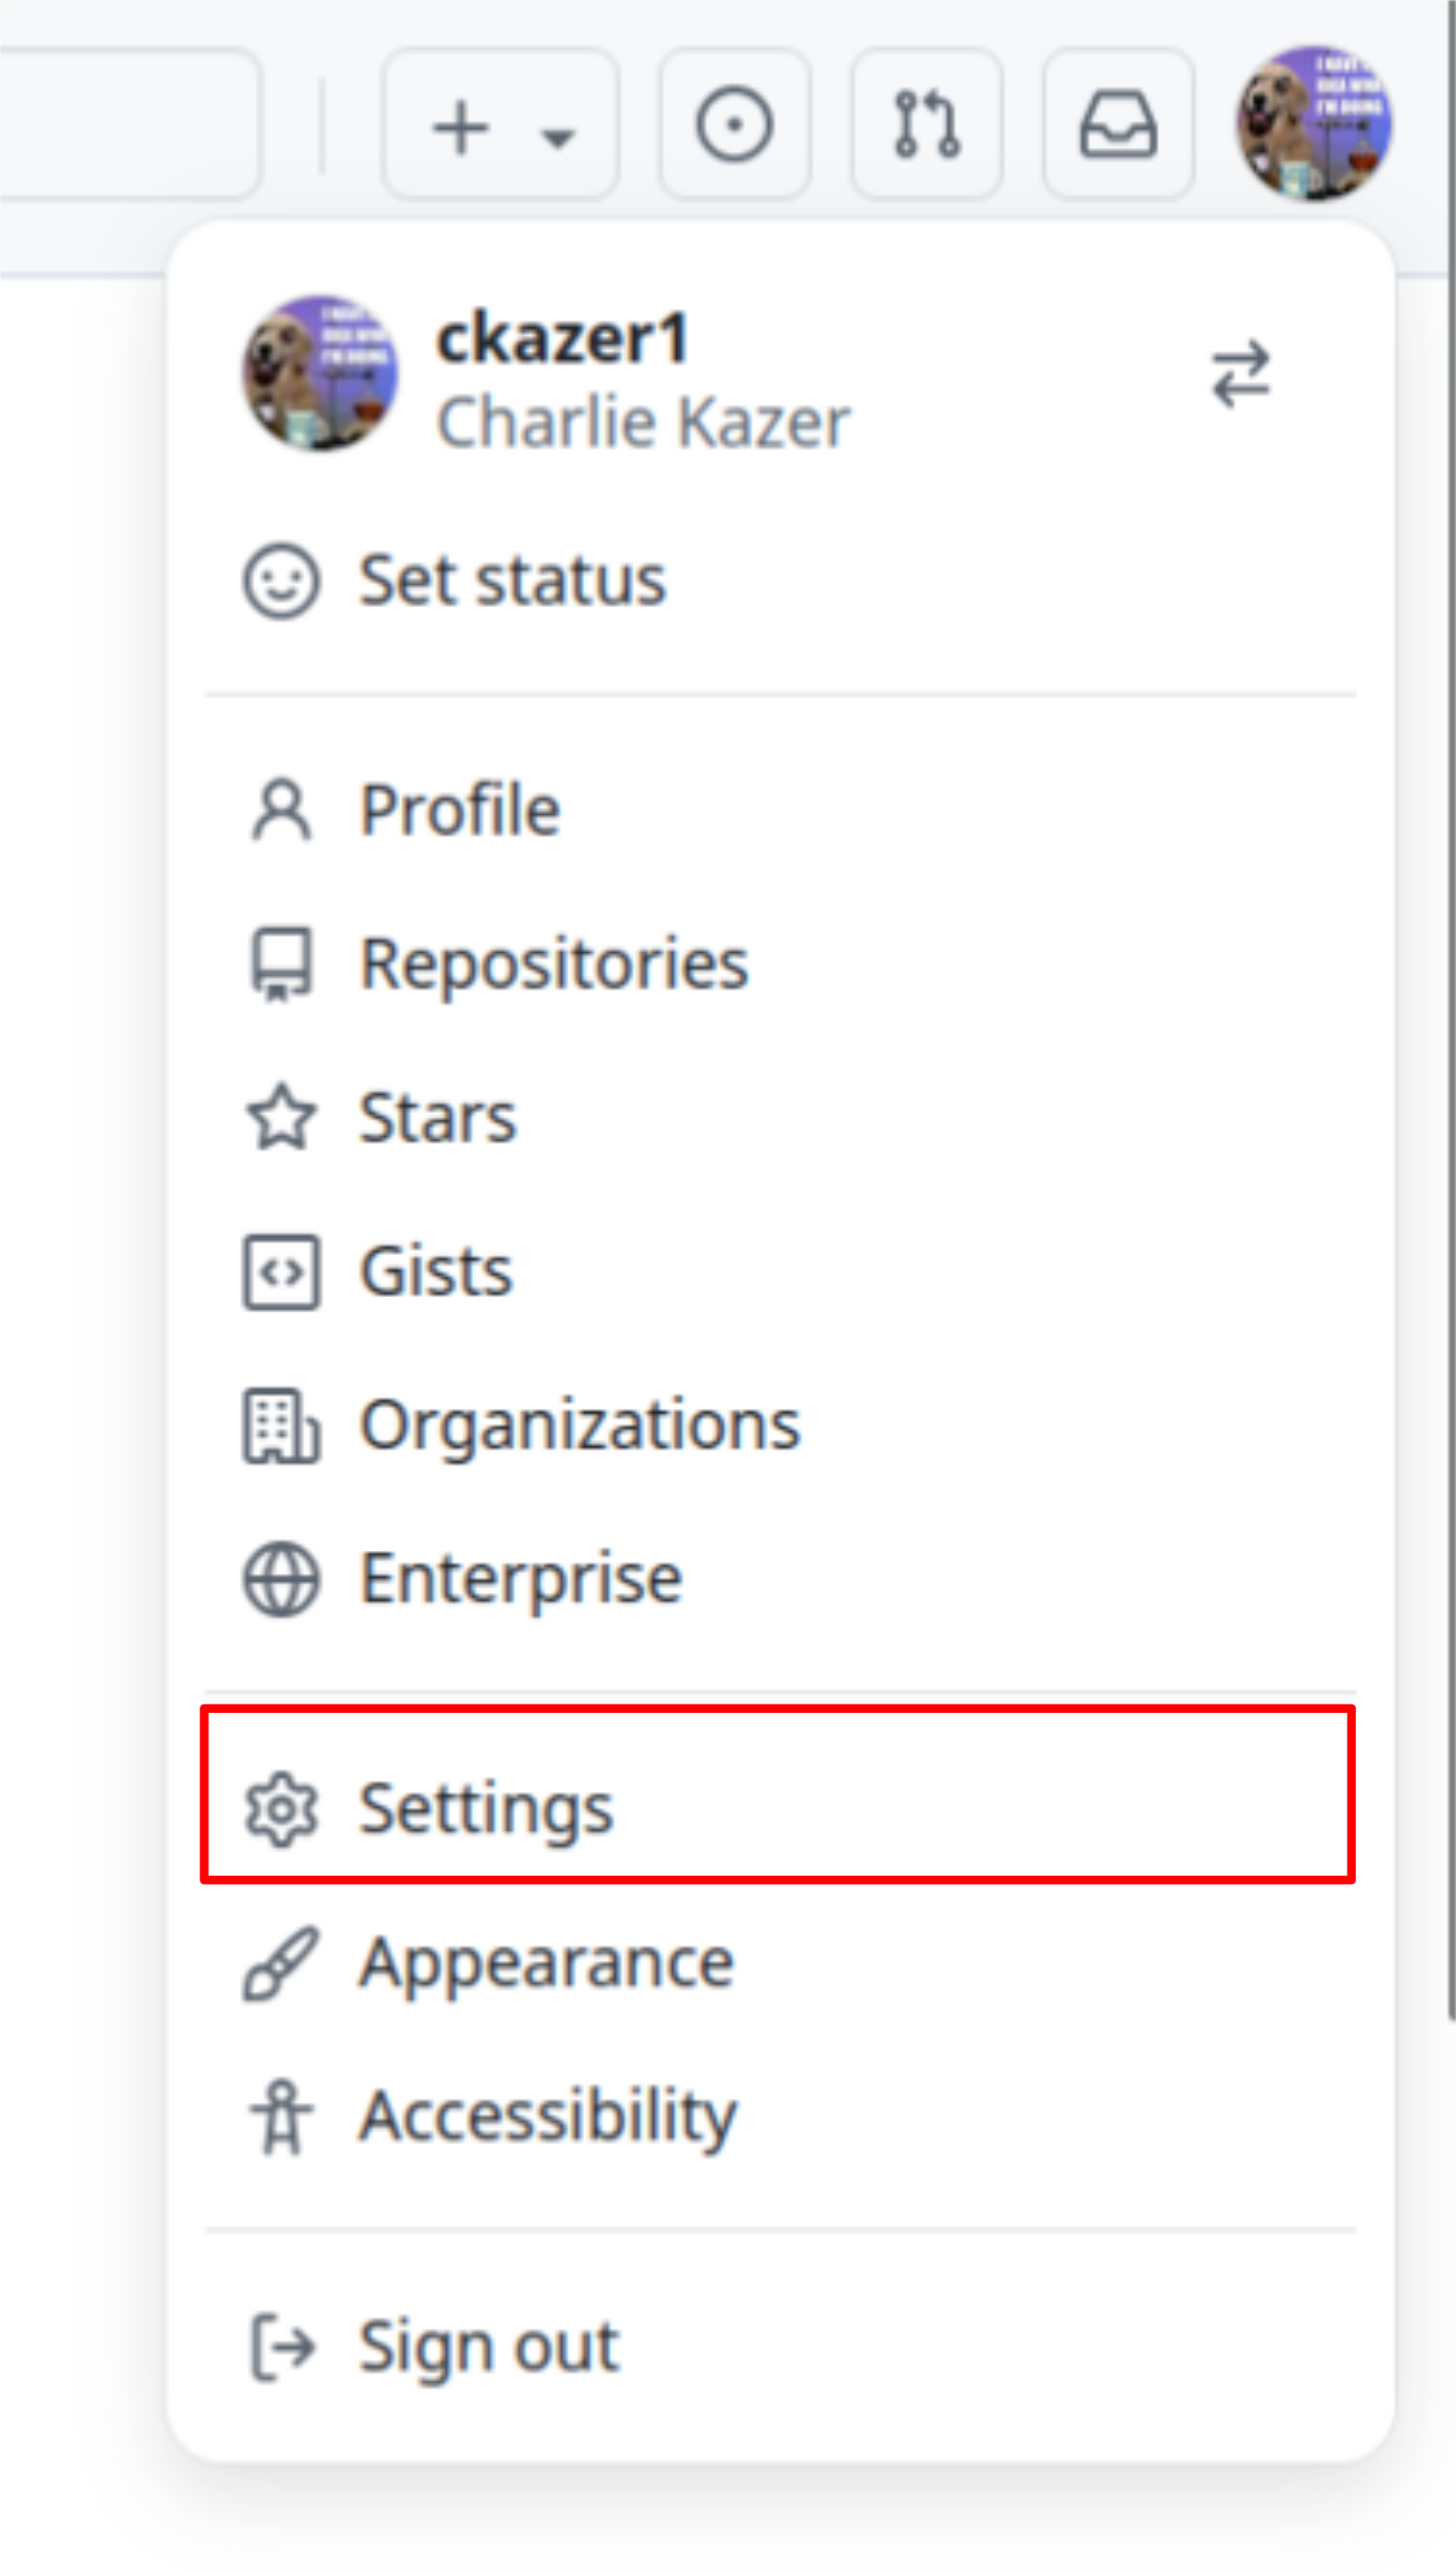
When you’re properly logged in, click your avatar image (small square) at the
top right of the page and select settings.
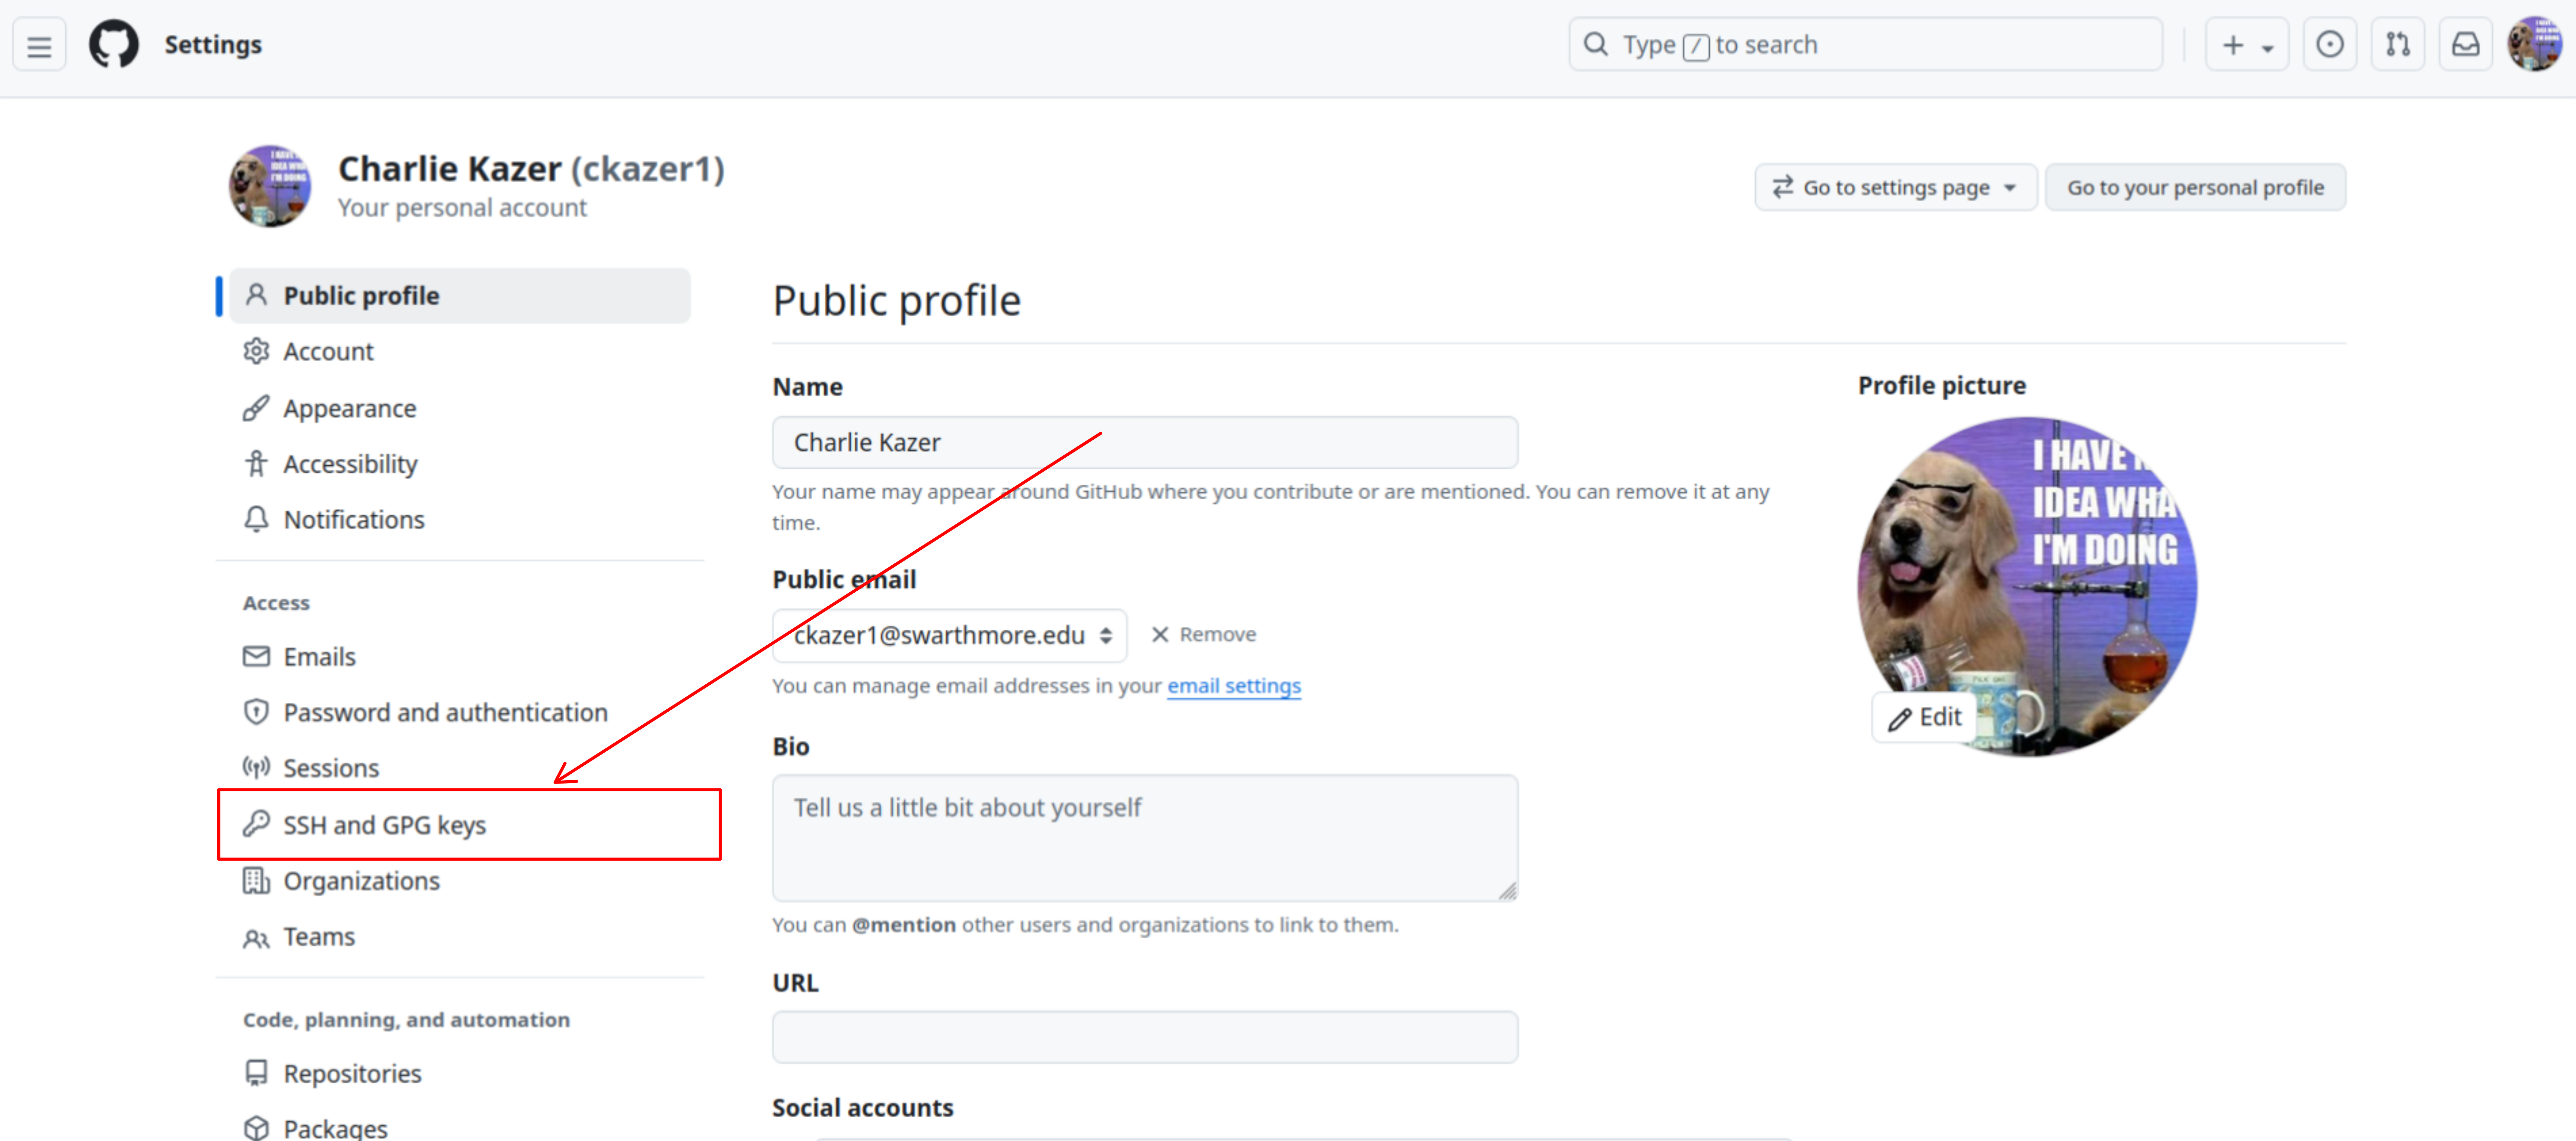
Choose SSH and GPG Keys from the menu on the left.
Click the New SSH key button, and two boxes will appear.
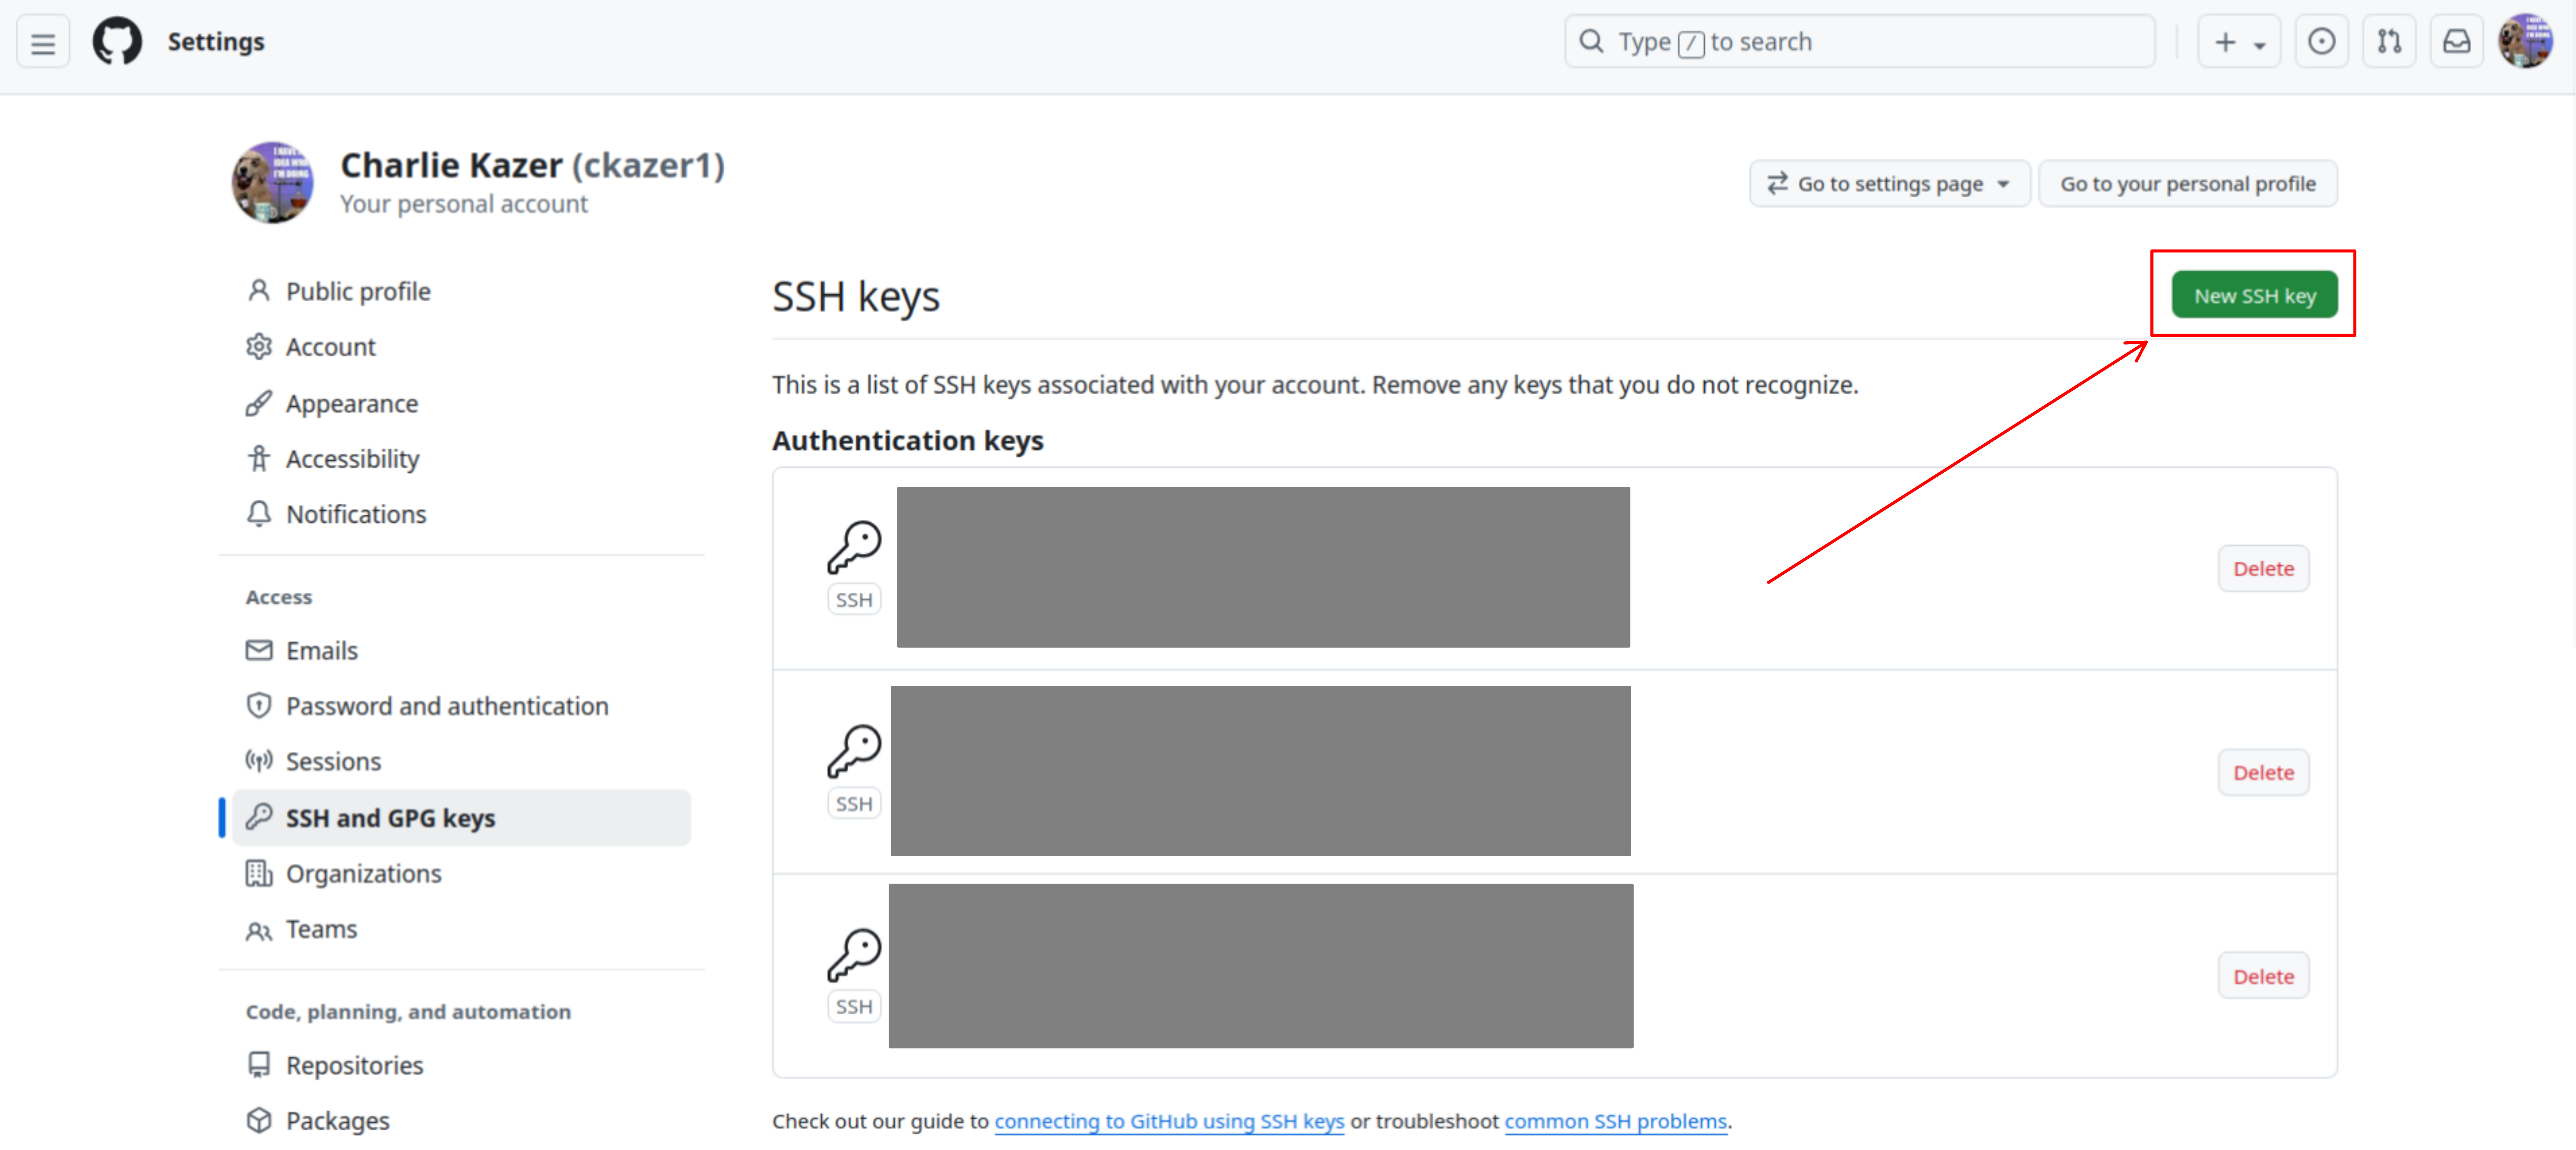
Fill in the title with anything you like; this is just to help you remember
where you generated the key. I would suggest a title like CS account.
After you’ve named your key, you need to copy in the entire contents of the
id_ed25519.pub file that you generated earlier. Make sure you use the file
ending in .pub. You can dump the contents of the file by executing:
cat ~/.ssh/id_ed25519.pubCopy the entire output of that file, paste it into the Key box on GitHub, and
click Add SSH Key.
Now, you are done with the one-time setup. To learn how to access an assignment repository, refer to Working with a Git Repository
References
-
GitHub’s guide to generating an ssh key (accessed August 2026)
-
Adding you ssh key to your GitHub account - note these instructions are for github.com, but the same steps apply to github.swarthmore.edu. (accessed August 2026)