CS21 Lab 11: Classes
This lab is due Saturday, Dec 7, before midnight
Goals
-
gain experience writing classes!
This lab will use the Zelle Graphics Library, so please review the objects in that library.
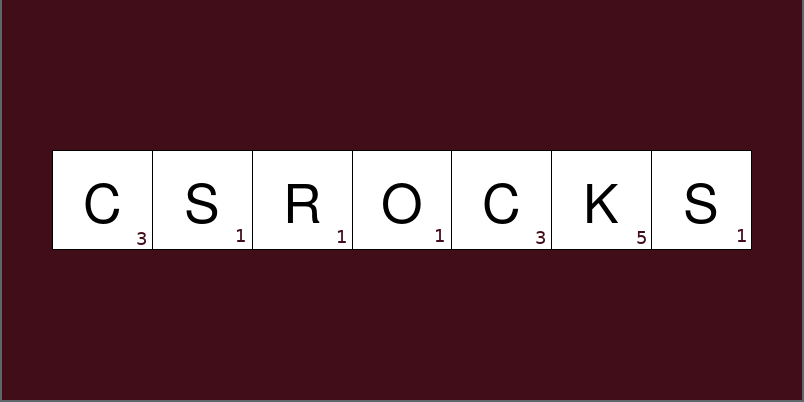
1. the Tile() class
Let’s make a Tile object that consists of a square with a letter or a number on it. This could be used in a game, such as scrabble or the fifteen puzzle we worked on earlier in the semester.
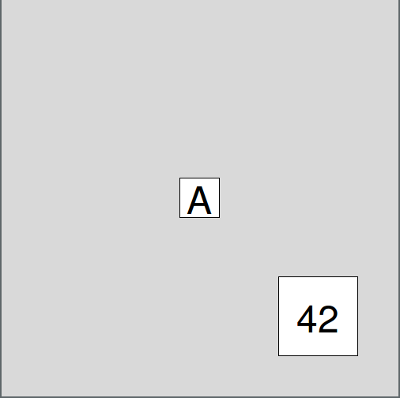
I would like to be able to create and draw tile objects, similar to other graphics objects in the Zelle library. Here’s an example of creating a tile:
$ python3
>>> from graphics import *
>>> from tile import *
>>> gw = GraphWin("Tile Example", 500, 500)
>>> cp = Point(250,250)
>>> t = Tile(cp, 50, "A")
>>> t.draw(gw)
>>> newcp = Point(400,400)
>>> t2 = Tile(newcp, 100, 42)
>>> t2.draw(gw)
And here’s the graphics window resulting from the above code:
Here is the documentation for the Tile class.
Below we have help and documentation
for each method in the class. Please write each method and
test it thoroughly before moving on to the next.
| constructor/method | description |
|---|---|
|
creates and returns a |
|
allow use of |
|
draw the tile to the given window |
|
get the value stored in the tile |
|
move whole tile by dx and dy |
|
set the tile color |
|
set/change the value stored in the tile |
1.1. write the constructor
Start by editing the tile.py file and adding your __init__()
method. As shown above, we want to be able to create a Tile object by specifying the
center point of the tile, the size of the tile, and the number or letter shown
on the tile (i.e., the value).
All Tile objects will have at least three instance variables (more if
you want): the Rectangle object
(i.e., the square that is drawn), the value stored in the object,
and a Text object showing the value stored in the object.
You will need to calculate the top left and bottom right coordinates of the square,
based on the given center point and the given size. Like other Zelle
object constructors, the Tile constructor just creates an object,
but doesn’t draw it.
You can make your tiles have any color, and any size text (I am using a text size of 36 in the above example).
Also note the last three parameters in the Tile class documentation.
These are examples of default parameters. If they are not specified
when the constructor is called, the tile created should have those properties.
If they are specified, then the tile created should have the specified properties.
For example:
>>> t1 = Tile(cp, 50)
>>> t2 = Tile(cp, 50, "A")
>>> t3 = Tile(cp, 50, "A", "blue", "white")
The first tile above uses the defaults (empty string for value, white square, black text), the second specifies the character on the tile (i.e., the value stored in the object is "A"), and the third specifies the character, makes the square blue, and makes the text color white.
In your constructor you can just use those parameters (value, color,
and textcolor) when creating your objects. They will all be set to
either the default values shown (i.e., "", "white", and "black"),
or the values specified as arguments
(e.g., "A", "blue", and "white" in the last example above).
1.1.1. test the constructor
Once your have the constructor written, you can test that there are no syntax
errors, but it won’t look like much until you can draw the tiles. Here’s a simple
main() with example calls to the constructor that shouldn’t give syntax errors
(assuming you import graphics at the top of your tile.py file):
def main():
    cp = Point(1,2)
    t1 = Tile(cp, 1, "A")
    t2 = Tile(cp, 3, "B")

if __name__ == "__main__":
    main()
1.2. write the draw(win) method
Since a Tile is really made up of two other graphics objects (a Rectangle and
a Text object), the tile’s draw(..) method will just call the Zelle draw methods
for those objects. Make sure you draw the rectangle first.
1.2.1. test the draw(win) method
You now have enough to actually see your Tile objects!
Add some code to main() to create a graphics window and draw a few
tiles. Try creating tiles that have different color backgrounds and text.
1.3. write and test the other methods
Two of the other methods are similar to draw(..) in that they will
just call the corresponding Zelle methods.
-
move(dx, dy)just moves both the rectangle and the text object -
setColor(color)just callssetFill(..)for the rectangle object
Two of the methods are just getters/setters for the value stored in the object:
-
getValue()returns the value stored in the object -
setValue(value)changes/sets the value stored in the object (also changes the text displayed on the tile!)
Write all four methods and test them!
1.4. write the less than comparison method
It might be useful if we can compare Tile objects using less than,
greater than, and equal to operators (<, >, ==). For example,
I might want to say if t1 < t2:, assuming my test objects declared above.
To do that we need the special
__lt__(..) method.
Since this method will be comparing two objects, it has a slightly different syntax:
def __lt__(self, other):
  """add your comment and code here"""
This method will be called when we try to compare two Tile objects
with t1 < t2, and in this case the self parameter will correspond with
the first object (t1), and the other parameter will correspond with the
second object (t2).
Using self and other, we can now write the code to do the comparison
of the value stored in our objects using self.getValue() and
comparing that to other.getValue().
1.4.1. test your "less than" method
The following comparisons should both print True:
>>> from tile import *
>>> cp = Point(1,2)
>>> t1 = Tile(cp,2,"A")
>>> t2 = Tile(cp,2,"Z")
>>> t1 < t2
True
>>> t1 = Tile(cp,2,50)
>>> t2 = Tile(cp,2,200)
>>> t1 < t2
True
If you want, you could add similar __gt__(..)
and __eq__(..) methods.
2. use the Tile class
Once you have your Tile objects working, write a program (in a
separate file, like selectionsortdemo.py) that
demos the selection sort algorithm using the Tile class.
You should create a list of Tile objects, then sort the list (and move
the tiles around in the graphics window).
One example is shown below, but you are welcome to change the look and feel (e.g., colors, sizes, etc) of the demo if you want.
The minimum requirements for this program are:
-
start with a list of 10
Tileobjects, all with randomly-chosen values -
show, using colors and moving tiles, the selection sort algorithm in action
-
at the end, all tiles should be in order from low to high
In the following video, the green tile is the smallest item seen so far in the list, the blue tile is the item currently being considered, and the yellow tiles are the ones being swapped at the end of each pass.
3. Answer the Questionnaire
Please edit
the Questions-11.txt file in your cs21/labs/11 directory
and answer the questions in that file.
Once you’re done with that, run handin21 again.
Turning in your labs….
Remember to run handin21 to turn in your lab files!
You may run handin21 as many times as you want. Each time it will
turn in any new work. We recommend running handin21 after
you complete each program or after you complete significant
work on any one program.