The problem
Many students have complained about the default colors in Putty. This guide is written to help you change the colors in Putty so that they aren’t as horrible. It isn’t a guide to completely customizing your colors.
The solutions
There are three fairly straightforward solutions. In each case, the first and last steps are the same. The middle step is different. If you try one solution and you don’t like it, you can just try a different solution and see how that works for you.
All three options assume that you have a saved session like the one shown below called "Swarthmore CS".
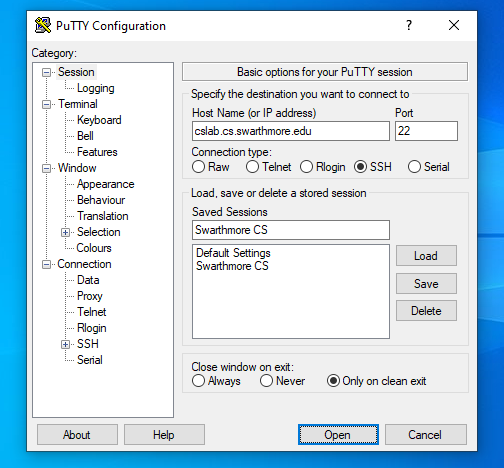
If you don’t have a saved session, you should go back to the instructions on how to connect your machine to the CS lab and set that up.
Option 1
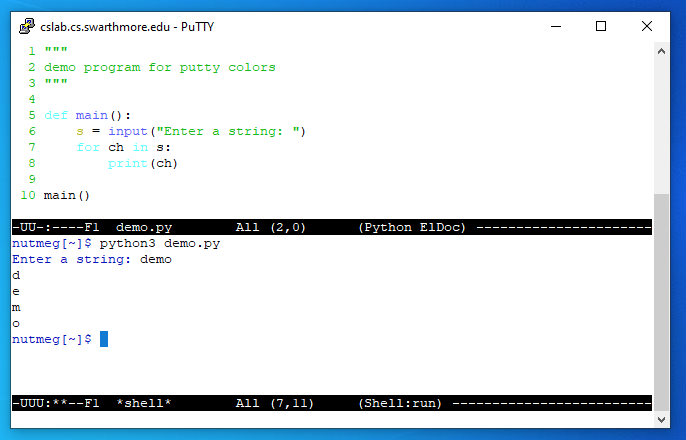
This should yield you a black window with a white font. There are no colors except for the cursor which shows up in green. Some items that used to appear syntax-highlighted will now show up in bold instead. Here is what this will look like:
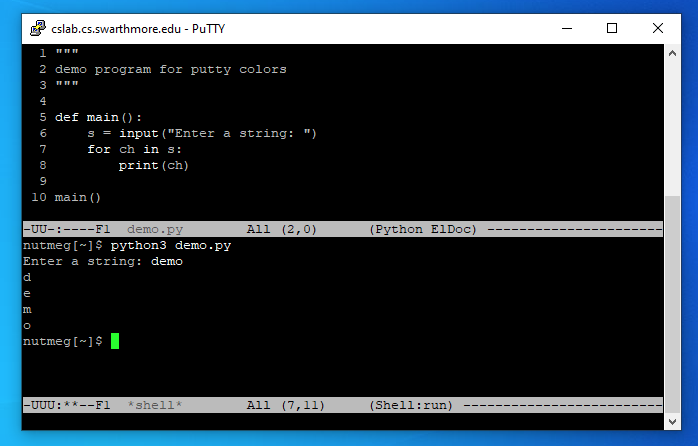
To get this color scheme, follow these steps:
-
Click on the name of the saved connection you use to connect the CS lab and hit the "Load" button.
-
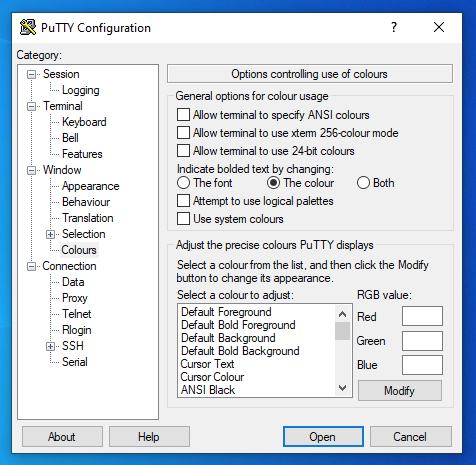
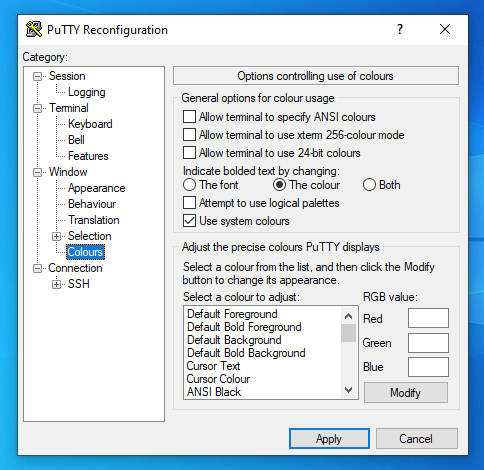
In the left side of the window, click on "Colours". On the new page that opens:
-
Deselect "Allow terminal to specify ANSI colours"
-
Deselect "Allow terminal to use xterm 256-colour mode"
-
Deselect "Allow terminal to use 24-bit colors"
-
When you are done, that window should look like this:
-
-
Return to the first page by clicking on "Session" on the top of the left panel. Click on the name of your Saved Session (don’t double click) and then hit "Save". This will save your new color settings in your saved session list. You can now hit "Open" at the bottom of the page to start your connection with these new settings.
Option 2
This should yield you a white window with a black font. There are no colors except for the cursor which shows up in blue. Some items that used to appear syntax-highlighted will now show up in bold instead. Here is what this will look like:
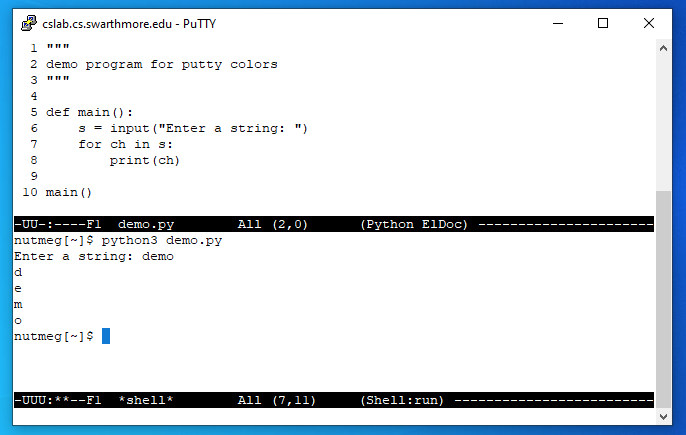
| I have the Windows 10 default colors set up. If you have changed the colors in your installation of Windows, you may end up with different colors. |
To get this color scheme, follow these steps:
-
Click on the name of the saved connection you use to connect the CS lab and hit the "Load" button.
-
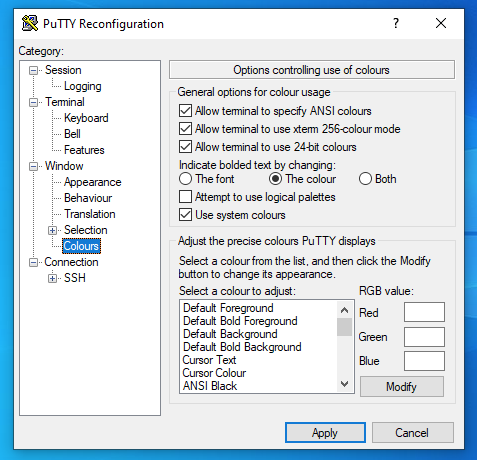
In the left side of the window, click on "Colours". On the new page that opens:
-
Deselect "Allow terminal to specify ANSI colours"
-
Deselect "Allow terminal to use xterm 256-colour mode"
-
Deselect "Allow terminal to use 24-bit colors"
-
Select "Use System Colors"
-
When you are done, that window should look like this:
-
-
Return to the first page by clicking on "Session" on the top of the left panel. Click on the name of your Saved Session (don’t double click) and then hit "Save". This will save your new color settings in your saved session list. You can now hit "Open" at the bottom of the page to start your connection with these new settings.
Option 3
This should yield you a white window with a black font. There are colors! Here is what this will look like if you make no changes to your emacs configuration file:
I found that the cyan color of keywords like main and for, and the yellow color of variable names, to be too light. With a simple change in my emacs configuration, I was able to get my colors to look like this:

| I have the Windows 10 default colors set up. If you have changed the colors in your installation of Windows, you may end up with different colors. |
To get this color scheme, follow these steps:
-
Click on the name of the saved connection you use to connect the CS lab and hit the "Load" button.
-
In the left side of the window, click on "Colours". On the new page that opens:
-
Select "Use System Colors"
-
When you are done, that window should look like this:
-
-
Return to the first page by clicking on "Session" on the top of the left panel. Click on the name of your Saved Session (don’t double click) and then hit "Save". This will save your new color settings in your saved session list. You can now hit "Open" at the bottom of the page to start your connection with these new settings.
-
Assuming your Windows 10 system colors are the same as mine, you should end up with a color scheme that looks a lot like the first image above with the slightly unreadable colors. If you’d like to change the colors to something I found more reasonable, you can copy the following emacs configuration file from me:
$ cp ~/.emacs ~/.emacs.backup
$ cp ~rwas/.emacs.putty ~/.emacs