CS21 Lab 10: Recursion
-
Part 1 is due on Monday, December 1 at the start of class. You must submit Part 1 on paper. Be sure that your paper is legible!
-
Part 2 is due on Tuesday, December 2, by 11:59am and will be turned in the "normal" way using
handin21.
Goals
The goals for this lab assignment are:
-
Practice tracing recursive functions
-
Designing recursive functions
-
Identifying base and recursive cases
1. Tracing: Stack Diagrams
The first part of this lab asks you to read three recursive functions. For each function, complete the following steps on paper.
-
Identify the base case and recursive case.
-
Trace the programs, and drawing the stack diagrams right up until the you reach the first
returnstatement. Do not erase stack frames as you go along. -
Write down the final output of the program.
Example Question
Given the Python program shown below:
def fact(n):
    if n <= 1:
       return 1
    else:
       f = n * fact(n - 1)
       return f

def main():
   v = fact(4)
   print(v)

main()
Example Solution
-
Base case: when
n <= 1 -
Recursive case(s): when
n > 1 -
The stack diagram would look like this if we didn’t erase stack frames and ran the program to completion:
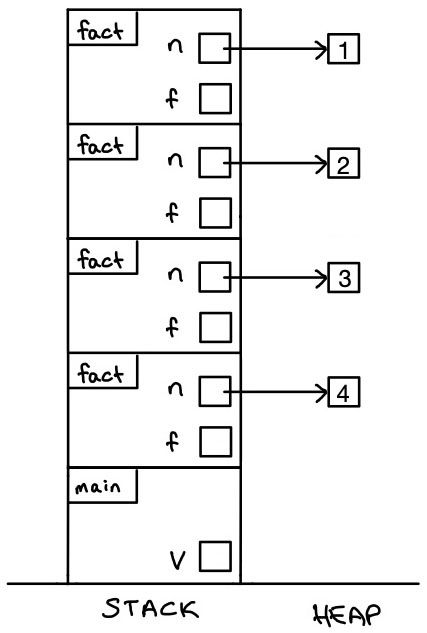
-
The final output of this program is:
Output:
24
Program 1
Provide the base case, recursive case, final output, and draw the stack diagram for the program shown below.
1
2
3
4
5
6
7
8
9
10
11
12
13
14
def main():
reverse("cat")
def reverse(msg):
n = len(msg)
if n == 0:
print("done")
#draw stack here
return
else:
reverse(msg[1:])
print(msg[0])
main()
Program 2
Provide the base case, recursive case, stack, and final output, for the program shown below.
1
2
3
4
5
6
7
8
9
10
11
12
13
14
15
16
def main():
v = mystery(15, 12)
print(v)
def mystery(a, b):
if b == 0:
ans = a
#draw stack here
return ans
else:
x = b
y = a % b
ans = mystery(x, y)
return ans
main()
Program 3
Provide the base case, recursive case, draw the stack diagram, and show the final output for the program shown below.
1
2
3
4
5
6
7
8
9
10
11
12
13
14
15
16
17
18
def main():
nums = [4, 1, 6, 3]
result = puzzle(nums)
print(result)
def puzzle(ls):
if ls == []:
r = 0
# draw stack here
return r
else:
val = ls[0]
r = puzzle(ls[1:])
if val % 2 == 1:
r = r + 1
return r
main()
2. Designing Recursive Functions
For this part of the lab, you will design and implement recursive functions.
When designing recursive programs, identify the base case(s) first: the simplest case where there is not a recursive call. Then move on to the recursive case(s).
Replace vowels
In the file vowels.py, write a recursive function called replace_vowels(s,
ch) that takes a string s and a character ch, and returns a new string that
has all lowercase vowels in s replaced with the character ch. You can ignore
capital vowels and assume 'y' is never a vowel: (that is, for this problem,
"vowel" means only lowercase 'a', 'e', 'i', 'o', or 'u').
Be sure that your solution includes a main function that tests your
replace_vowels function with a few different parameter values.
Your solution must be recursive.
def replace_vowels(s, ch):
    """
    Return a string which is a copy of `s` with all vowels replaced by the
    character specified by `ch`.
    Parameters:
        s (str): a string
        ch (str): a single character, to replace vowels with
    Returns:
        str: a copy of s, but with vowels replaced by the character `ch`
    """
For example:
print(replace_vowels("computer science is fun", "*")) # c*mp*t*r sc**nc* *s f*n
print(replace_vowels("Happy Thanksgiving!", "@")) # H@ppy Th@nksg@v@ng!
print(replace_vowels("For Good", "a")) # Far Gaad
print(replace_vowels("I LOVE RECURSION", "7")) # I LOVE RECURSION
Digit Sum
In the file digit_sum.py write a recursive function called sum_digits(n)
that takes a non-negative integer n and returns the sum of its digits. Your solution must
be recursive.
print(digit_sum(123)) #6
print(digit_sum(1)) #1
print(digit_sum(0)) #0
print(digit_sum(1024)) #7
print(digit_sum(97653)) #30
def digit_sum(n):
"""
This function takes a number n and returns the sum of its digits
Parameter
n (int): a non-negative integer whose digits to sum
Returns:
int: The sum of the digits of n
"""Hint: The last digit of a number n can be found by calculating n % 10, and
the remaining digits are given by n // 10.
A Recursive Triangle Drawing
In the file triangle.py, we have given some starter code to set up a graphics
window and draw a triangle with the points p1, p2, and p3. You will
implement the function triangle_recursion(win, p1, p2, p3, levels), which will
draw a pattern within the triangle recursively. The parameters this function
takes are win, the window to draw on, the points p1, p2, p3 specifying
the points of a triangle, and levels, specifying the number of levels of the
pattern we want to draw. The pattern this function should draw is described
below.
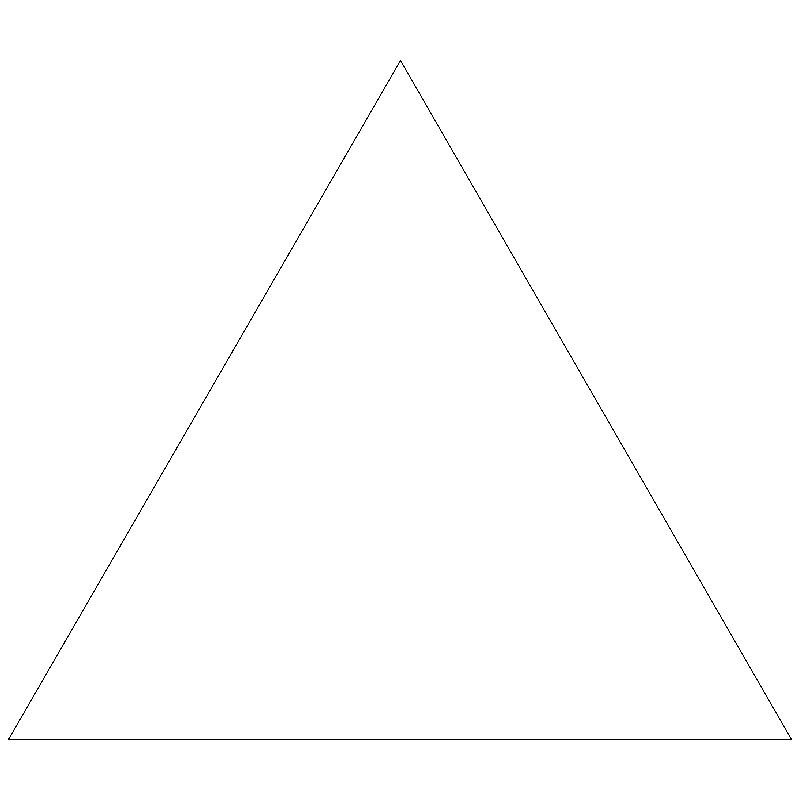
When the number of levels is 0, the pattern is just a triangle.
When the number of levels is larger than 0, the following happens:
-
We first find the midpoints of each side of the triangle (that is, the midpoint between
p1andp2, betweenp2andp3, and betweenp1andp3). The midpoints are shown labeled in the diagram below (where, e.g.,mid12is the midpoint ofp1andp2):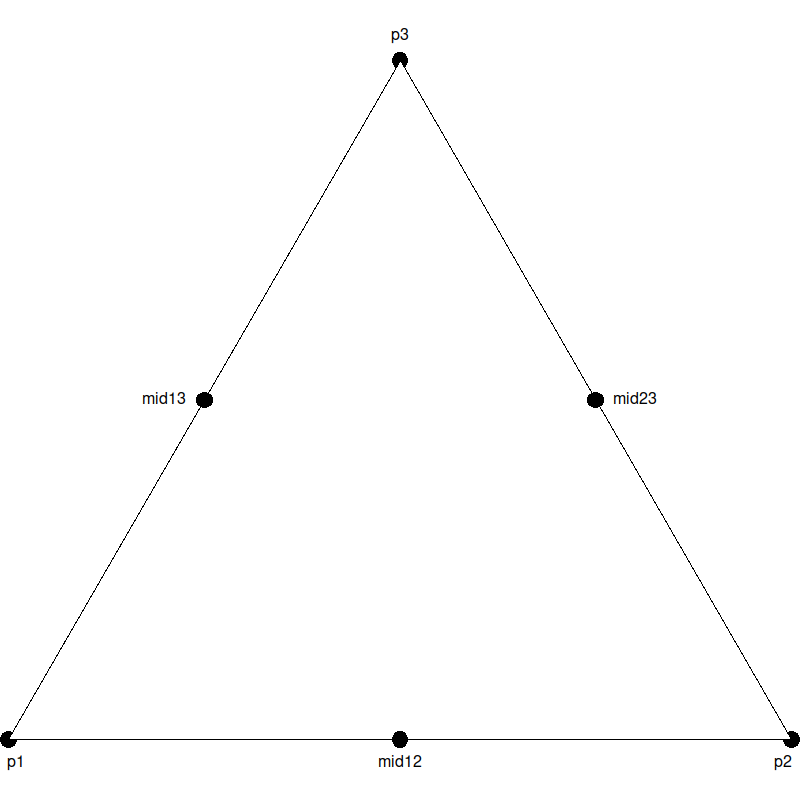
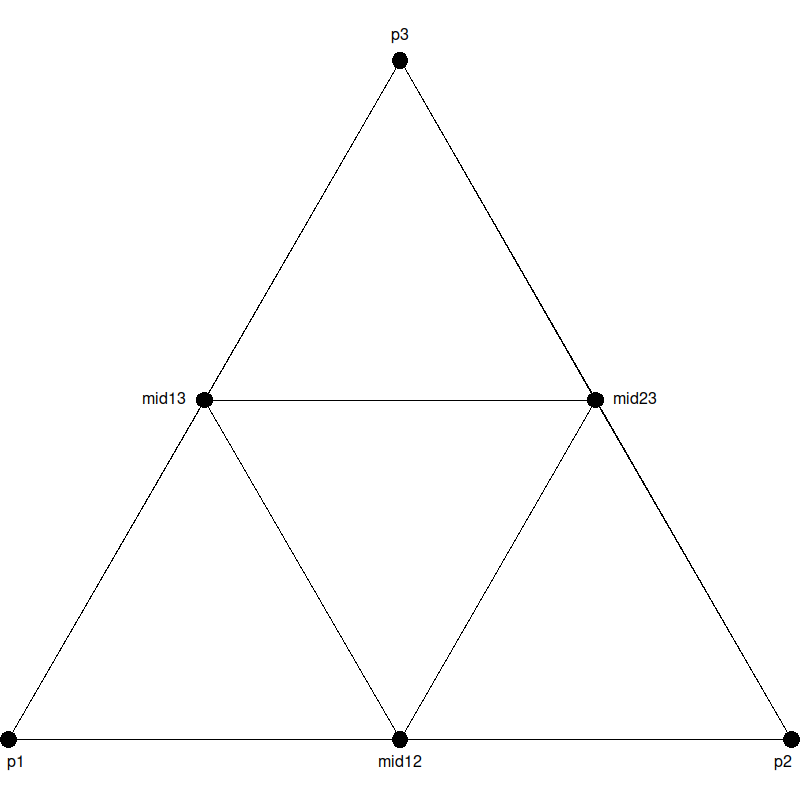
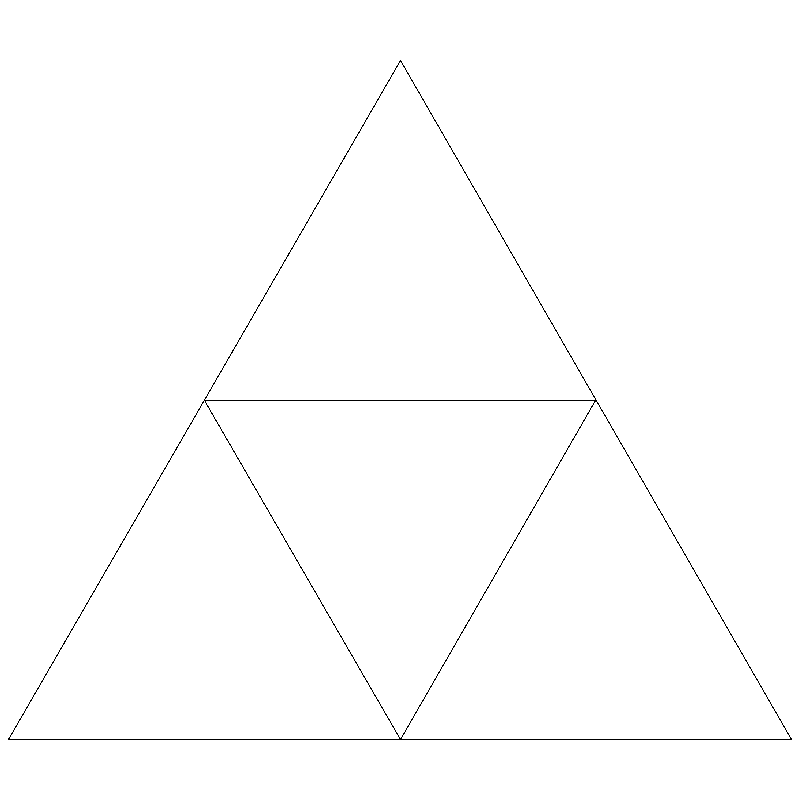
These points can be used to divide the large triangle into smaller triangles:
To create our pattern, we must recursively draw our pattern, for
levels-1levels, in each of the three corner triangles (but not the inverted triangle in the center). For example, your first recursive call might be on the triangle shown in purple below, defined by the pointsp1,mid12, andmid13: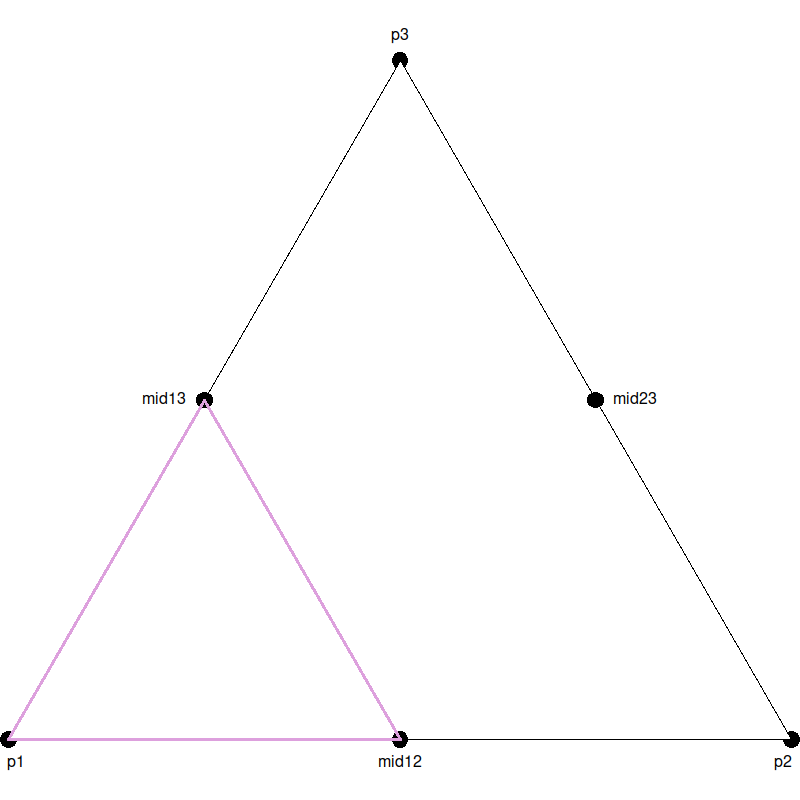
Then you want to do the same with the next two corner triangles, one given by
p2,mid12, andmid23(shown in red):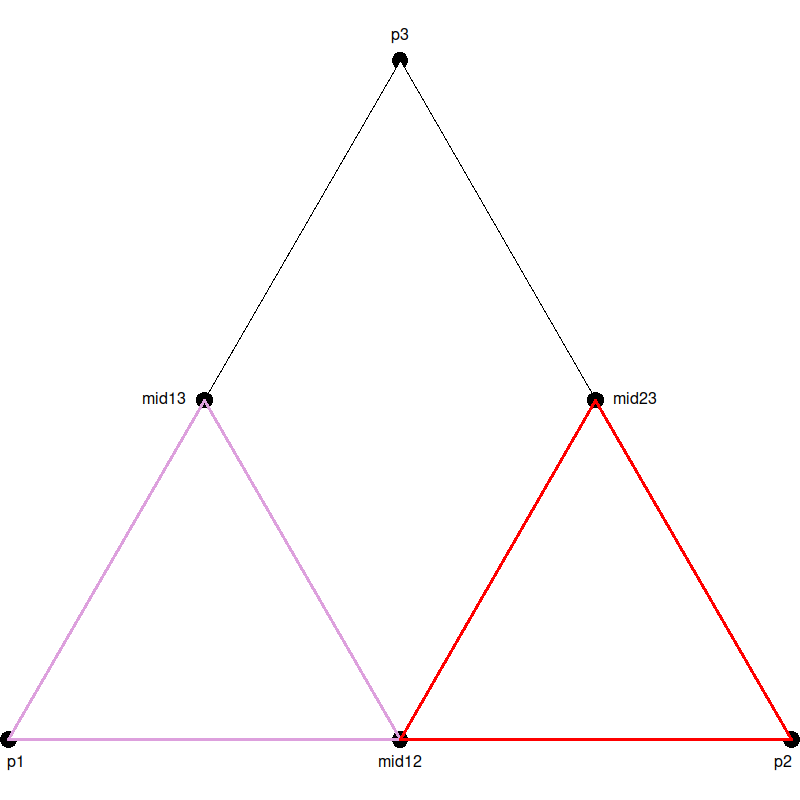
and the final one given by
p3,mid13, andmid23(shown in blue):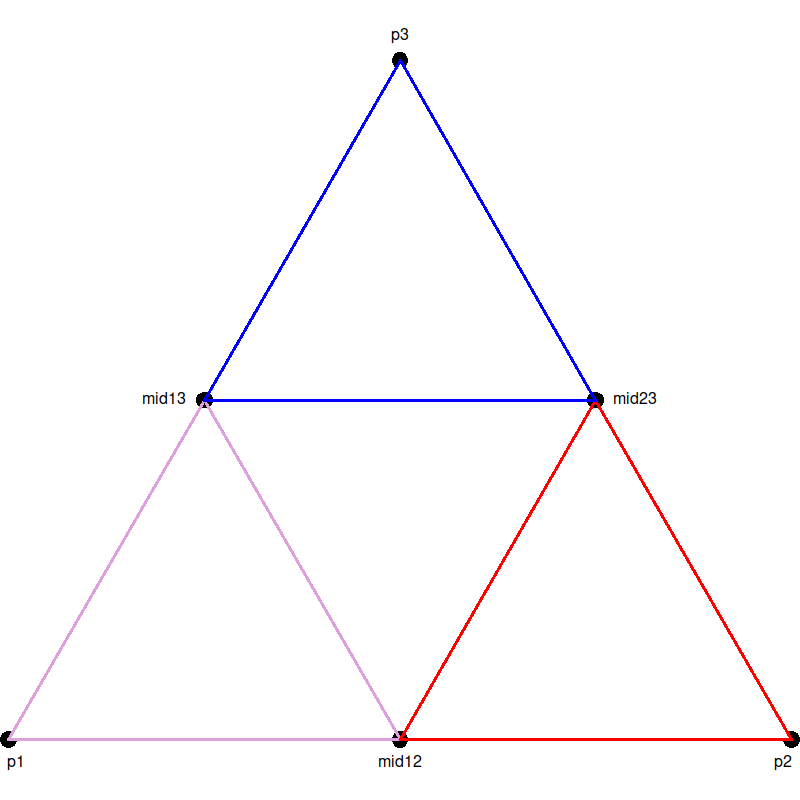
Note that you do not need to draw these triangles with these colors (we show this only for illustration purposes). Instead, your program should recursively draw our pattern, for
levels-1levels, in each of these corner triangles. With only one level of recursion (levels == 1), the result will look like this:
Modify the code in main to test your function with different levels. Start by
making sure your program simply produces a single triangle when levels is 0
(this will help establish your base case). Then, try to make sure your drawing
looks like the above when levels is 1 (this should help you get started on
the recursive case). Then, test for larger levels and make sure your drawing
matches the examples below. Think about your base case and make sure your
recursive calls decrease the number of levels by one.
You may use whatever colors you like in your drawing. Using a simple black outline when drawing the triangle, the result should be the following for higher levels:
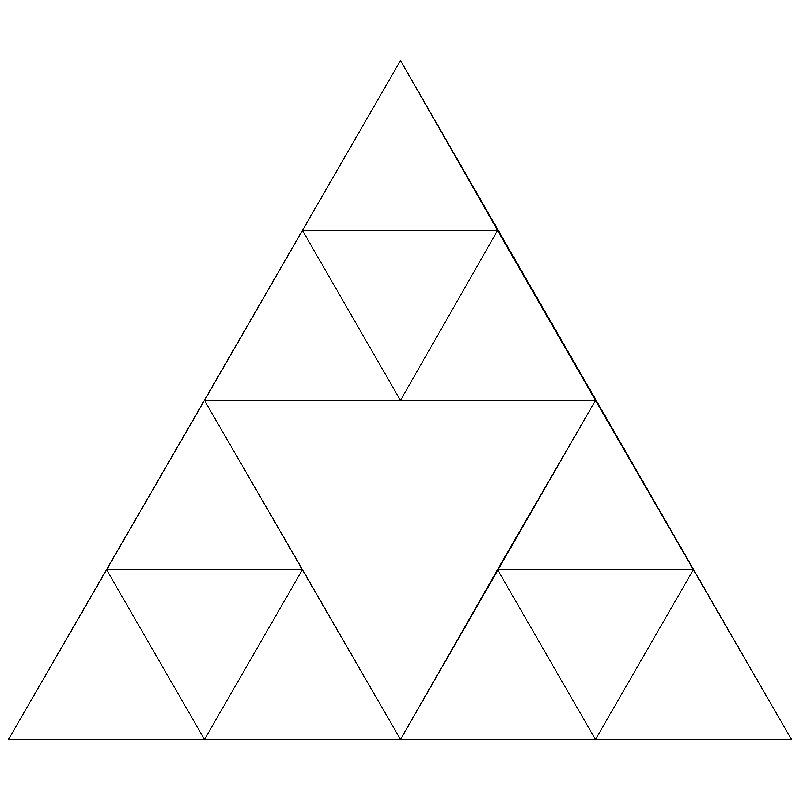
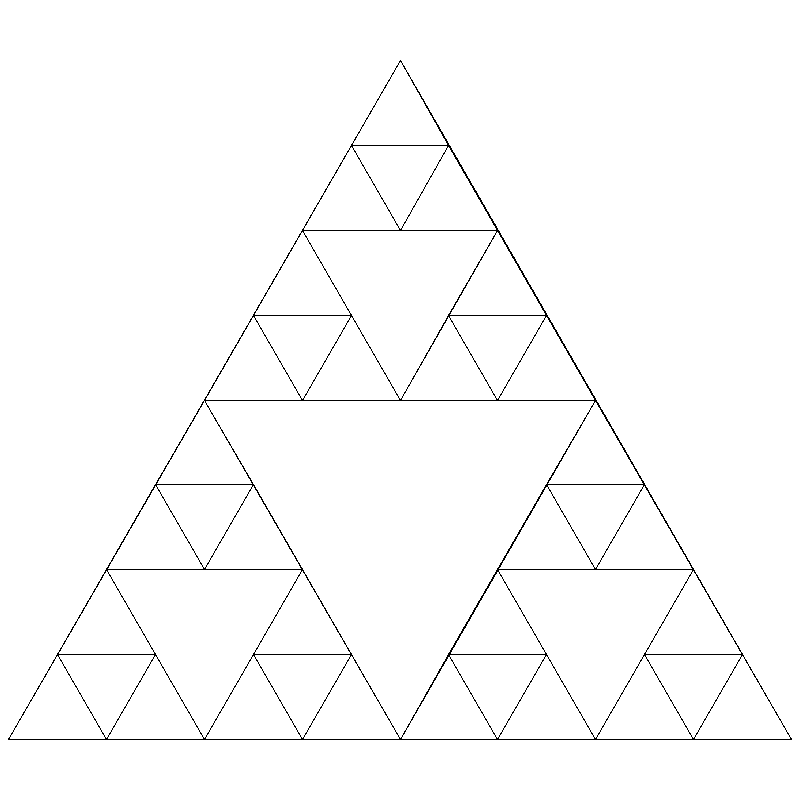
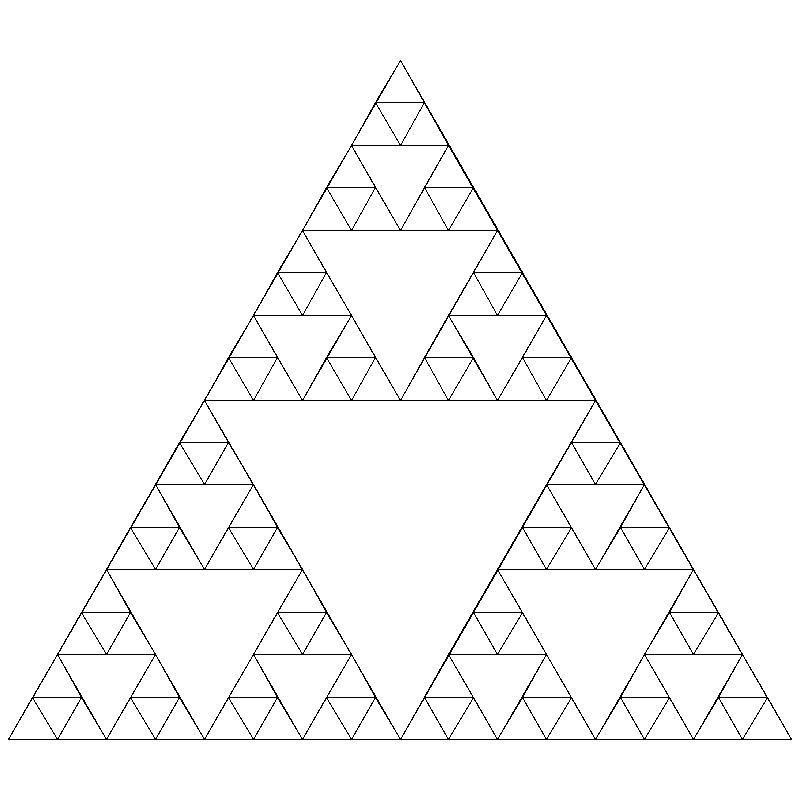
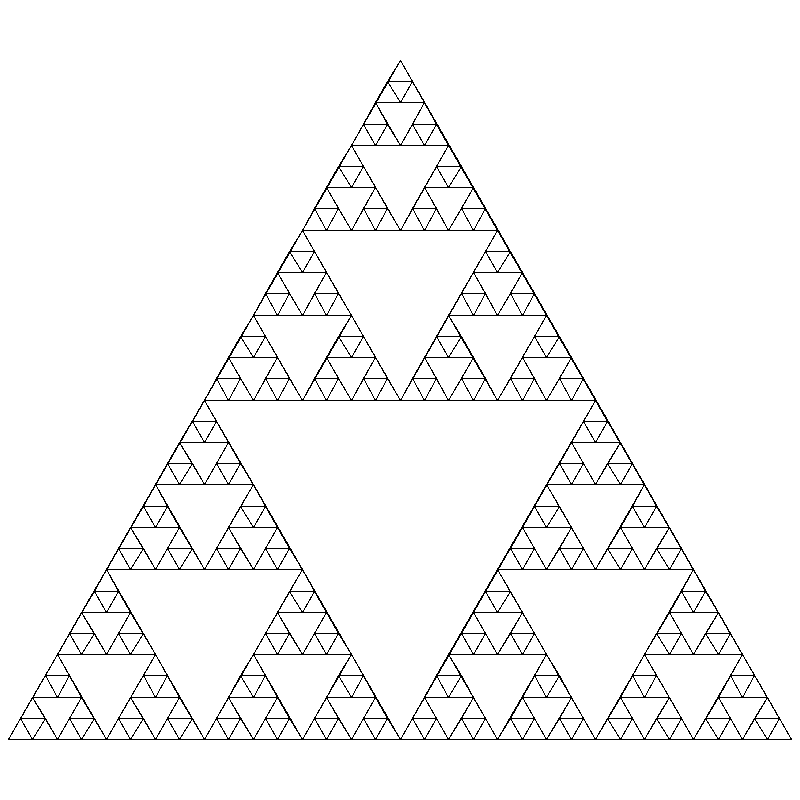
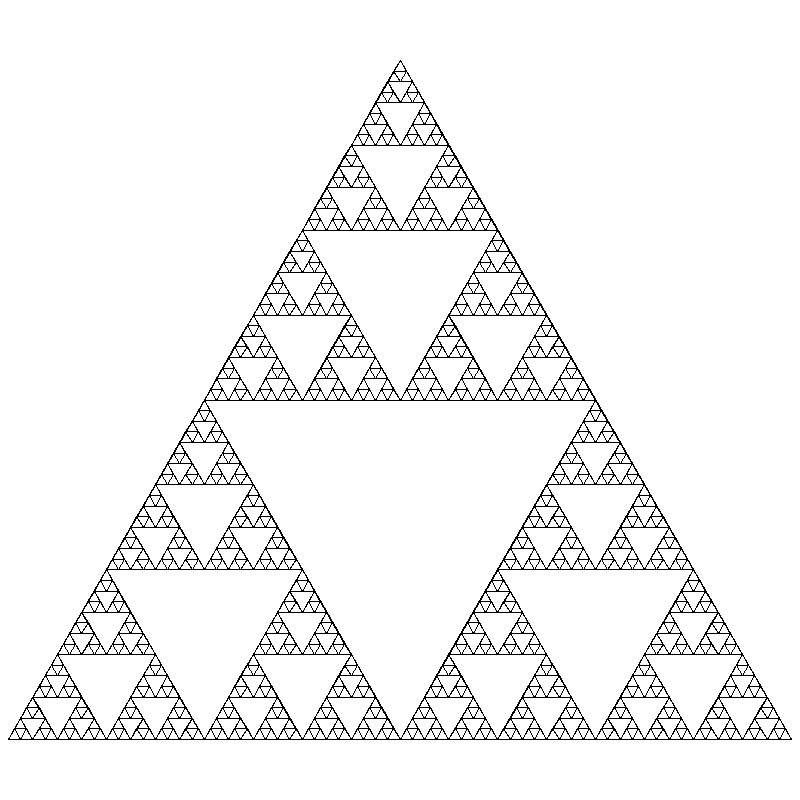
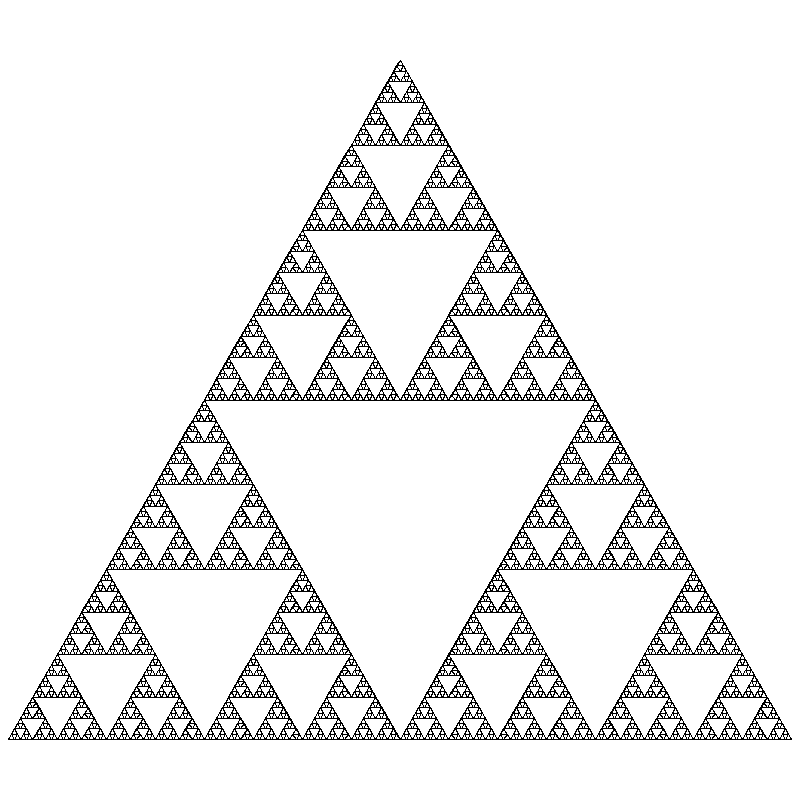
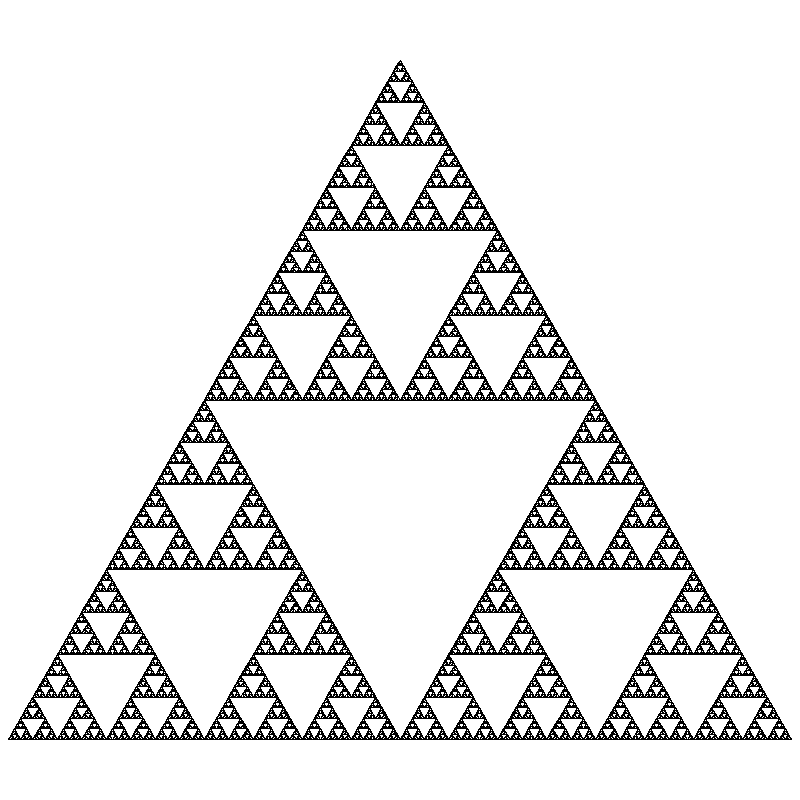
You may notice this pattern looks familiar. As we increase the number of levels, the pattern starts to look like the Sierpinski triangle, which arose from our random drawing in lab 6. We’ve created the same pattern, except now we’re doing it with recursion!
Requirements
|
The code you submit for labs is expected to follow good style practices, and to meet one of the course standards, you’ll need to demonstrate good style on six or more of the lab assignments across the semester. To meet the good style expectations, you should:
In addition, you’ll need to demonstrate good top-down design practices on two or more lab assignments across the semester. To meet the top-down design expectations, you should:
|
For EACH QUESTION in the stack-diagram portion of the lab, you should meet the following requirements:
-
Draw the correct stack diagram.
-
Show the base case and recursive case.
-
Show the final output of the program.
For EACH PROGRAM in the function-writing portion of the lab, you should meet the following requirements:
-
Your function should contain a non-recursive base case.
-
Your function should make one or more recursive calls on a smaller version of the problem.
-
Your function should correctly solve the problem.
-
To test your solution, your
mainfunction should make at least three calls to the recursive function.
Optional
-
For the triangle recursion, try using the
sleep()function (import it at the top of your program withfrom time import sleep) to add a delay between drawing triangles, so you can visualize the recursion. -
For the triangle recursion, try playing around with different colors. Notice that, in addition to the three corner triangles, there is one (inverted) triangle in the middle. We should not do any recursive calls with this middle triangle, but we can separately fill it in with a color of our choosing. You can also try changing colors depending on the current level.
-
For the triangle recursion, try adding functionality to your main to allow the user to click to specify the three points for the initial (outermost) triangle.
-
Write a function
get_number(n)which performs input validation using recursion. The function gets a positive integer no larger thannfrom the user; if the user enters an invalid input, print a message saying so and prompts again. We’ve accomplished this before using loops, but now try it using recursion. -
Binary search: We saw binary search as an iterative algorithm, using a while loop. But we can also implement it recursively. Write a function
binary_search(item, lst, low, high)which performs a binary search to find the index ofitemin the listlstbetween the indexeslowandhigh.
Answer the Questionnaire
After each lab, please complete the short Google Forms questionnaire. Please select the right lab number (Lab 10) from the dropdown menu on the first question.
Once you’re done with that, you should run handin21 again.
Submitting lab assignments
Remember to run handin21 to turn in your lab files! You may run handin21
as many times as you want. Each time it will turn in any new work. We
recommend running handin21 after you complete each program or after you
complete significant work on any one program.
Logging out
When you’re done working in the lab, you should log out of the computer you’re using.
First quit any applications you are running, including your vscode editor, the browser and the
terminal. Then click on the logout icon ( or
or
 ) and choose "log out".
If you plan to leave the lab for just a few minutes, you do not need to log
out. It is, however, a good idea to lock your machine while you are gone. You
can lock your screen by clicking on the lock  icon.
PLEASE do not leave a session locked for a long period of time. Power may go
out, someone might reboot the machine, etc. You don’t want to lose any work!
icon.
PLEASE do not leave a session locked for a long period of time. Power may go
out, someone might reboot the machine, etc. You don’t want to lose any work!